Setting up Perforce on Operator and Render Nodes

This tutorial helps us get started for new classes/groups using Perforce for a render node and operator in LSU XR Studio.
Guide Changes Yet To Make
- [ ] Replace the images to match the new text about multiple users.
Pre-reqs
- Download the Perforce from here: https://www.perforce.com/downloads/helix-visual-client-p4v.
- Install both, the command line client and visual client.
- Follow the steps here p4-newdepot to setup your Depot in P4 Admin.
P4V
-
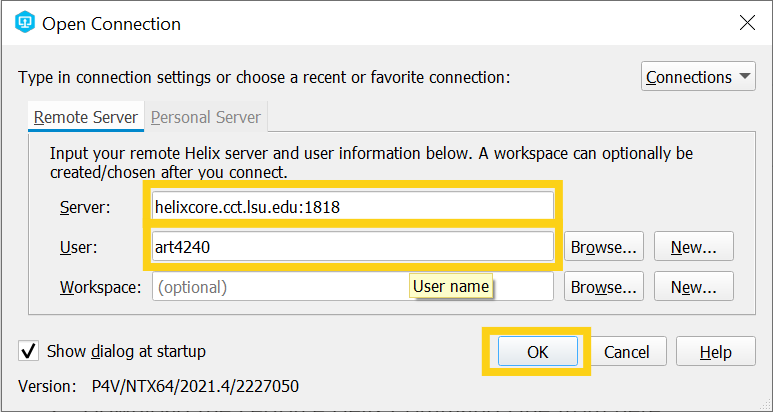
Open P4V and connect to ssl:helixcore.cct.lsu.edu:1818 as the user that was made in P4 Admin
-
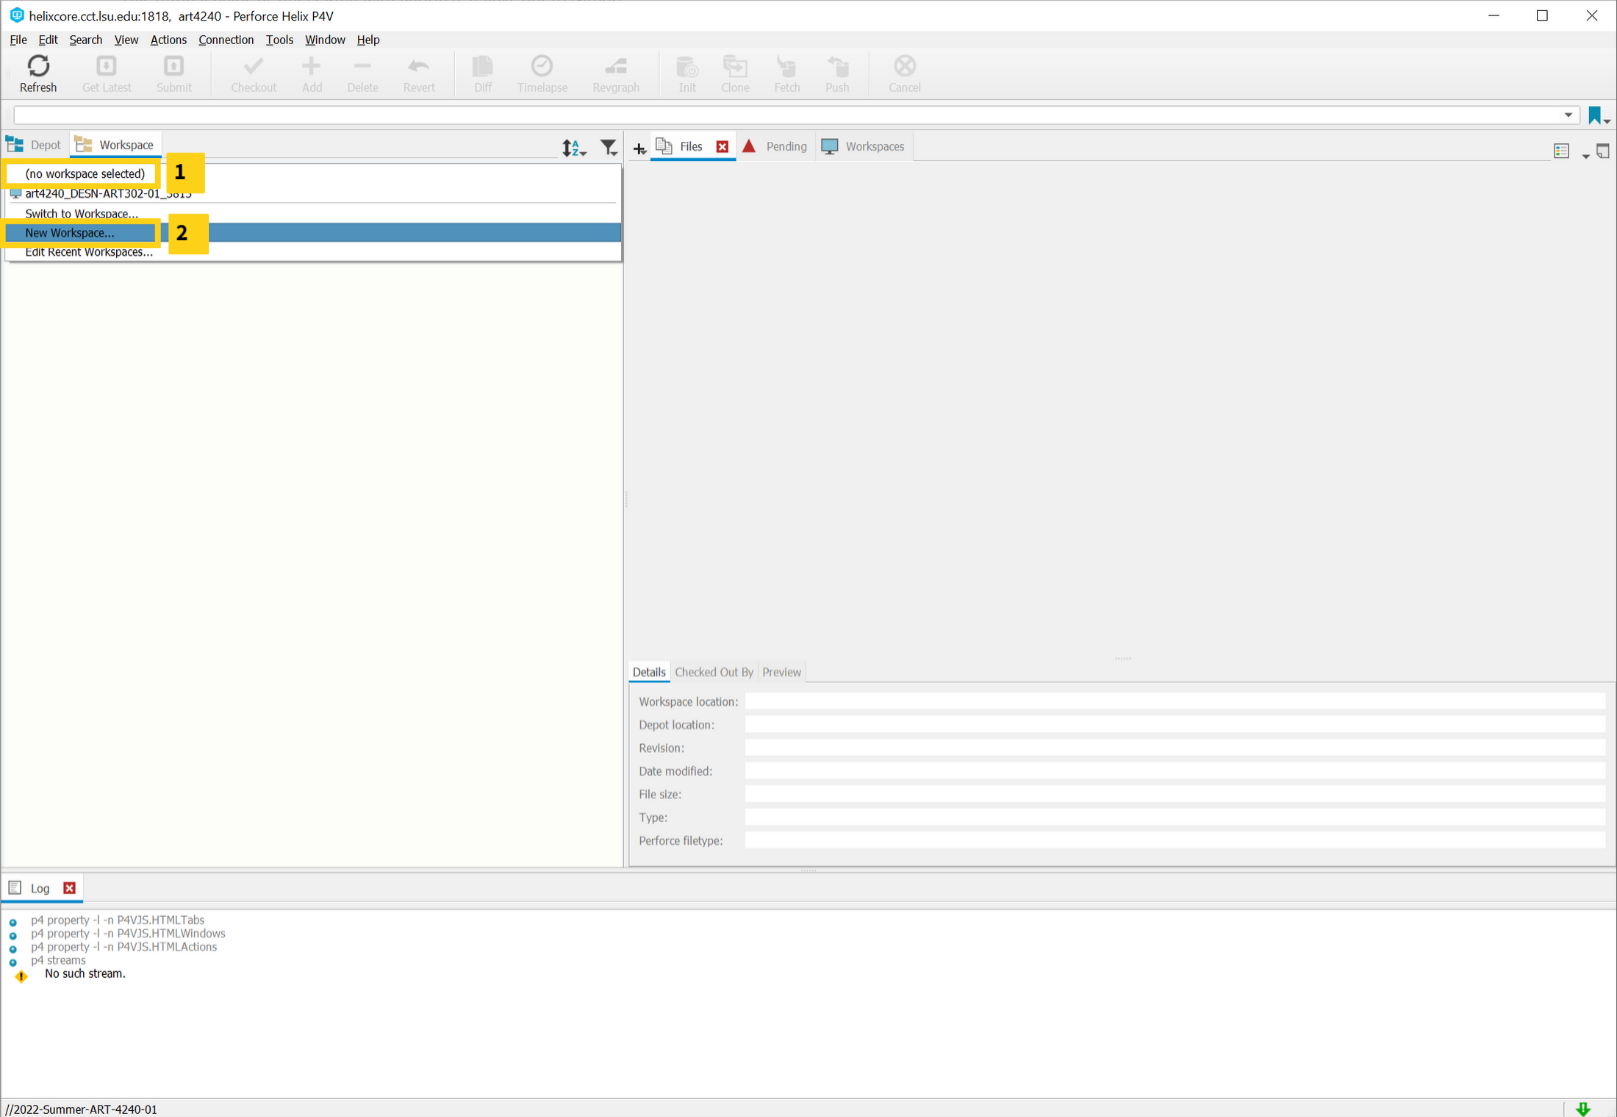
Go to the Workspaces tab and click New Workspace
-
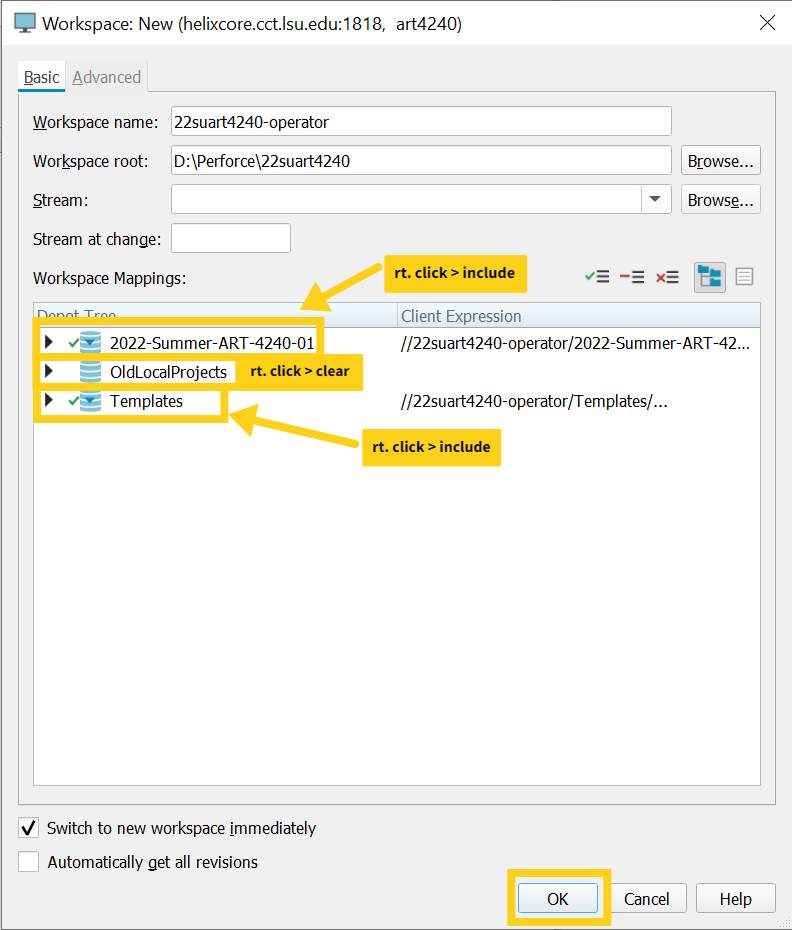
For Workspace Name choose something unique, for instance: 22suart4240-operator or 22suart4240-render.
-
For Workspace Root, start with the the default file path, which should be
C:\Users\Virtual Production\Perforce\[WORKSPACE_RANDOM-NUMBER]. Replace theRANDOM NUMBERwith the year and semester, for instance22faor23spso you workspace root looks likeC:\Users\Virtual Production\Perforce\scrn4015-render_DMC-XR1001-01_22fa. -
Click on the Advanced tab and set Modtime... to
trueand rmdir totrueand On submit toRevert unchanged filesthen pressok -
If you have also chosen a new depot that hasn't had anything submitted to it yet. In the workspace location create a new folder with the same name as the Depot, don't forget this is cap sensitive.
-
In P4V select
Connection | Edit Current Workspacethen right click on the newly created workspace and Templates > LSUBaseTemplate and selectInclude Tree. -
Rt. Click > Clear any depots you don’t want such as OldProjects.
-
Press Ok
-
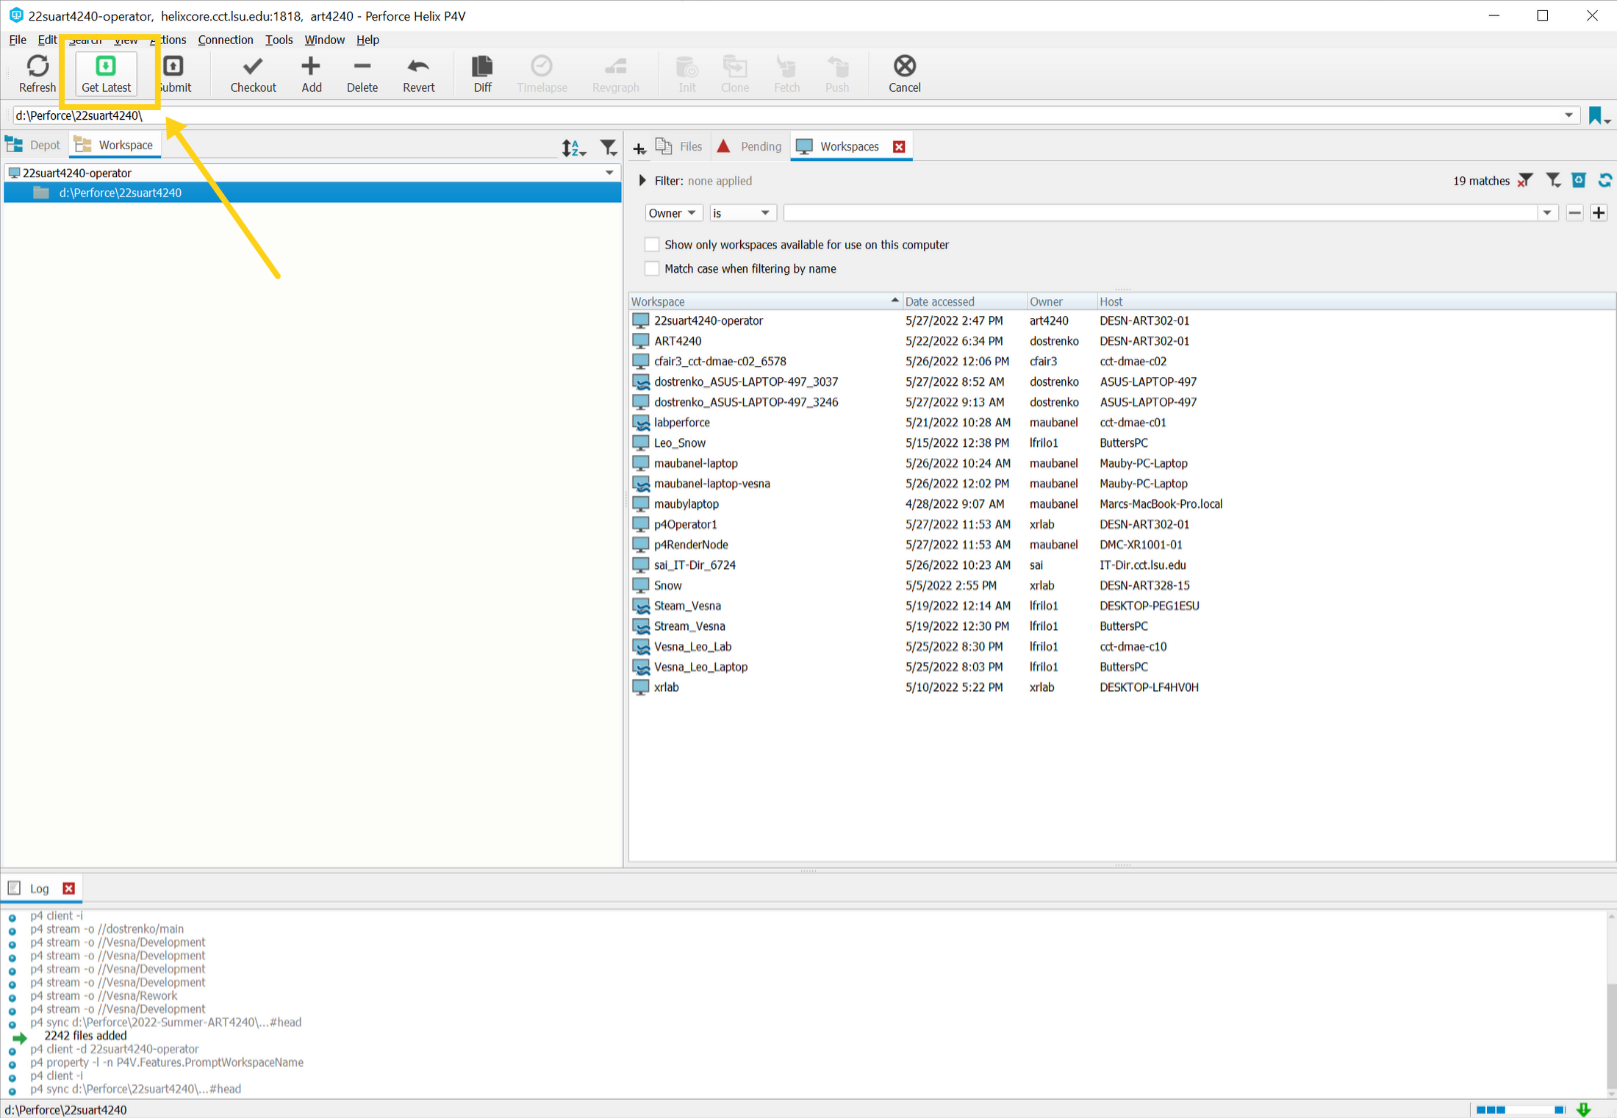
Select your Workspace Folder and Press Get Latest. This will download all your from your depot.
-
On the Render Node repeat the same steps as above to create a new workspace.
P4 Command Line
-
To make sure the command line version of P4 is in sync with P4V create two files called
[RENDER_WORKSPACE_NAME].p4configand[OPERATOR_WORKSPACE_NAME].p4configin the root of these workspaces alongside your.p4ignorefiles. -
In each file put the following contents:
Contents of operator.p4config:
P4CLIENT=scrn4015-operator_DESN-ART302-01_22fa
P4USER=scrn4015-operator
P4PORT=ssl:helixcore.cct.lsu.edu:1818
P4IGNORE=.p4ignore
Contents of render.p4config:
P4CLIENT=scrn4015-render_DMC-XR1001-01_22fa P4USER=scrn4015-render P4PORT=ssl:helixcore.cct.lsu.edu:1818 P4IGNORE=.p4ignore -
On each machine, open a command prompt
p4 set P4CONFIG="PATH TO WORKSPACE/[OPERATOR_WORKSPACE_NAME].p4config"on the operator machine andp4 set P4CONFIG="PATH TO WORKSPACE/[RENDER_WORKSPACE_NAME].p4config"on the render machine. -
Last thing we should do is setup our typemapping. Open a command prompt and type
p4 typemap. Under the word "Typemap" press enter and then tab and past the following:
Typemap:
    binary+w //....exe
    binary+w //....dll
    binary+w //....lib
    binary+w //....app
    binary+w //....dylib
    binary+w //....stub
    binary+w //....ipa
    binary+l //....uasset
    binary+l //....umap
    binary+l //....upk
    binary+l //....udk
    binary+l //....ubulk
    binary+wS //..._BuiltData.uasset
-
Now check tha values ahave been set with
p4 setandp4 info. -
We’re good to go. Our Client name, host, and root all look correct now.
Resources
- maubanel/p4v-unreal
- https://docs.unrealengine.com/5.0/en-US/using-perforce-as-source-control-for-unreal-engine/
- https://www.perforce.com/products/helix-core/configure-helix-core-game-engine#tab-panel-76008
