Live Link

Now we have the base nDisplay config set up. We need to add camera tracking into our Template. We have an OptiTrack motion capture system that will track the cameras. We also are using a Lonet Server for focus tracking. We do this in Unreal using the Live Link plugin. Lets get started.
Step 1.|BTS|
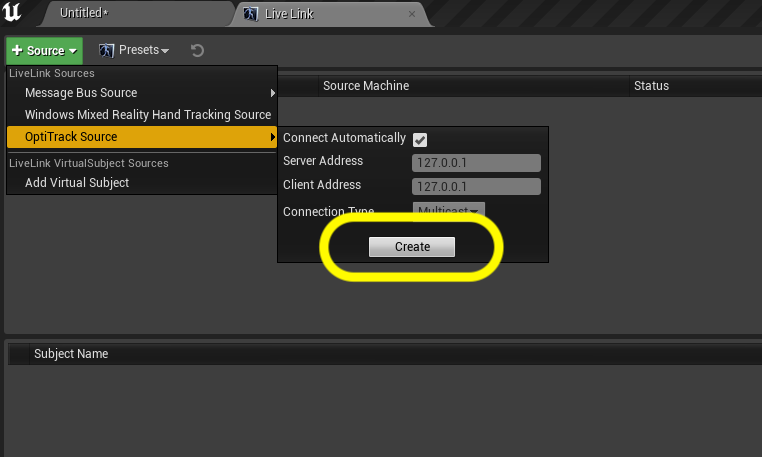
Lets get livelink setup to bring in Mocap data from the OptiTrack. Make sure the motion capture system is turned on, has streaming enabled and has a static mesh tracking the camera on set. Go to Window | Live Link and add a OptiTrack Soucce with default settings. Press the Create button.

Step 2.|BTS|

Make sure your tracker has a green (not yellow or red) light and the name of the static mesh is the same as the one on the tracker. In our case it is called ActivePuck_CH20_ID1. Make sure that Rebroadcast Subject is set to true.


Step 3.|BTS|


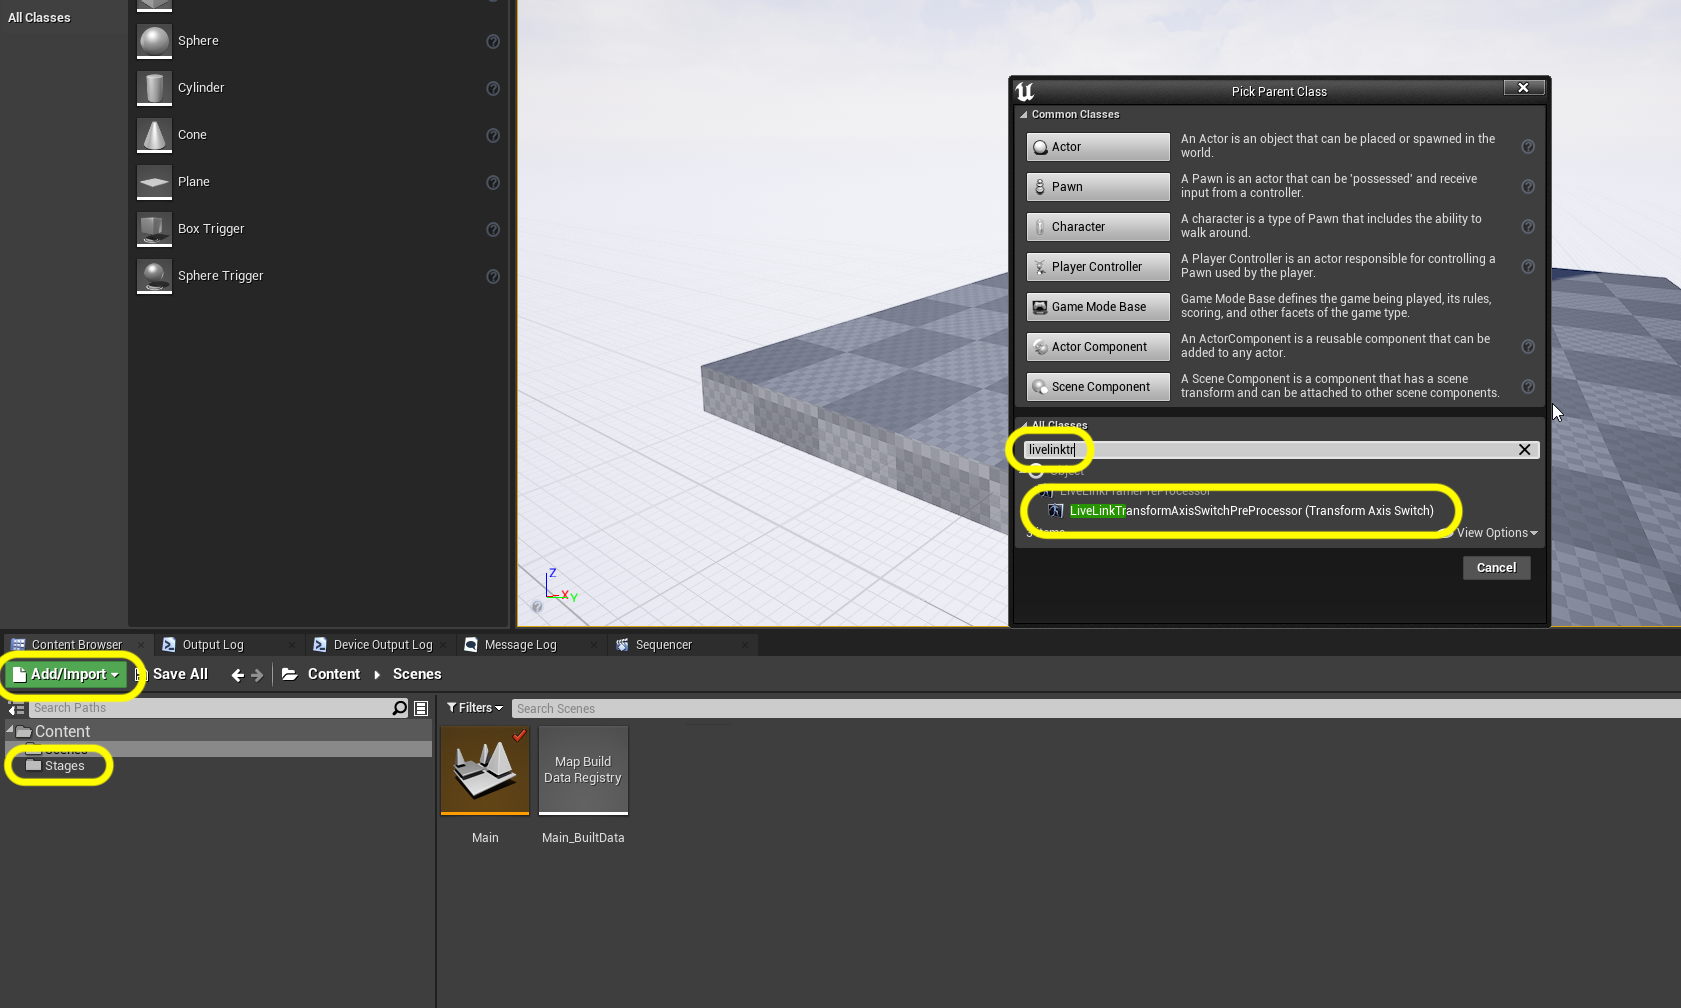
Now the orientation of the axis in OptiTrack is not the same as what Unreal expects. The camera would not mimic the movement on set correctly. We need to select the Stage folder and press the Add/Import button and select Blueprint. Open up All Classes and this time we will search for the LiveLinkTransformAxisSwitchPreProcessor(TransformAxisSwitch).

Step 4.|BTS|


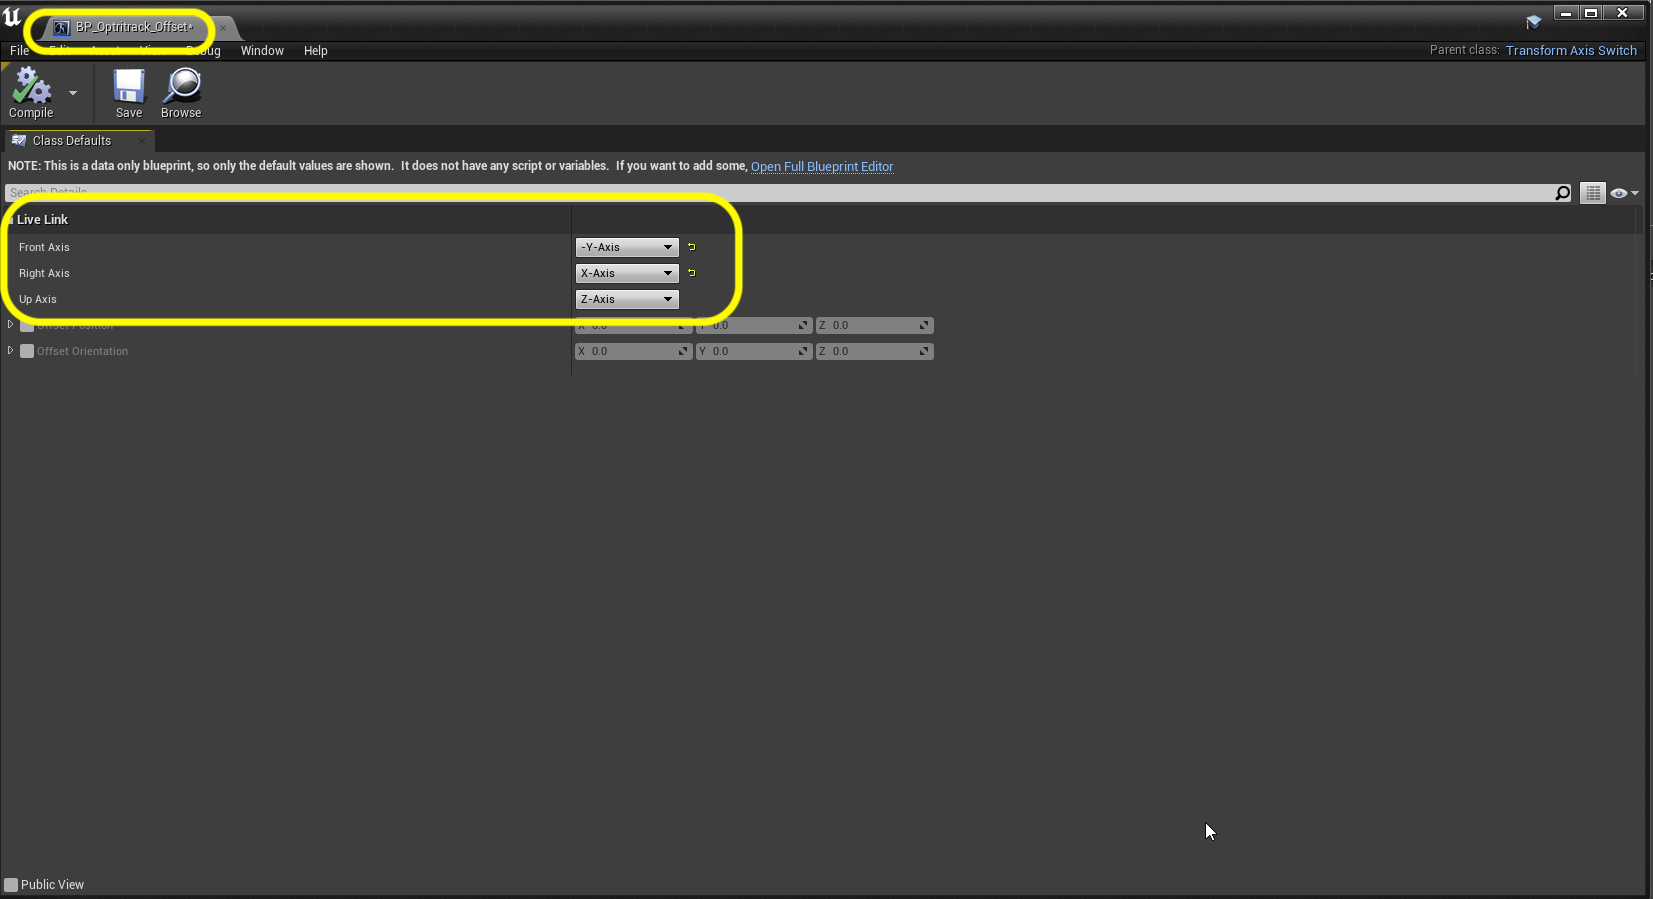
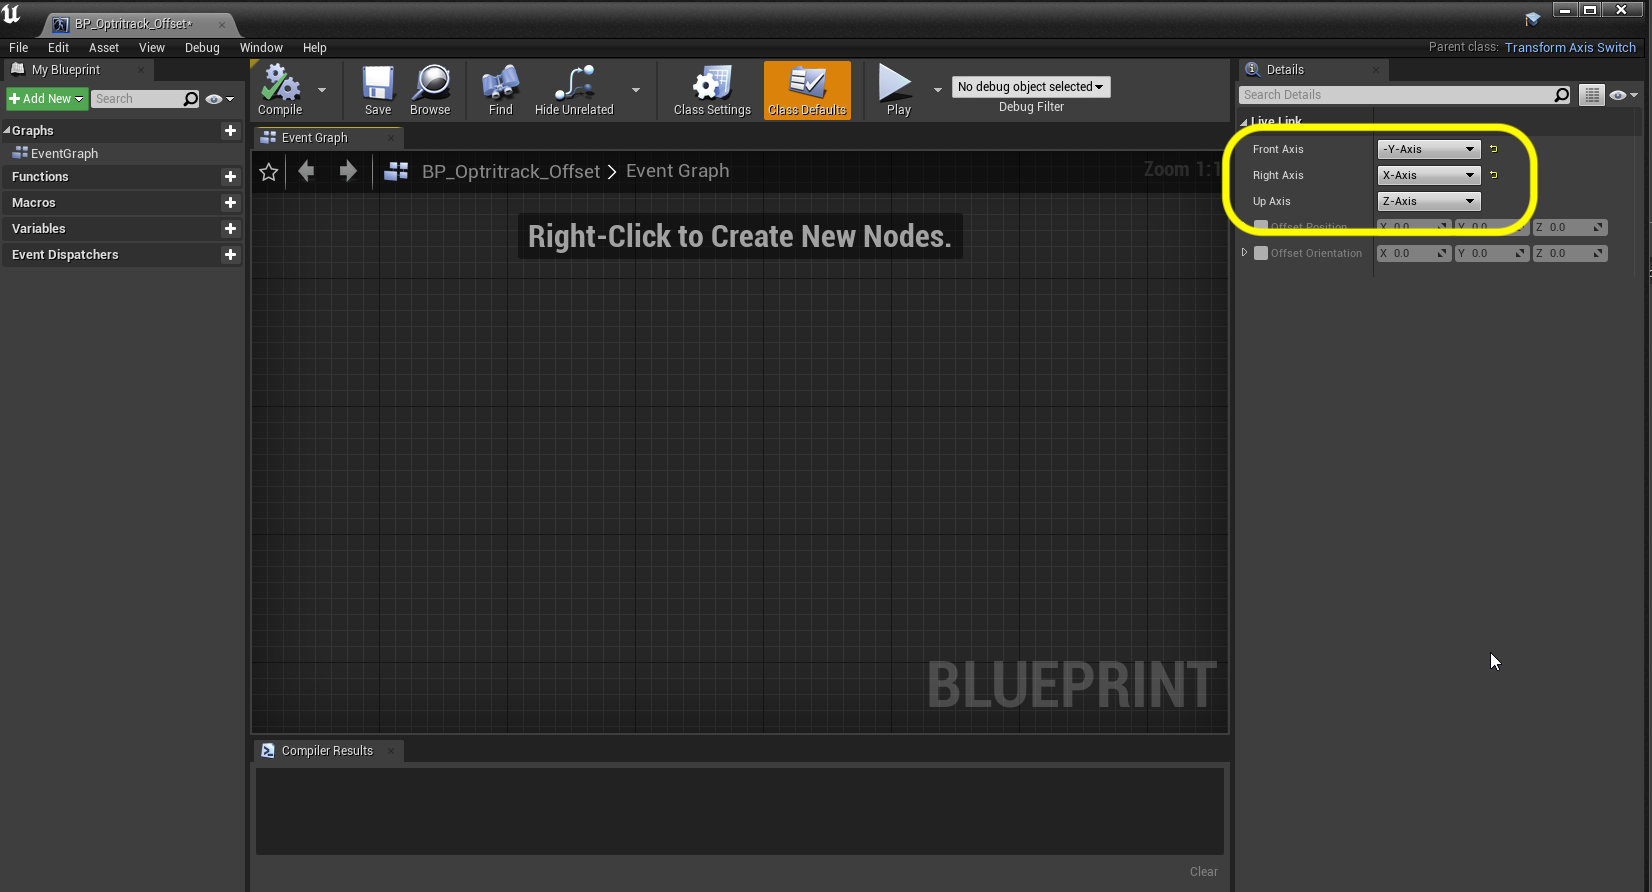
Call this new blueprint BP_OptiTrack_Offset. Double click it. It will either look like a normal blueprint or come in a reduced form. In either case you want to set the Front Axis (what Unreal thinks of facing forward or X) as -Y-axis coming from OptiTrack (inverting the Y axis as the positive direction is wrong). Set the Right Axis to the X-Axis.

Step 5.|BTS| 
Sometimes the blueprint will open up in the full editor and you can make the same adjustments in the Details panel.

Step 6.|BTS| 

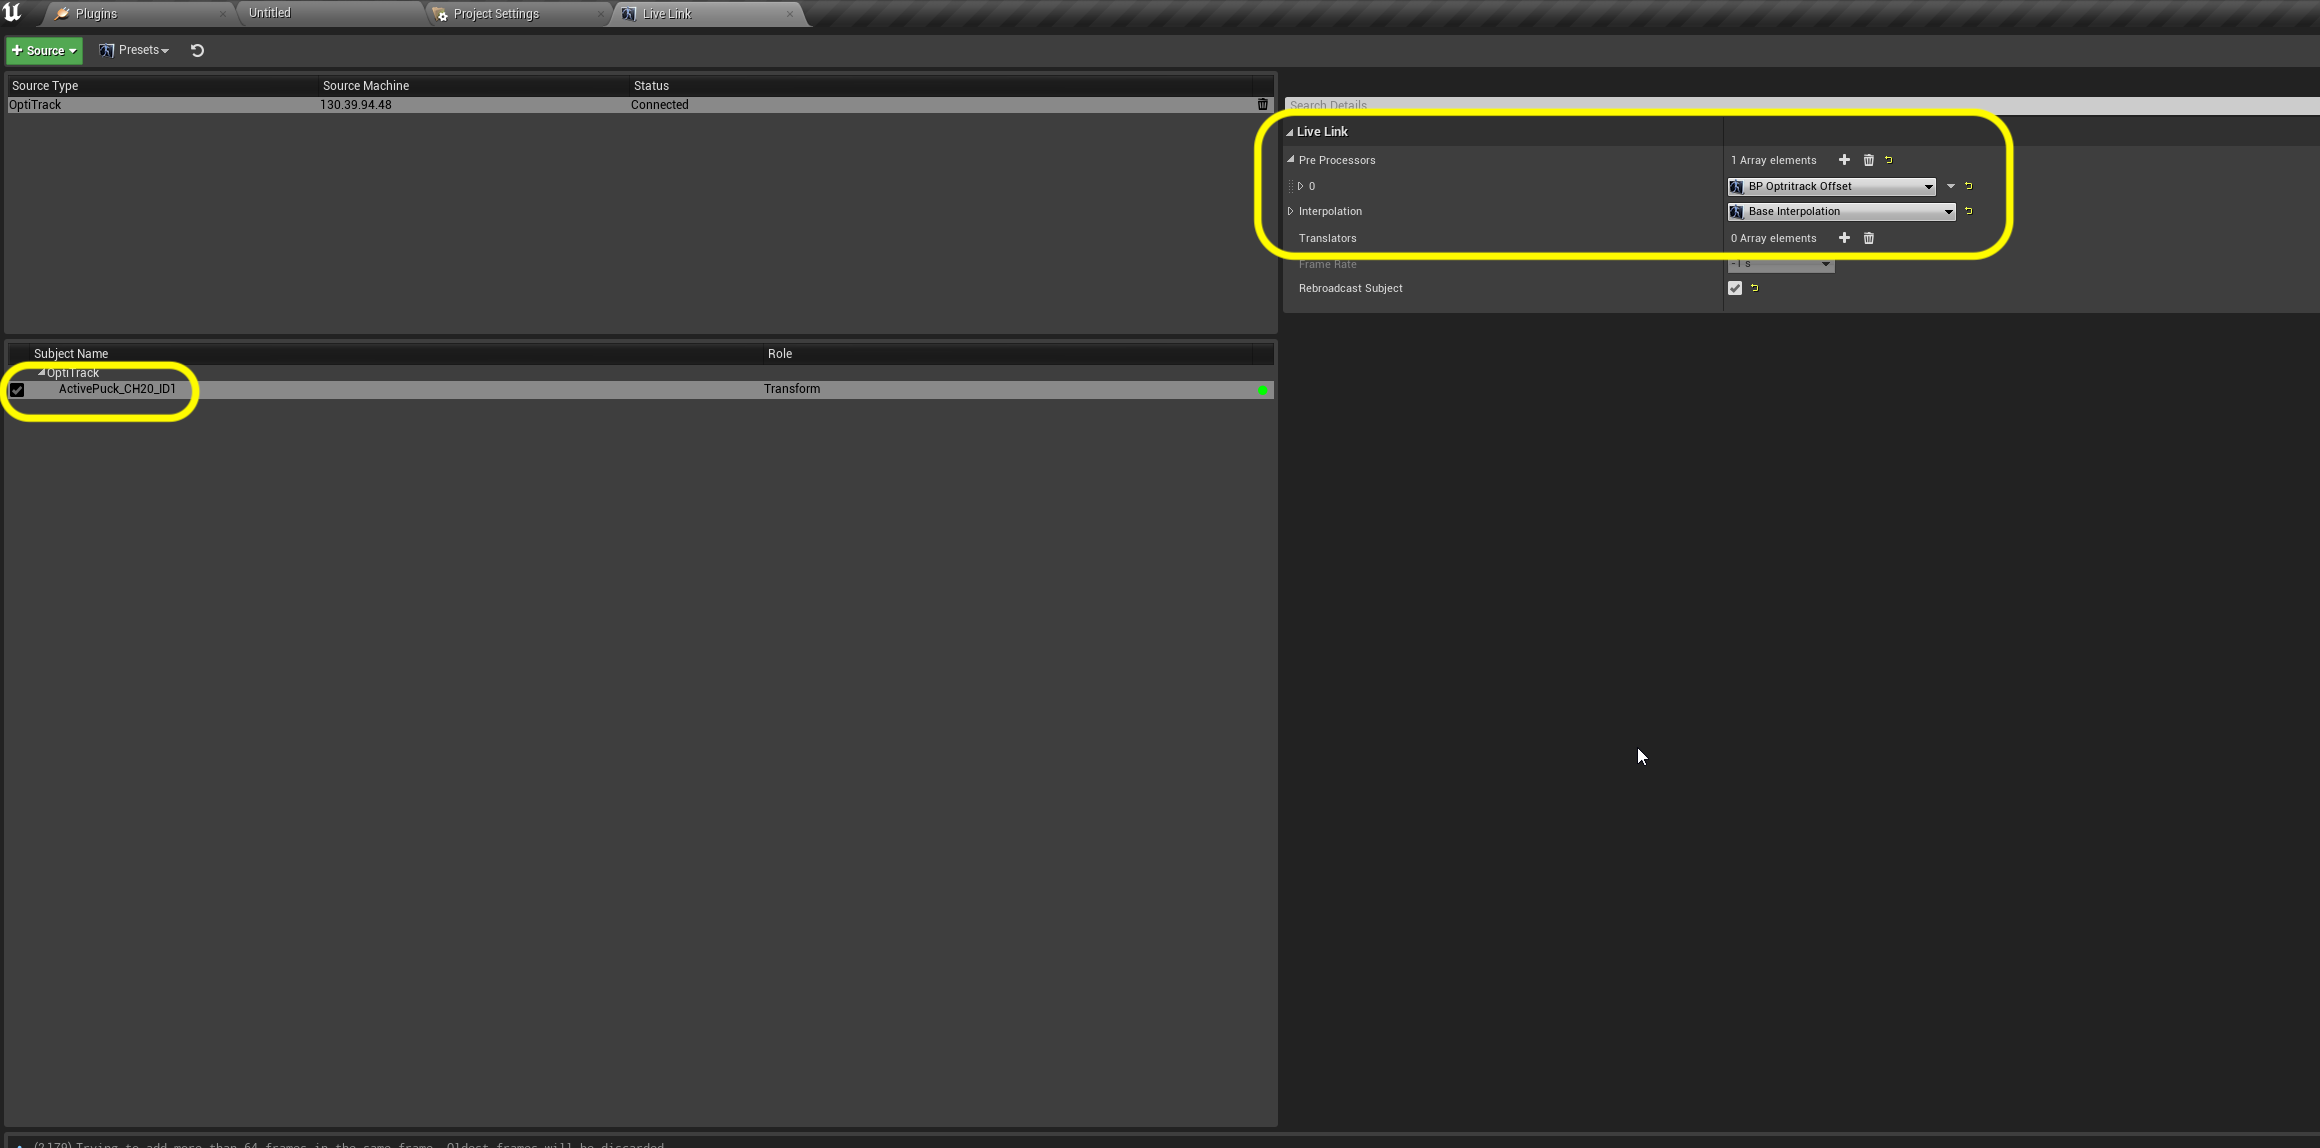
Now we can open up the LiveLink window again and select the ActivePuck_CH20_ID1 camera tracker in the Subject Name window. Now in the Pre Processor press the + key and assign the BP_Optitrack_Offset blueprint in preprocessor slot 0.

Step 7.|BTS| 


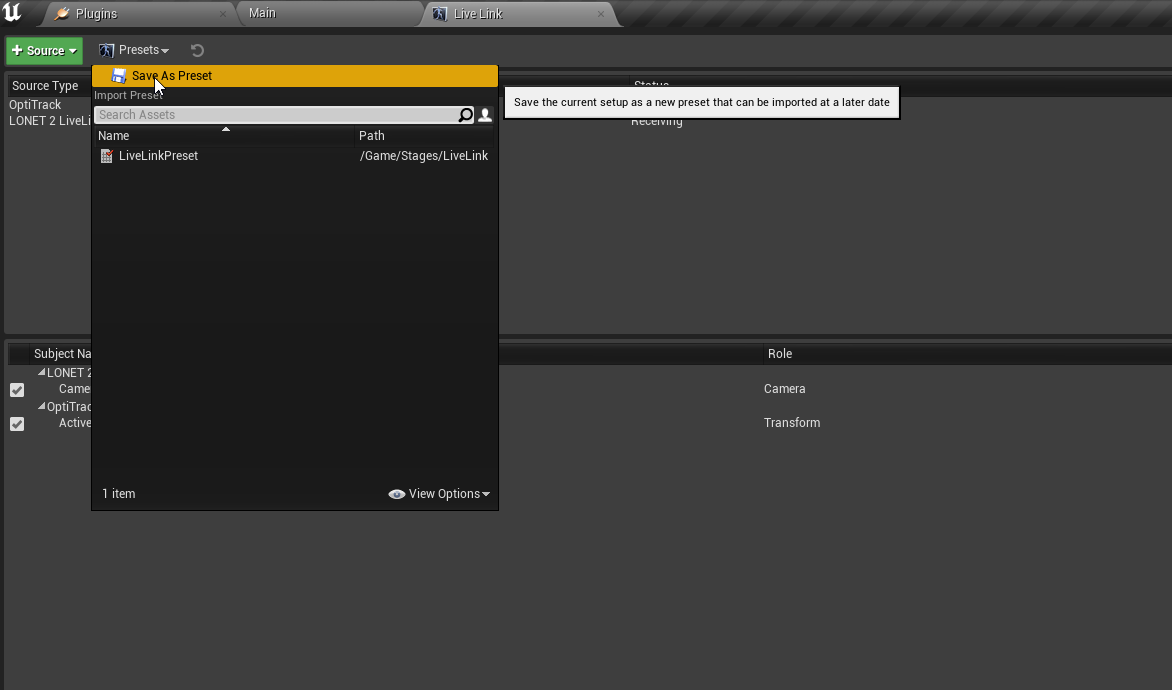
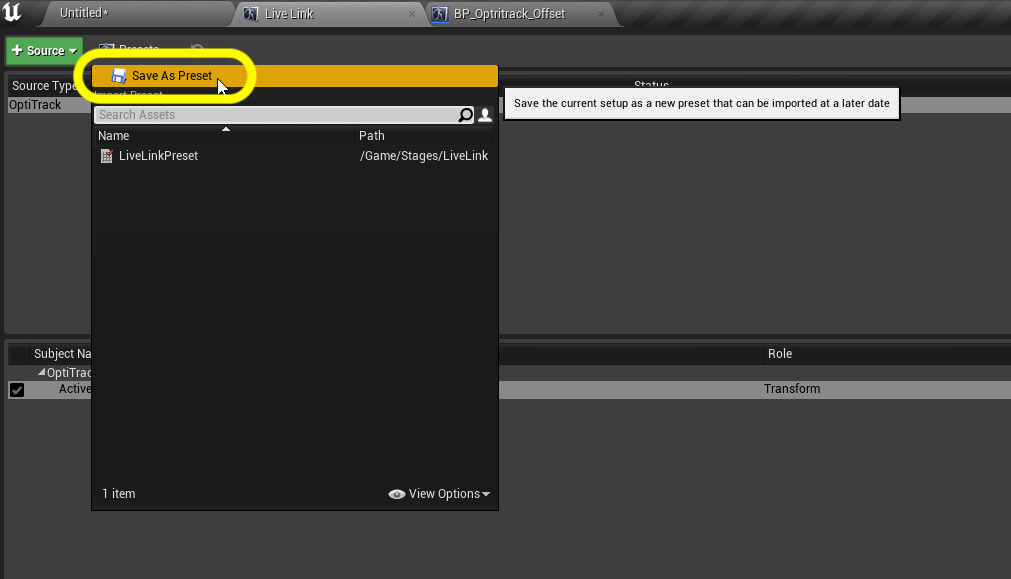
Now select Presets and choose Save Preset. Save it to the Stage folder and call it LiveLinkPreset.

Step 8.|BTS| 


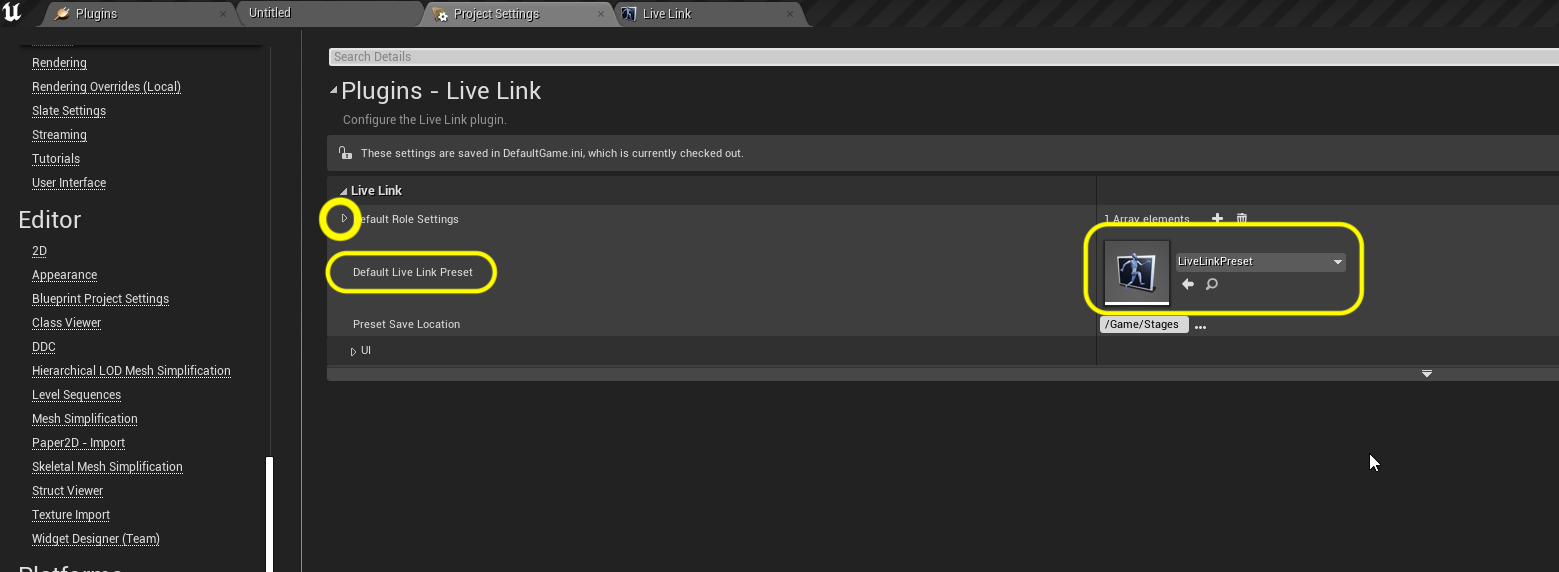
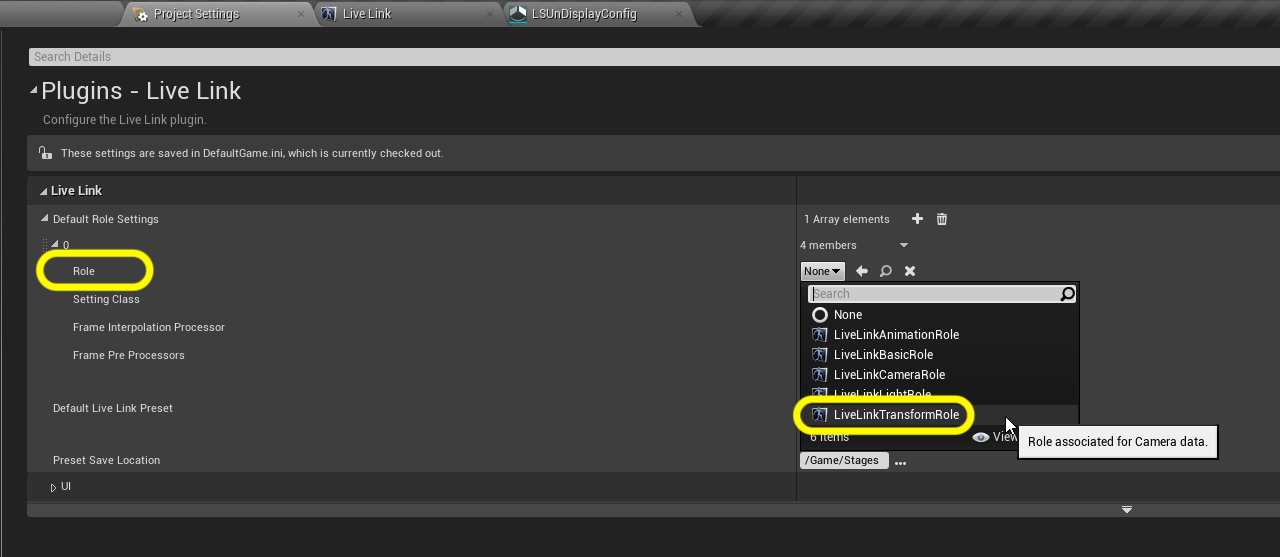
Now this just adds it to this tracking machine. We also need to add it to the project configuraiton so that all the other machines can get this offset as well. Open up the Edit | Project Settings folder and select Live Link plugin settings. Assign LiveLinkPreset to Default Live Link Preset. Open up the little triangle next to Default Role Settings.

Step 9.|BTS| 


Now you can set the Role to a LiveLinkTransformRole.

Step 10.|BTS| 
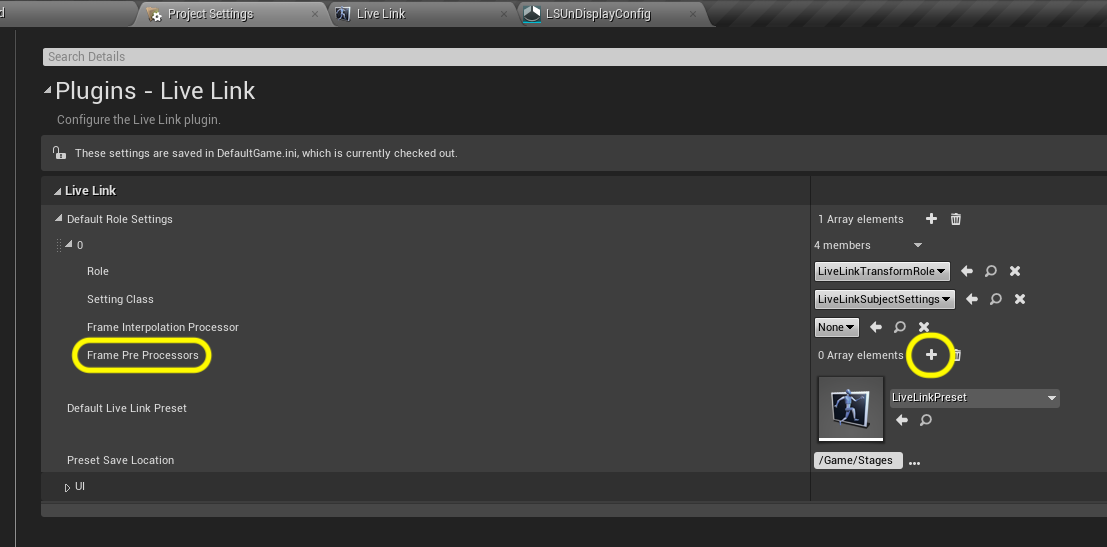
Now we also need to alter the orientation and add the pre processor. Press the + button next to the Frame Pre Processors.

Step 11.|BTS| 

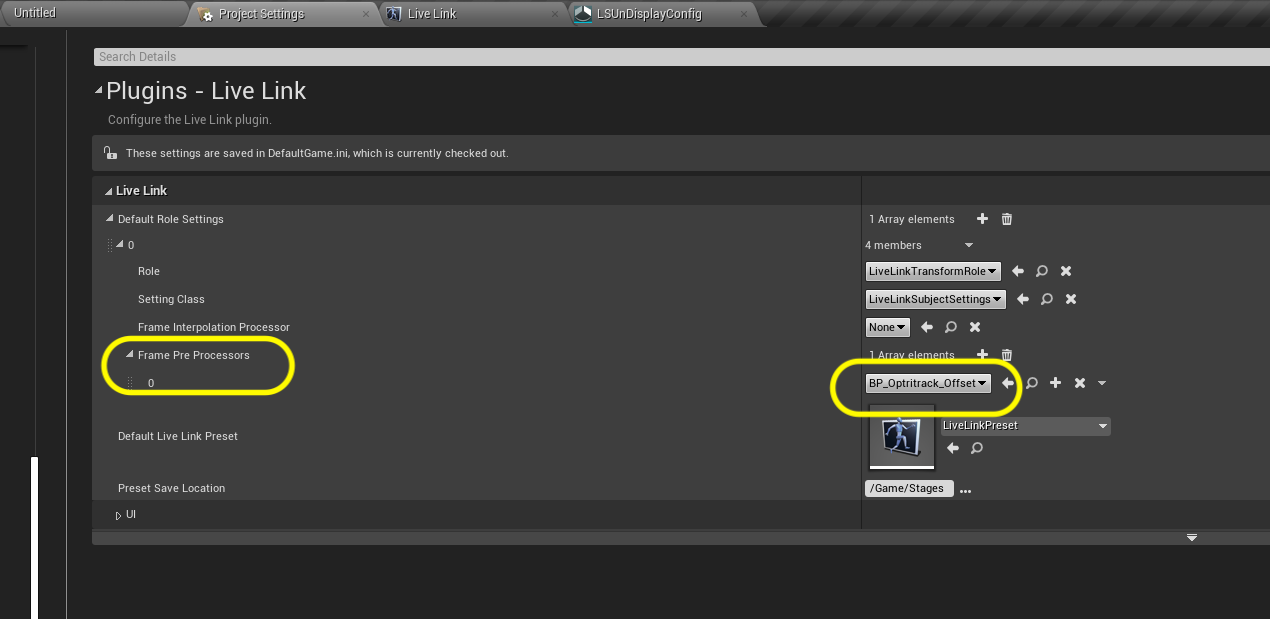
Assign BP_OptiTrack_Offset to this pre processor.

Step 12.|BTS| 


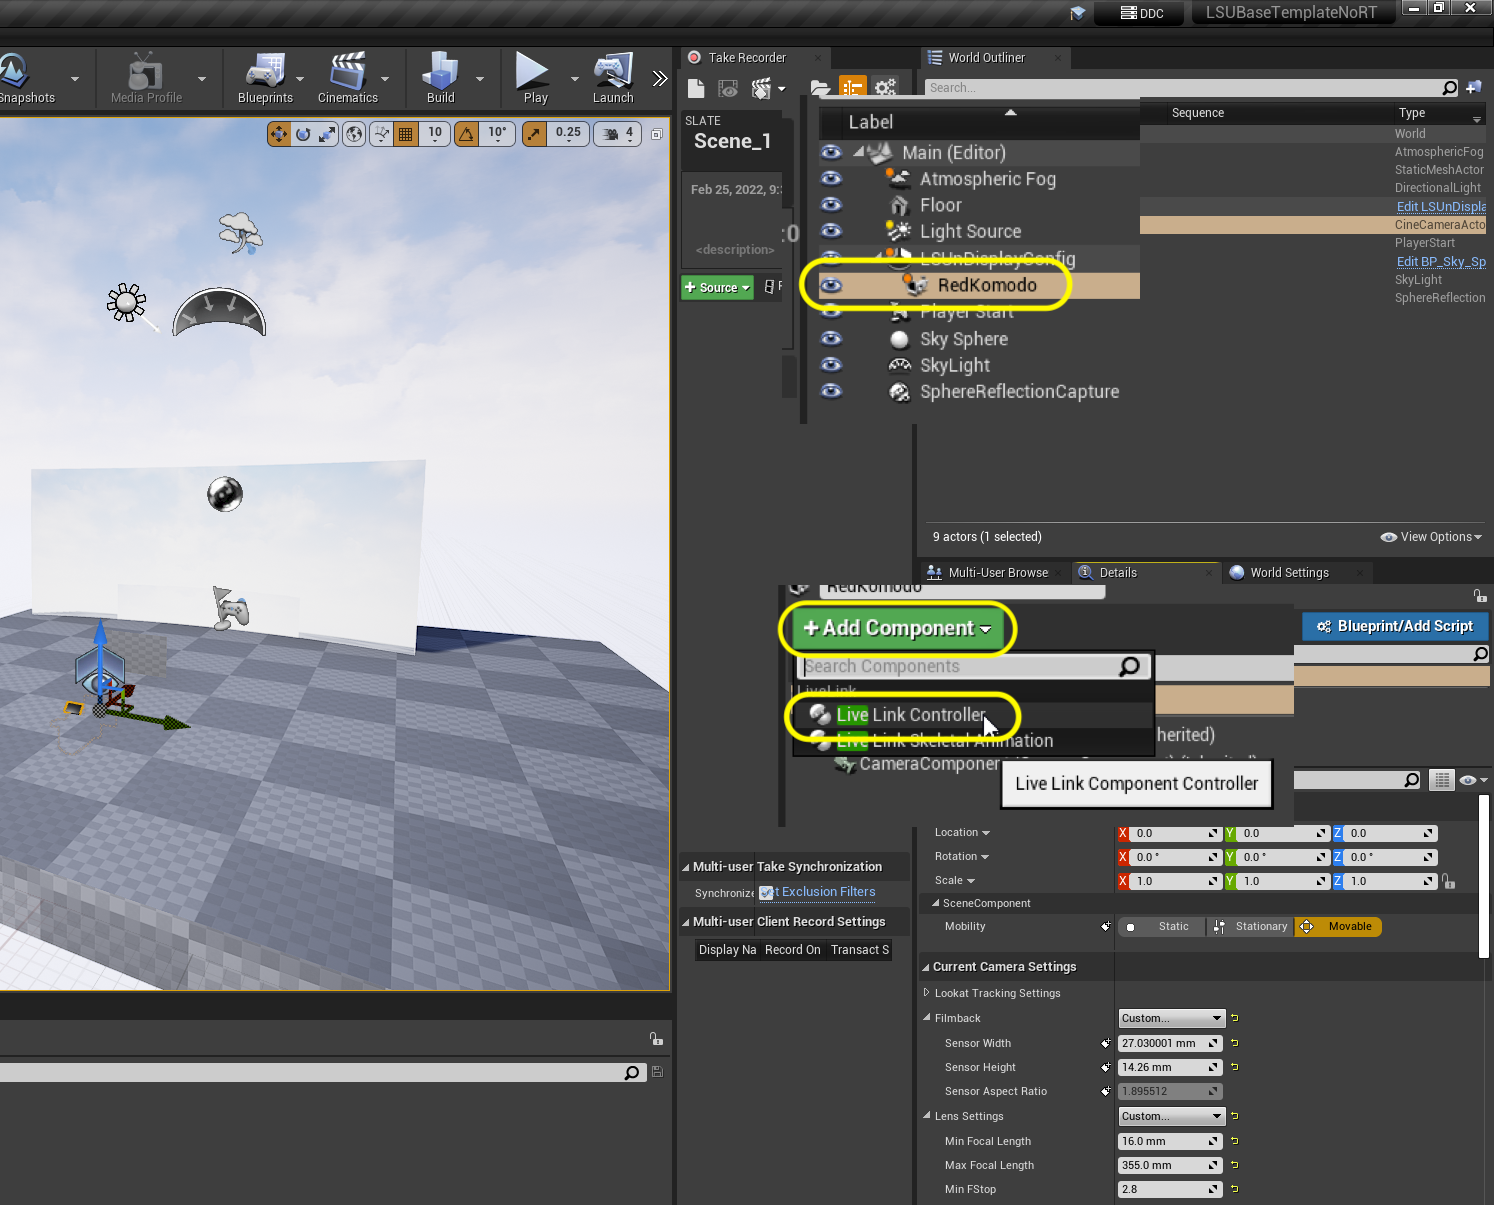
Now that we have the LiveLink setup we just need to have it communicate to our in game camera. Go back to the Main level and select the RedKomodo cinecamera. Press the green + Add Component button and select a Live Link Controller component. Call this component Live Link OptiTrack.

Step 13.|BTS| 


Now select the Subject Representatino in the Live Link Controller and pick ActivePuck_CH20_ID1.
![]()

Step 14.|BTS| 


Now you should see in game that the camera pops up to the position of where it is tracking in OptiTrack Motive.
https://user-images.githubusercontent.com/5504953/157681712-fd89c85f-0311-4e03-b9b3-d808dc9325ef.mp4

Step 15.|BTS| 

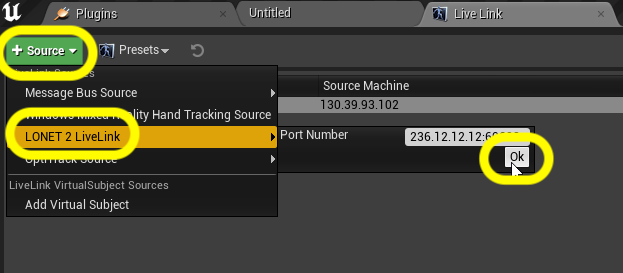
Now we need to add focus tracking. Go back to the Live Link tab and seelct Source and select the LONET 2 LiveLink plugin and press the OK key.

Step 16.|BTS| 


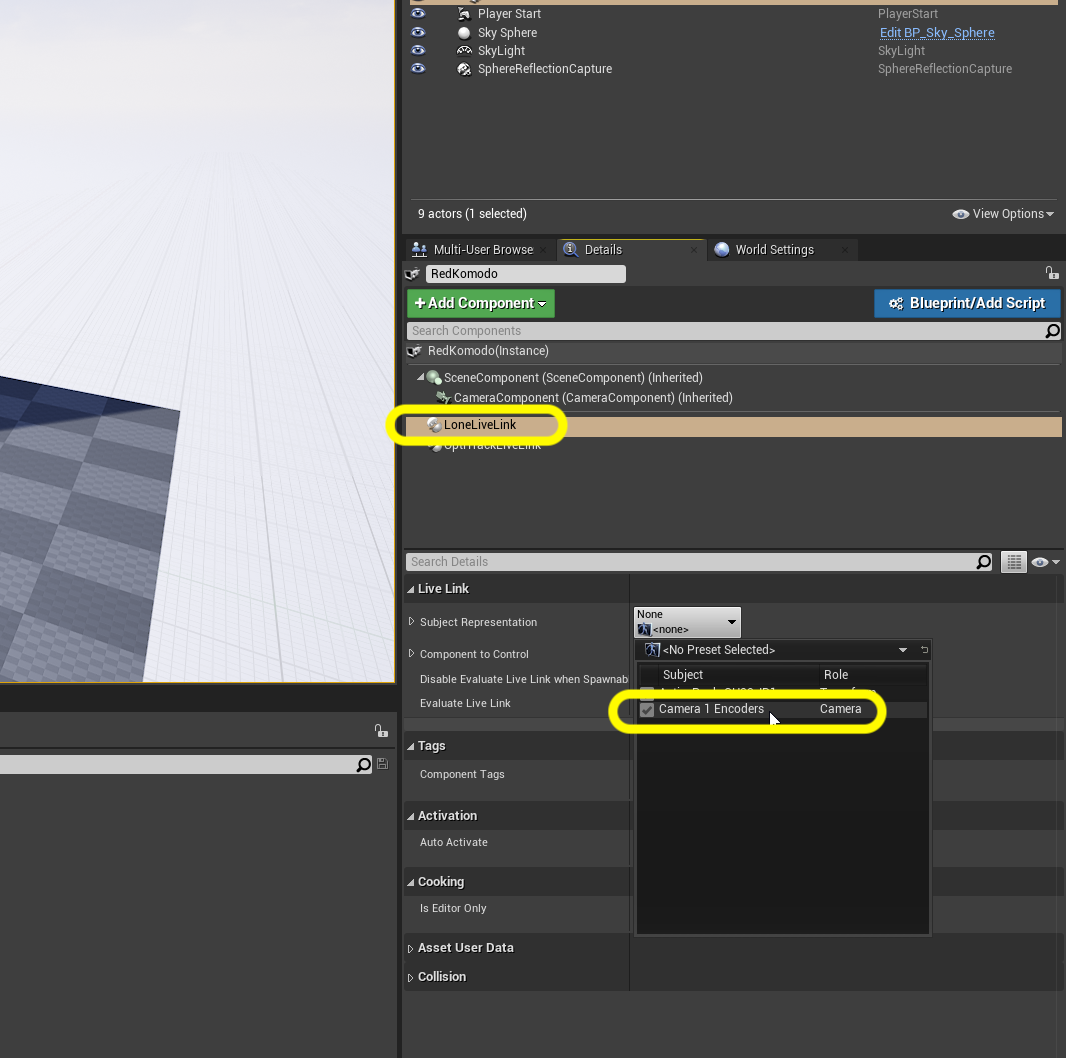
Make sure the camera name you have in LoNet shows up under Subject Name. Make sure the light is green. Keep all the default settings.


Step 17.|BTS| 


Now that we have the LiveLink setup we just need to have it communicate to our in game camera. Go back to the Main level and select the RedKomodo cinecamera. Press the green + Add Component button and select a Live Link Controller component. Call this component Live Link Lonet.

Step 18.|BTS| 


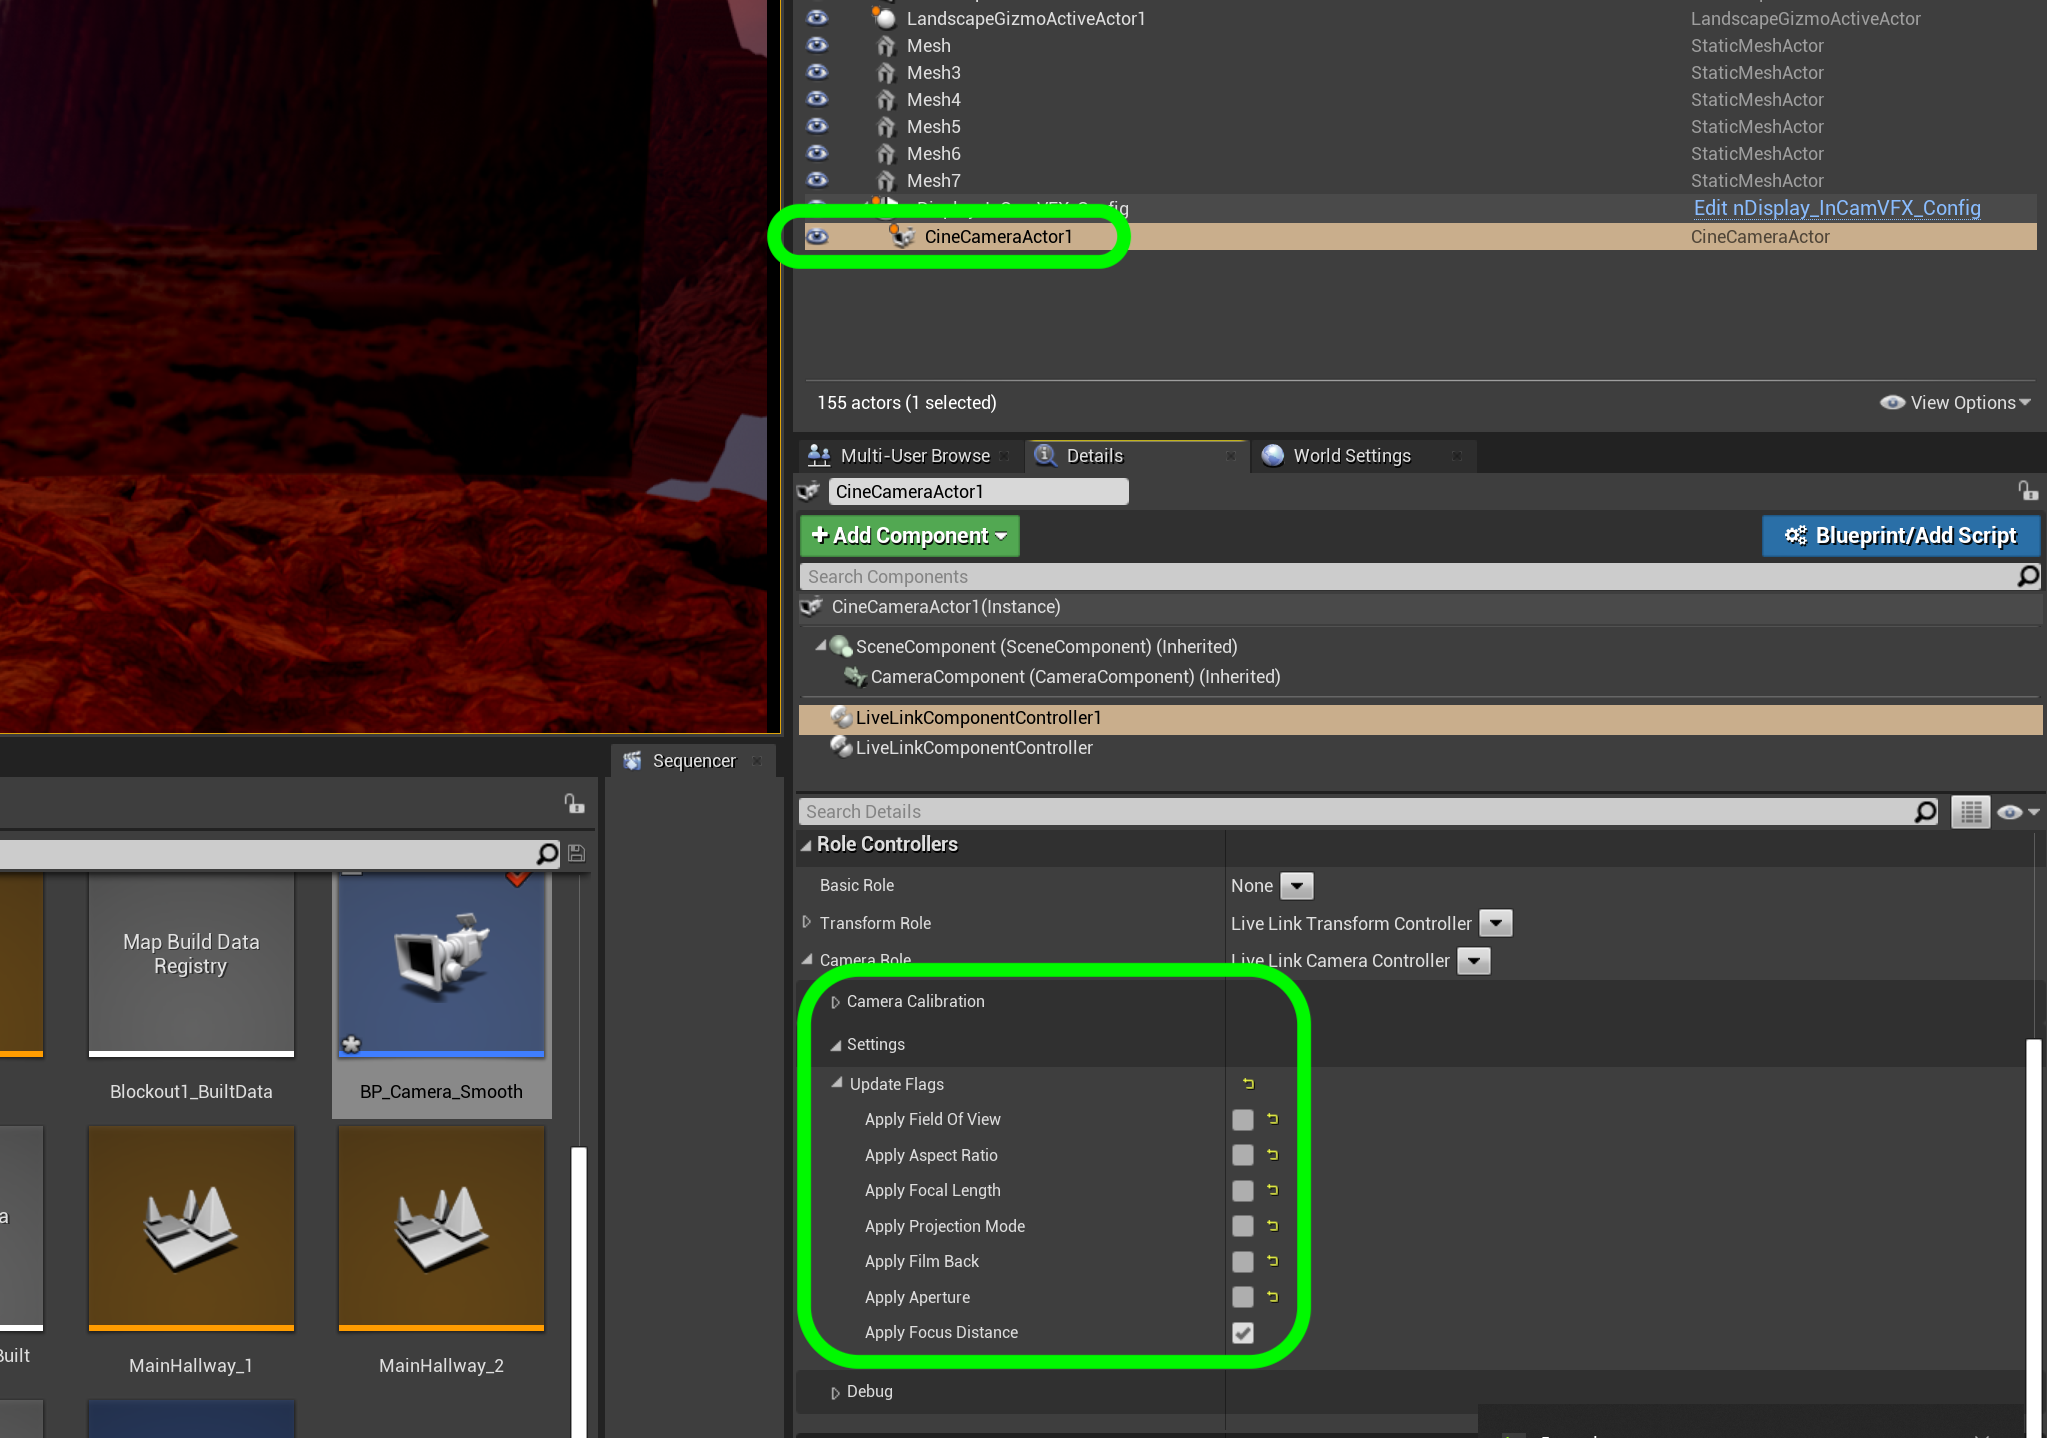
Now we have to select what the LiveLink data will be altering. In this case it is pulling the Focal Distance. Turn off all of the settings we will not be using.

Step 19.|BTS| 


Now we are able to see the Current Focus Distance change when the focal ring is moved on the camera.
https://user-images.githubusercontent.com/5504953/157722365-b18b5091-1fbe-466f-9c8c-6ea4a2c872d5.mp4

Step 20.|BTS| 

If everything works resave the Live Link preset to the same file overwriting the old one. Now we have live camera and lense tracking.
