HDR Output

The LED wall wants to receive a linear HDR signal. Unreal has been built to output sRGB for computer monitors for playing games. There are a few extra steps in configuring the project to output in the correct color space. The monitor uses a PQ signal. We need to convert the color to Linear PQ. Please note this will look wrong in your monitor viewing the project, but will look correct on the LED panels.
Step 1.|BTS|
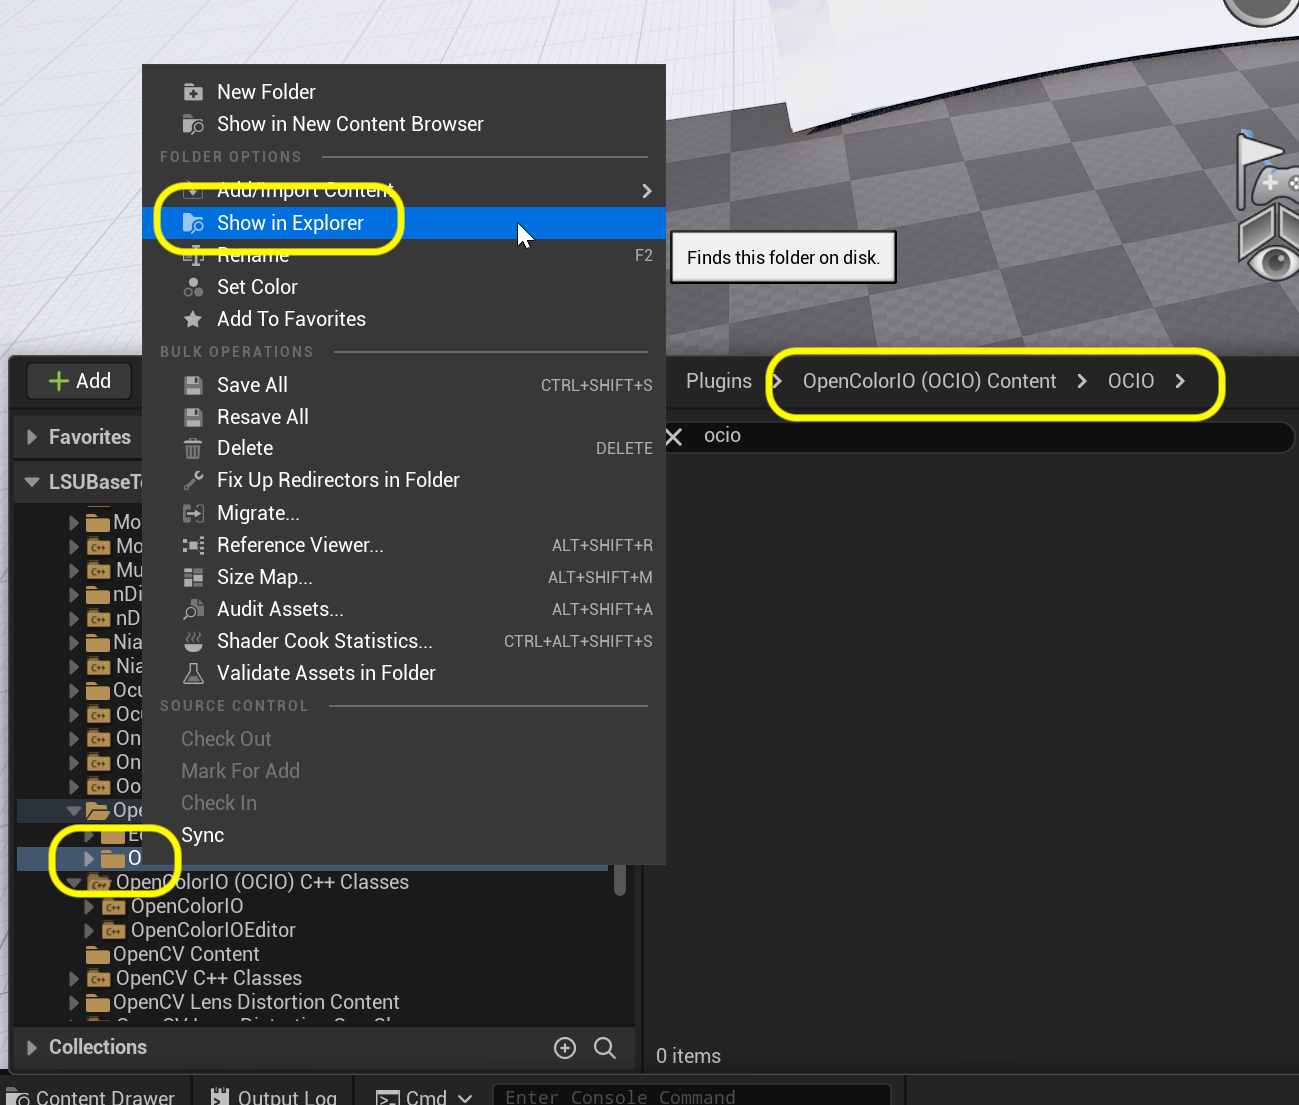
Make sure the OCIO plugin is enabled. Click on View Options and turn on Engine Content and Plugin Content. Search of OCIO. Now none of the files will show up in Unreal so you will have to right click on the OCIO folder and select Open in Explorer.

Step 2.|BTS|
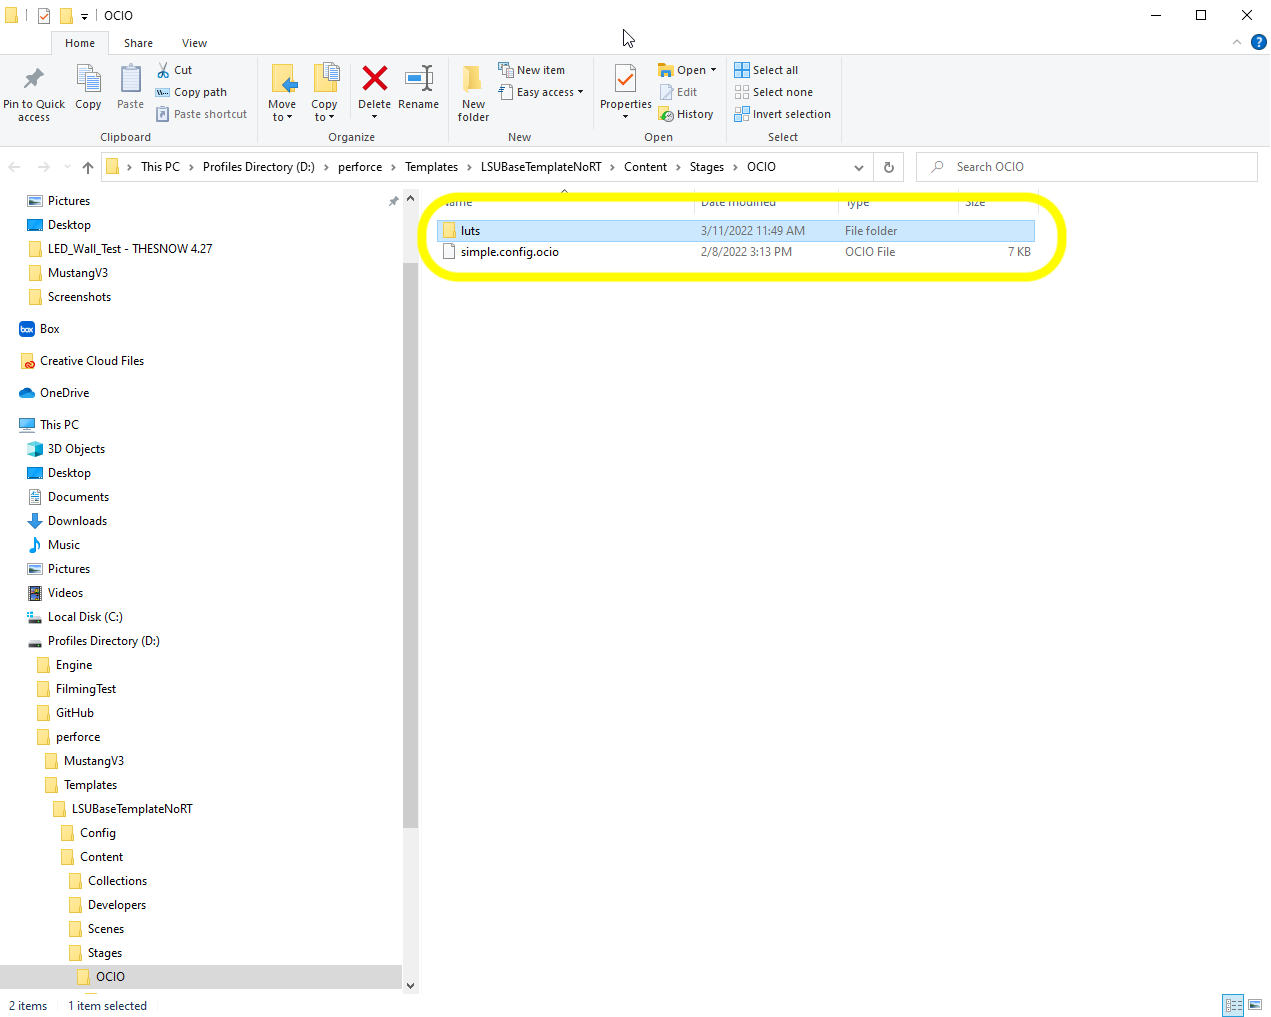
Copy the simple.config.ocio and the luts folder.
Step 3.|BTS|
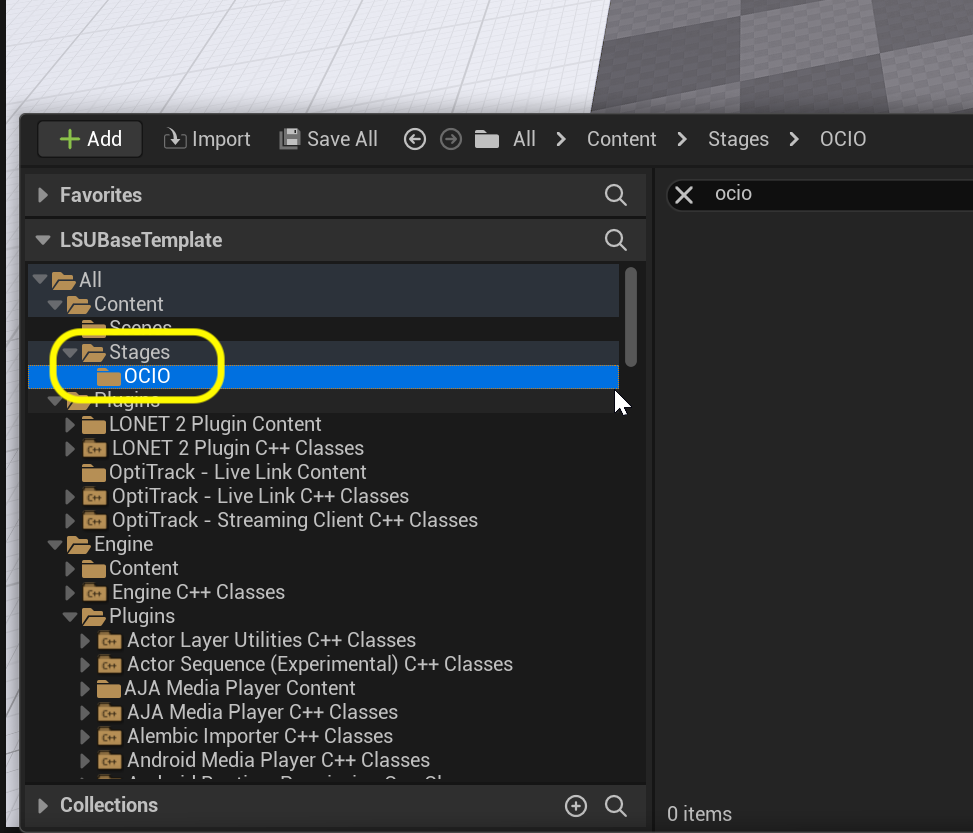
Create a new folder inside of Stages called OCIO.
Step 4.|BTS|
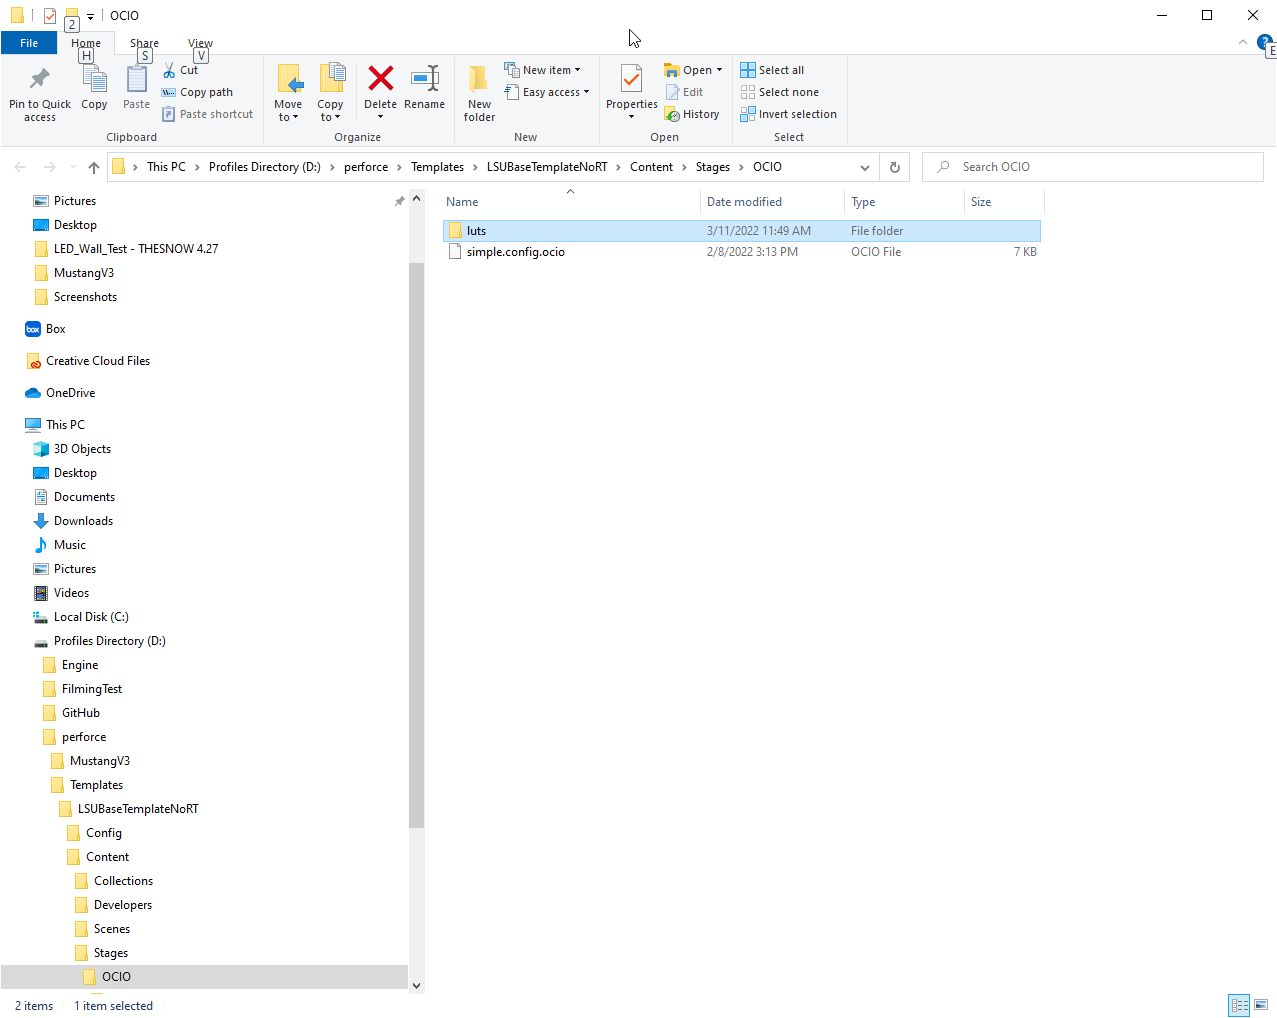
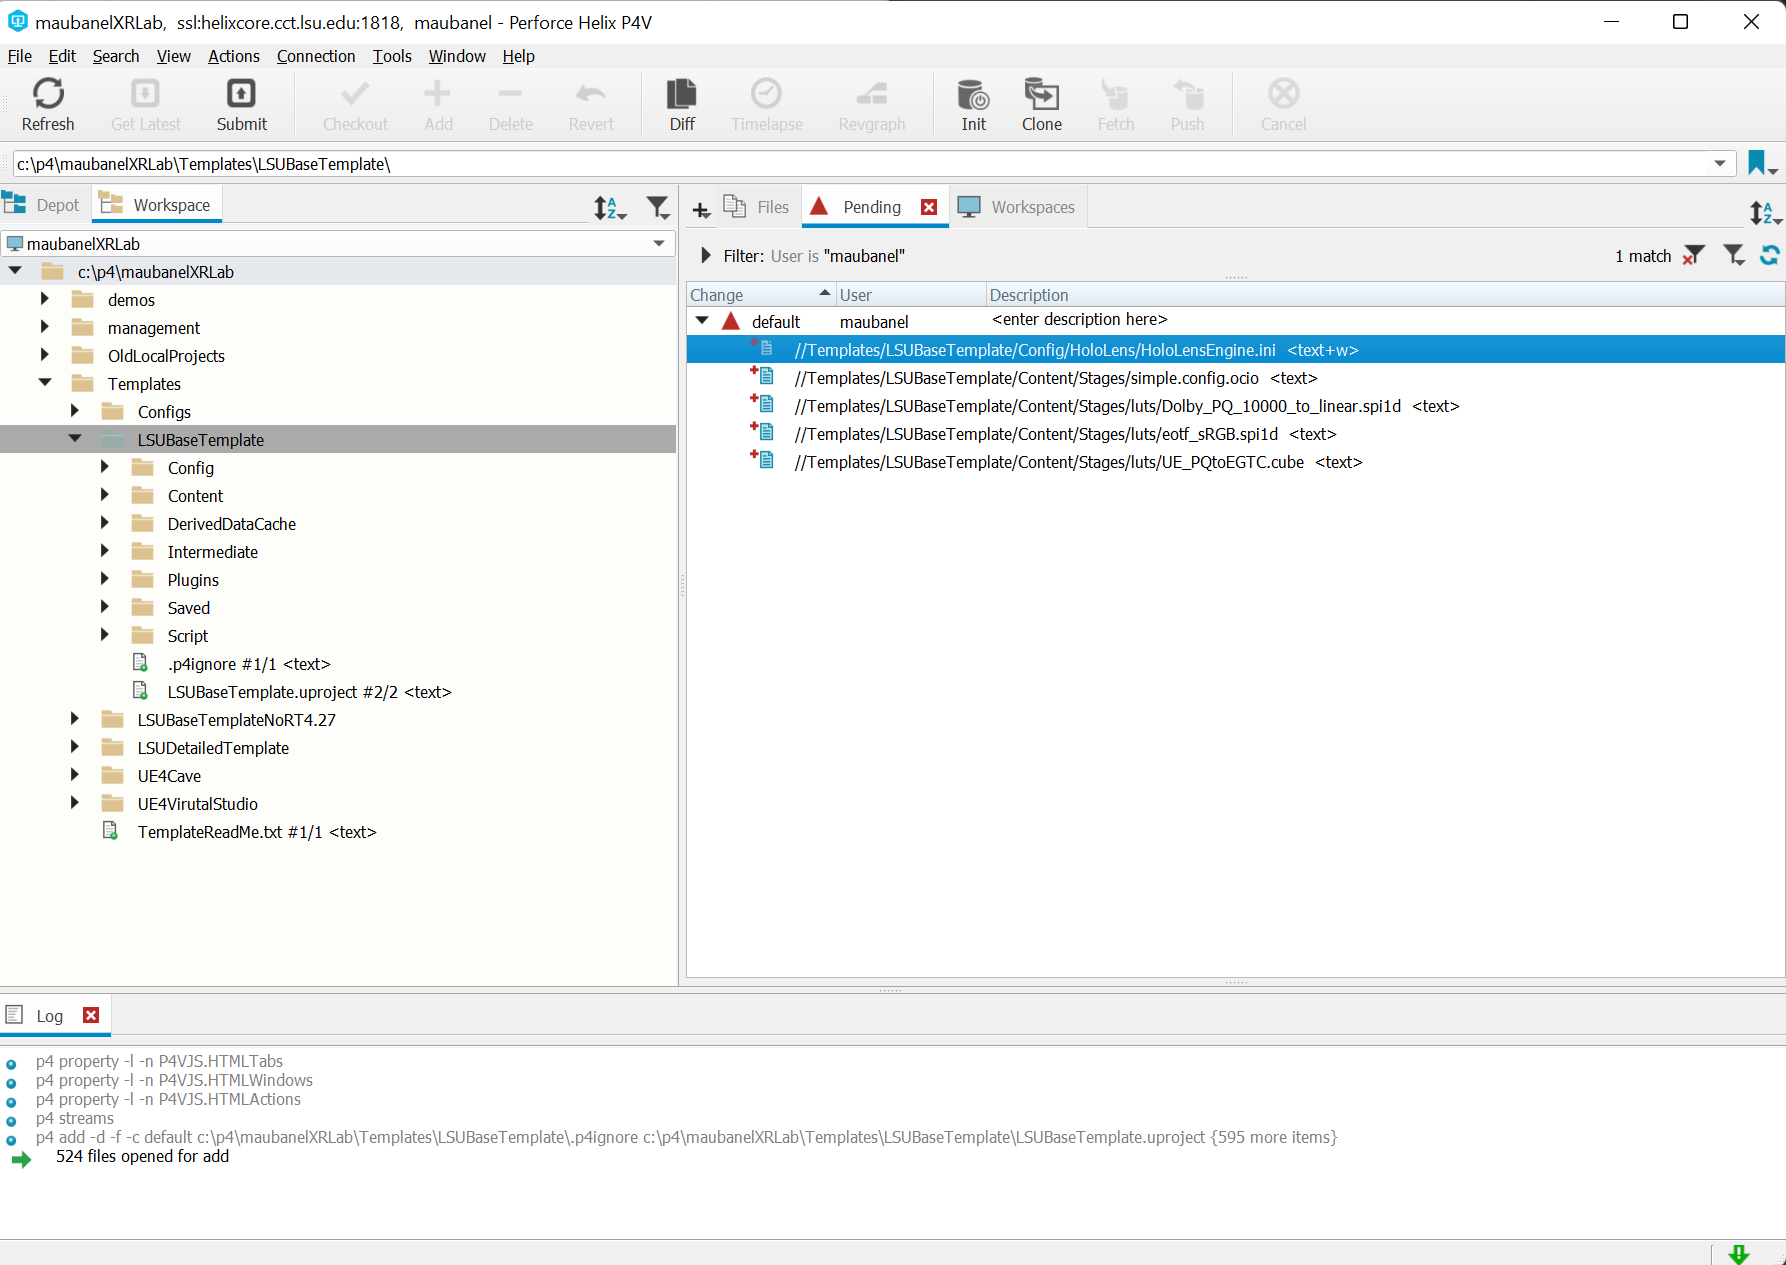
Right click on Stages > OCIO and select Open in Explorer and now paste the config file and folder into this folder. Again, this will not show up in Unreal so you will have to confirm it in Explorer. Please note, since it doesn't show up in Unreal you need to use P4V to commit the files to source control. This is very important as your nDisplay machine will not OCIO setup if this is not done.
Step 5.|BTS| 
Now these files will not show up in the browser or in the repository. We need to open up P4V and manually Add and Submit these files.
Step 6.|BTS|
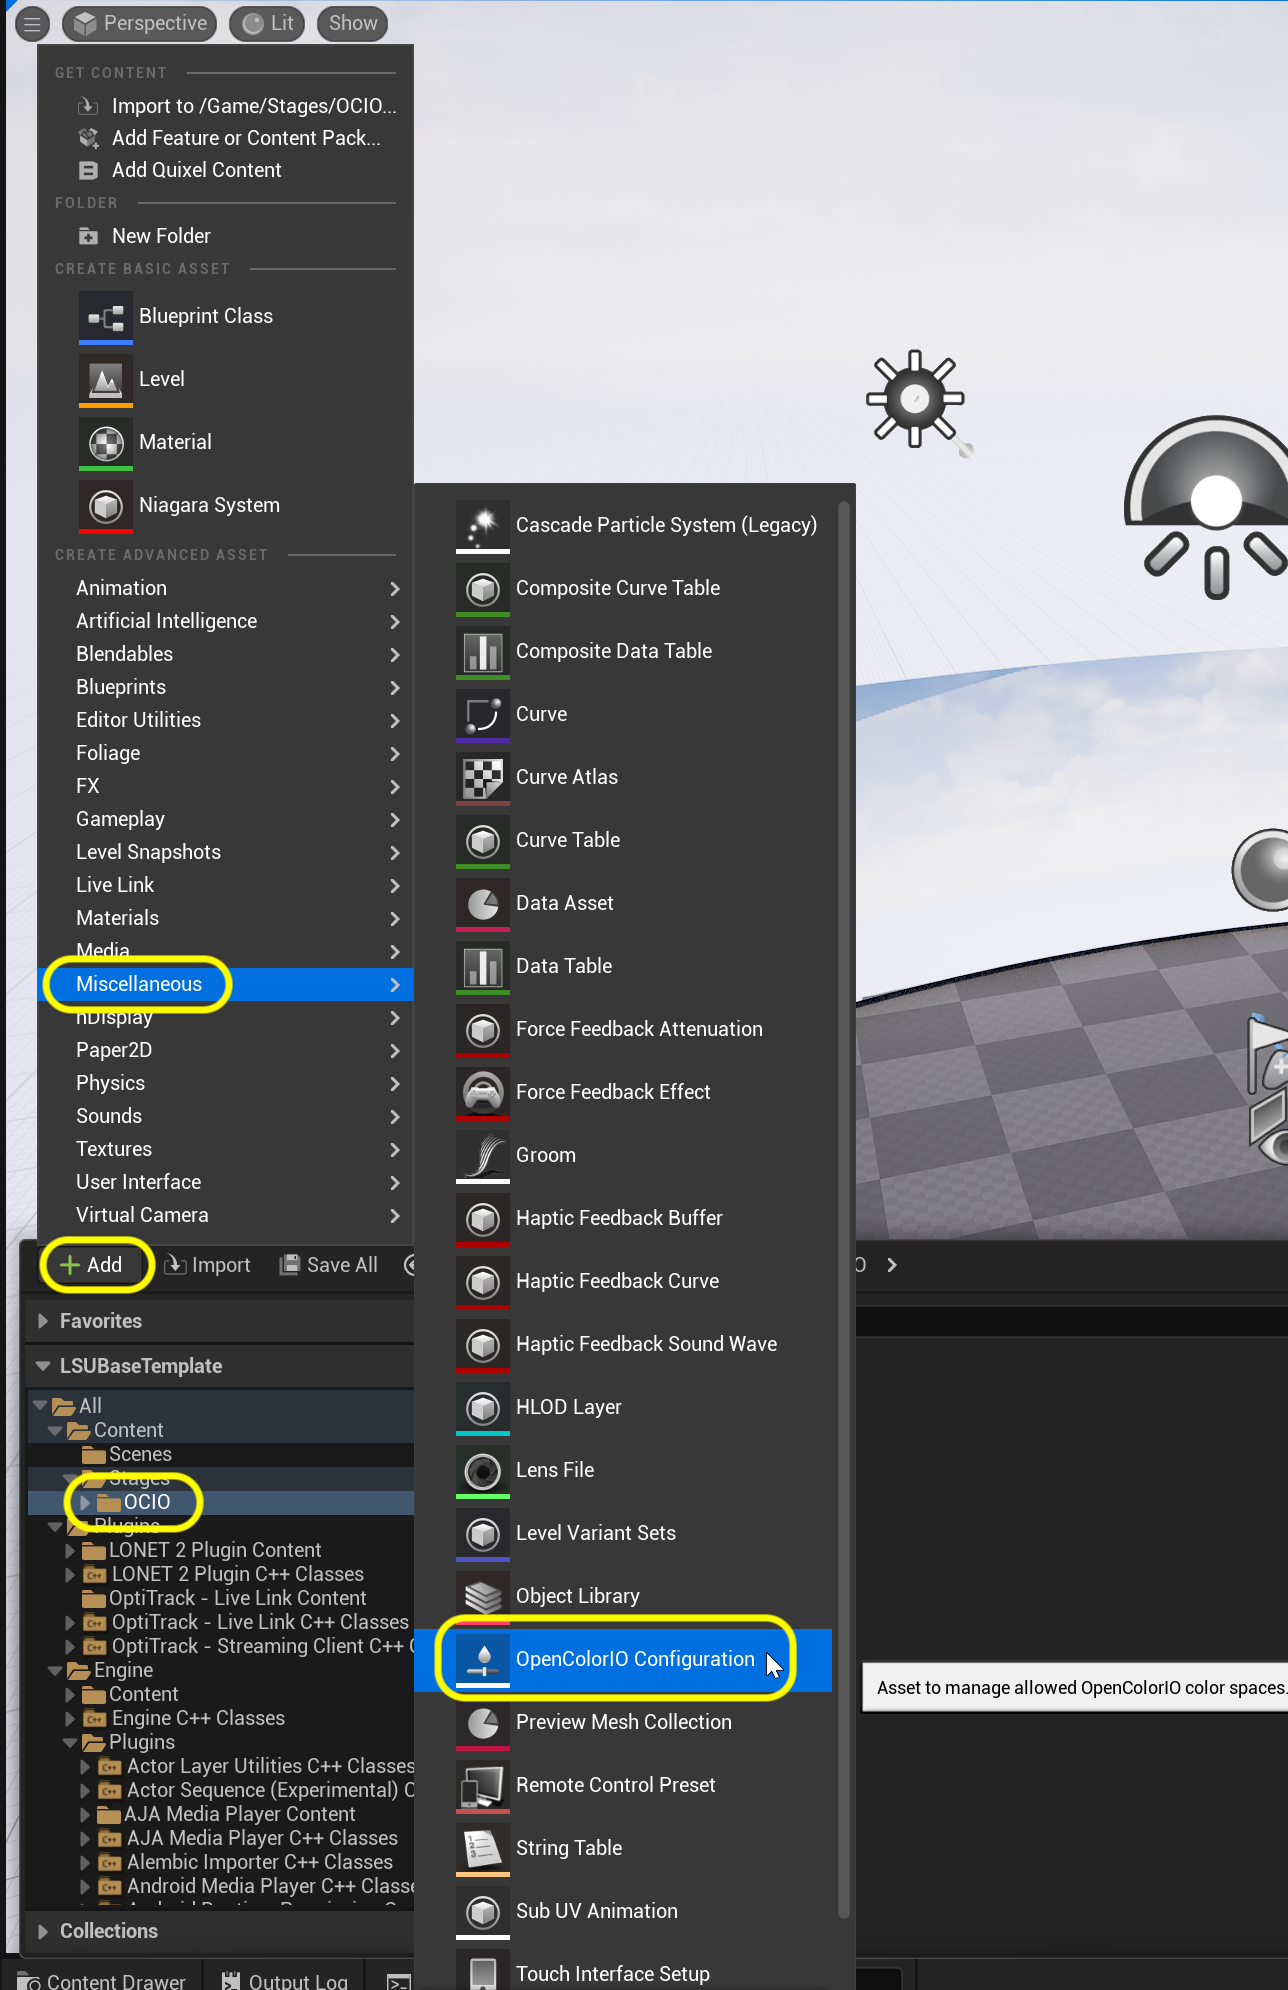
Click on the OCIO folder and right click on the + Add button and select the Miscellaneous | OpenColorIO Configuration node. Call it SRGBtoPQ. SRGB is the native format that Unreal outputs for games and PQ is an HDR format that our Brompton processors are set up to receive.
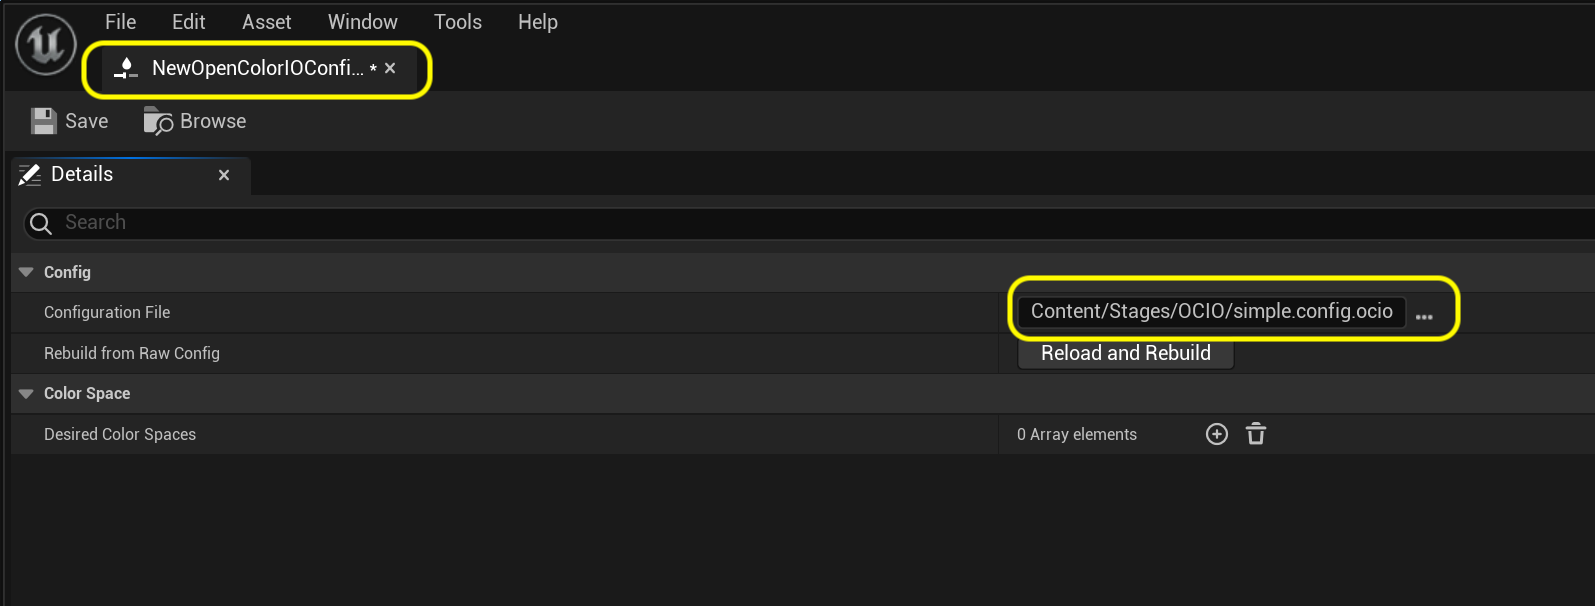
Open up the SRGBtoPQ file and load the simple.config.ocio into the Configuration File slote.
Step 7.|BTS|
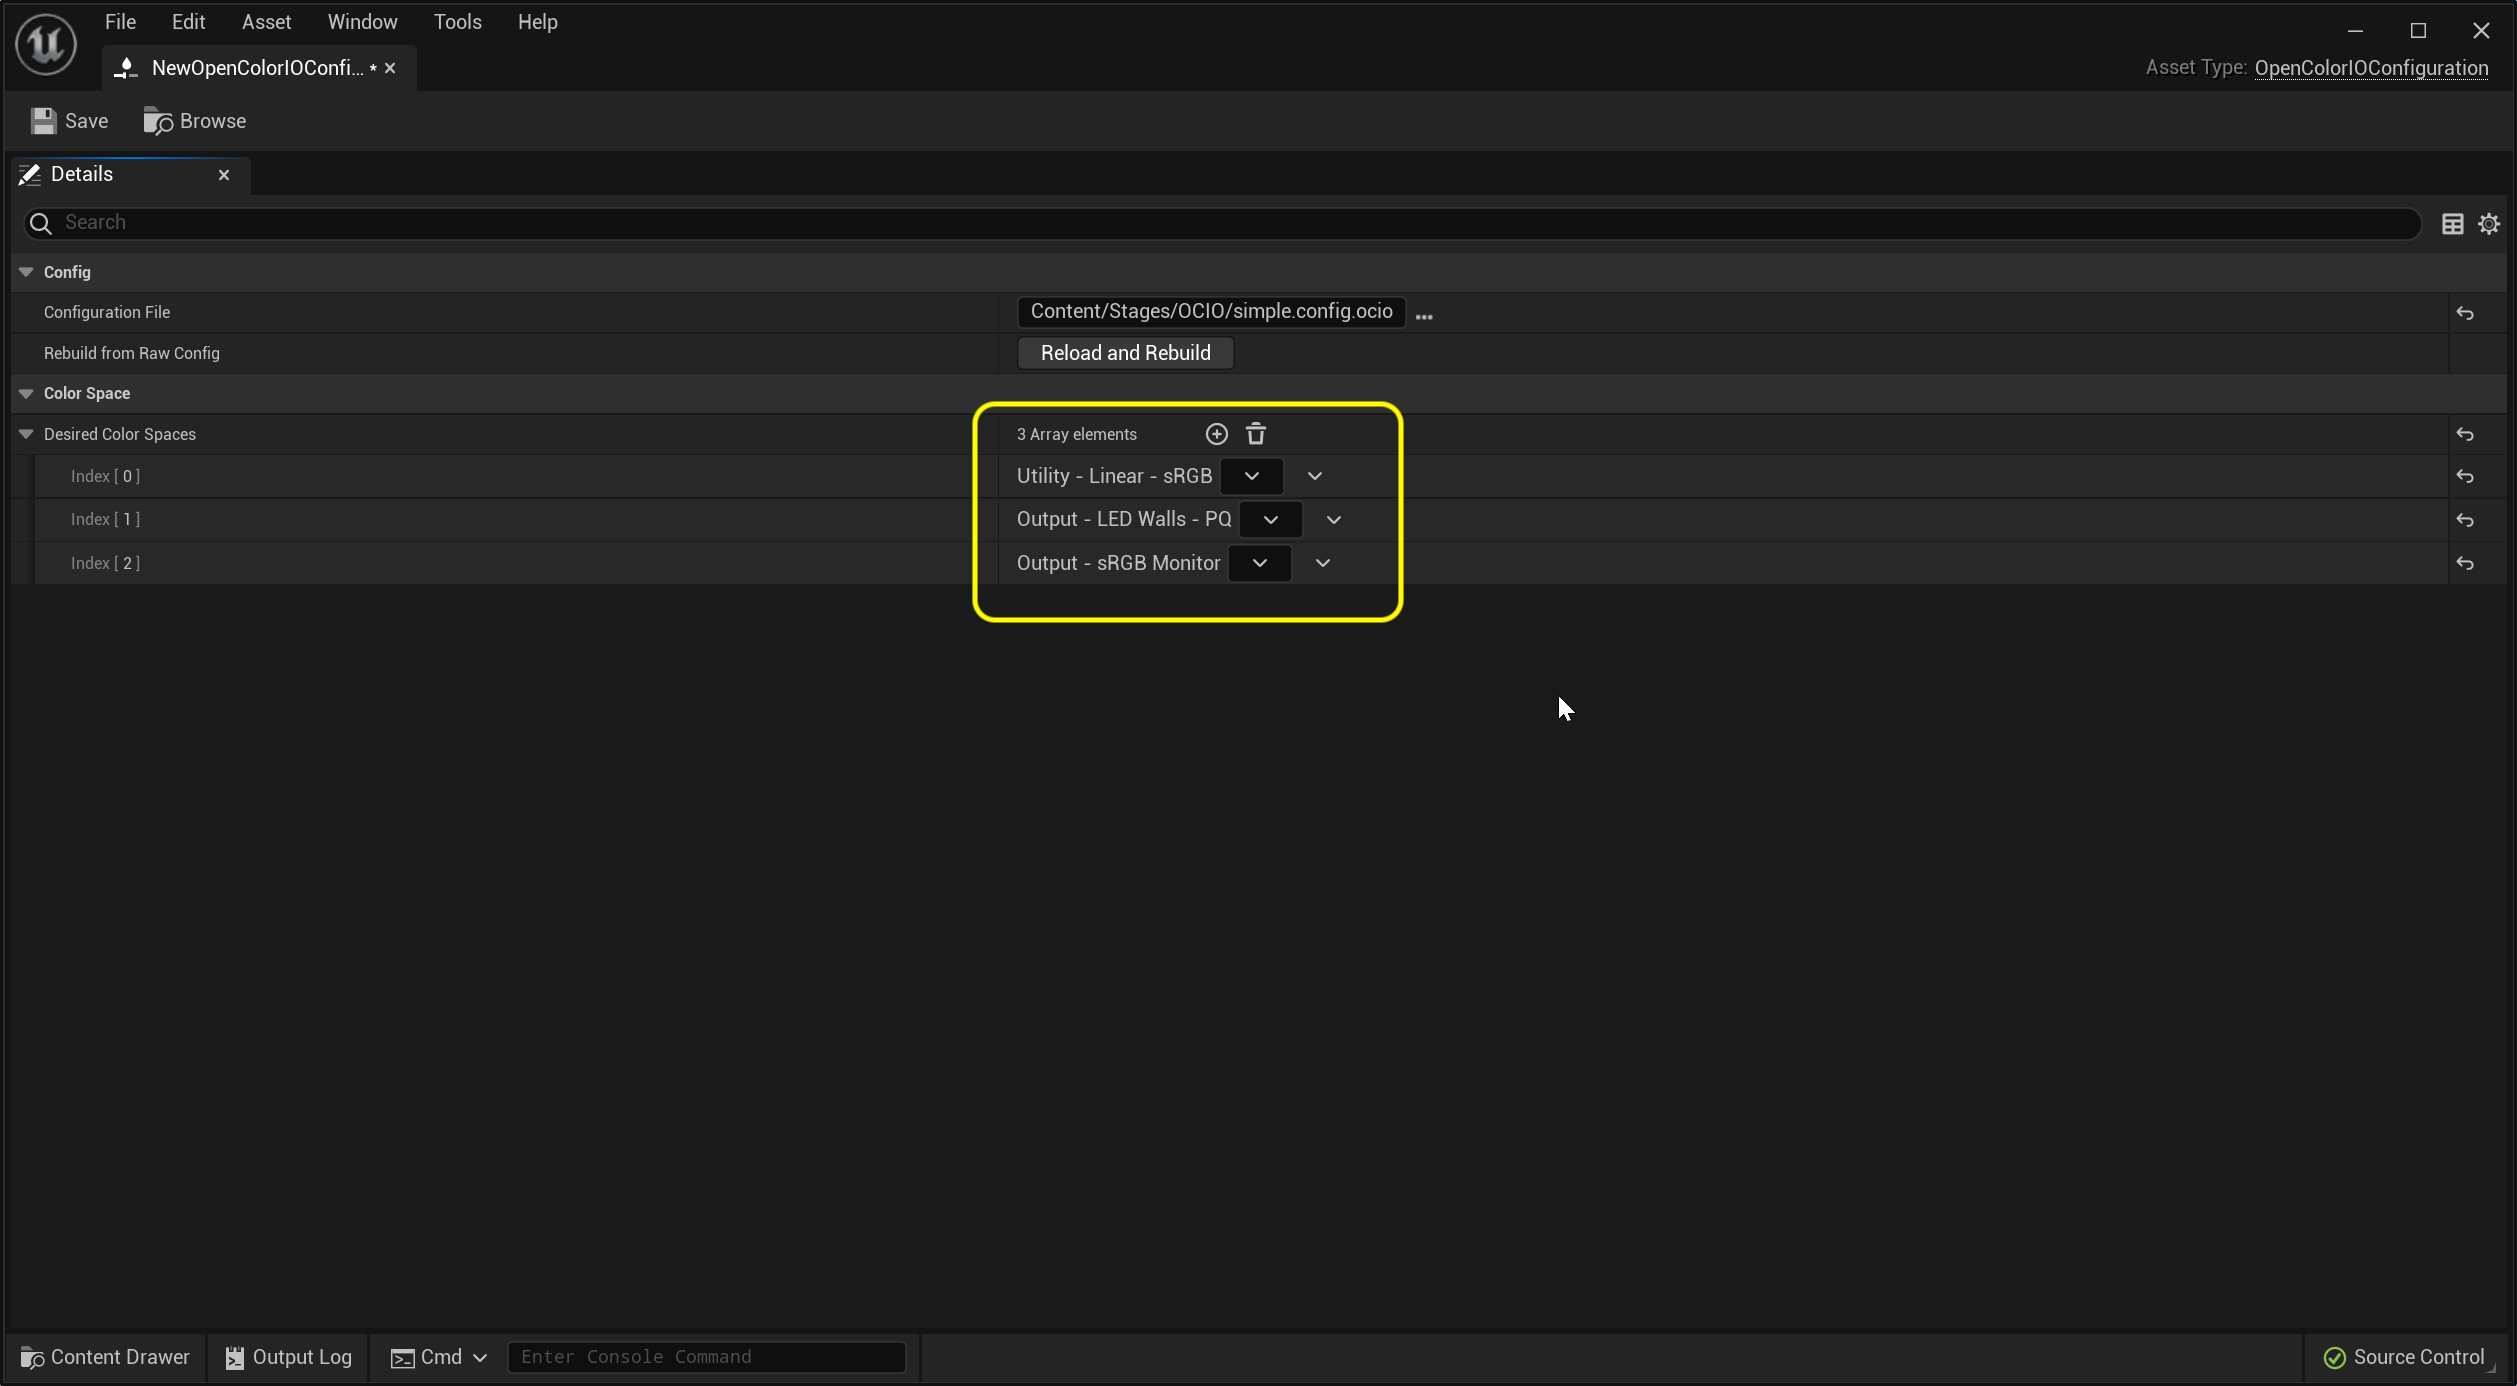
Next to Desired Color Space press the + button next to Desired Color Space three times. In the slot 0 add Utility > Utility - Linear -sRGB. On 1 select Output > LED Walls - PQ. We also need a third output for anyone who is working in Unreal Editor (like operator 1) to get the output color into a sRGB computer monitor color.
Step 8.|BTS|
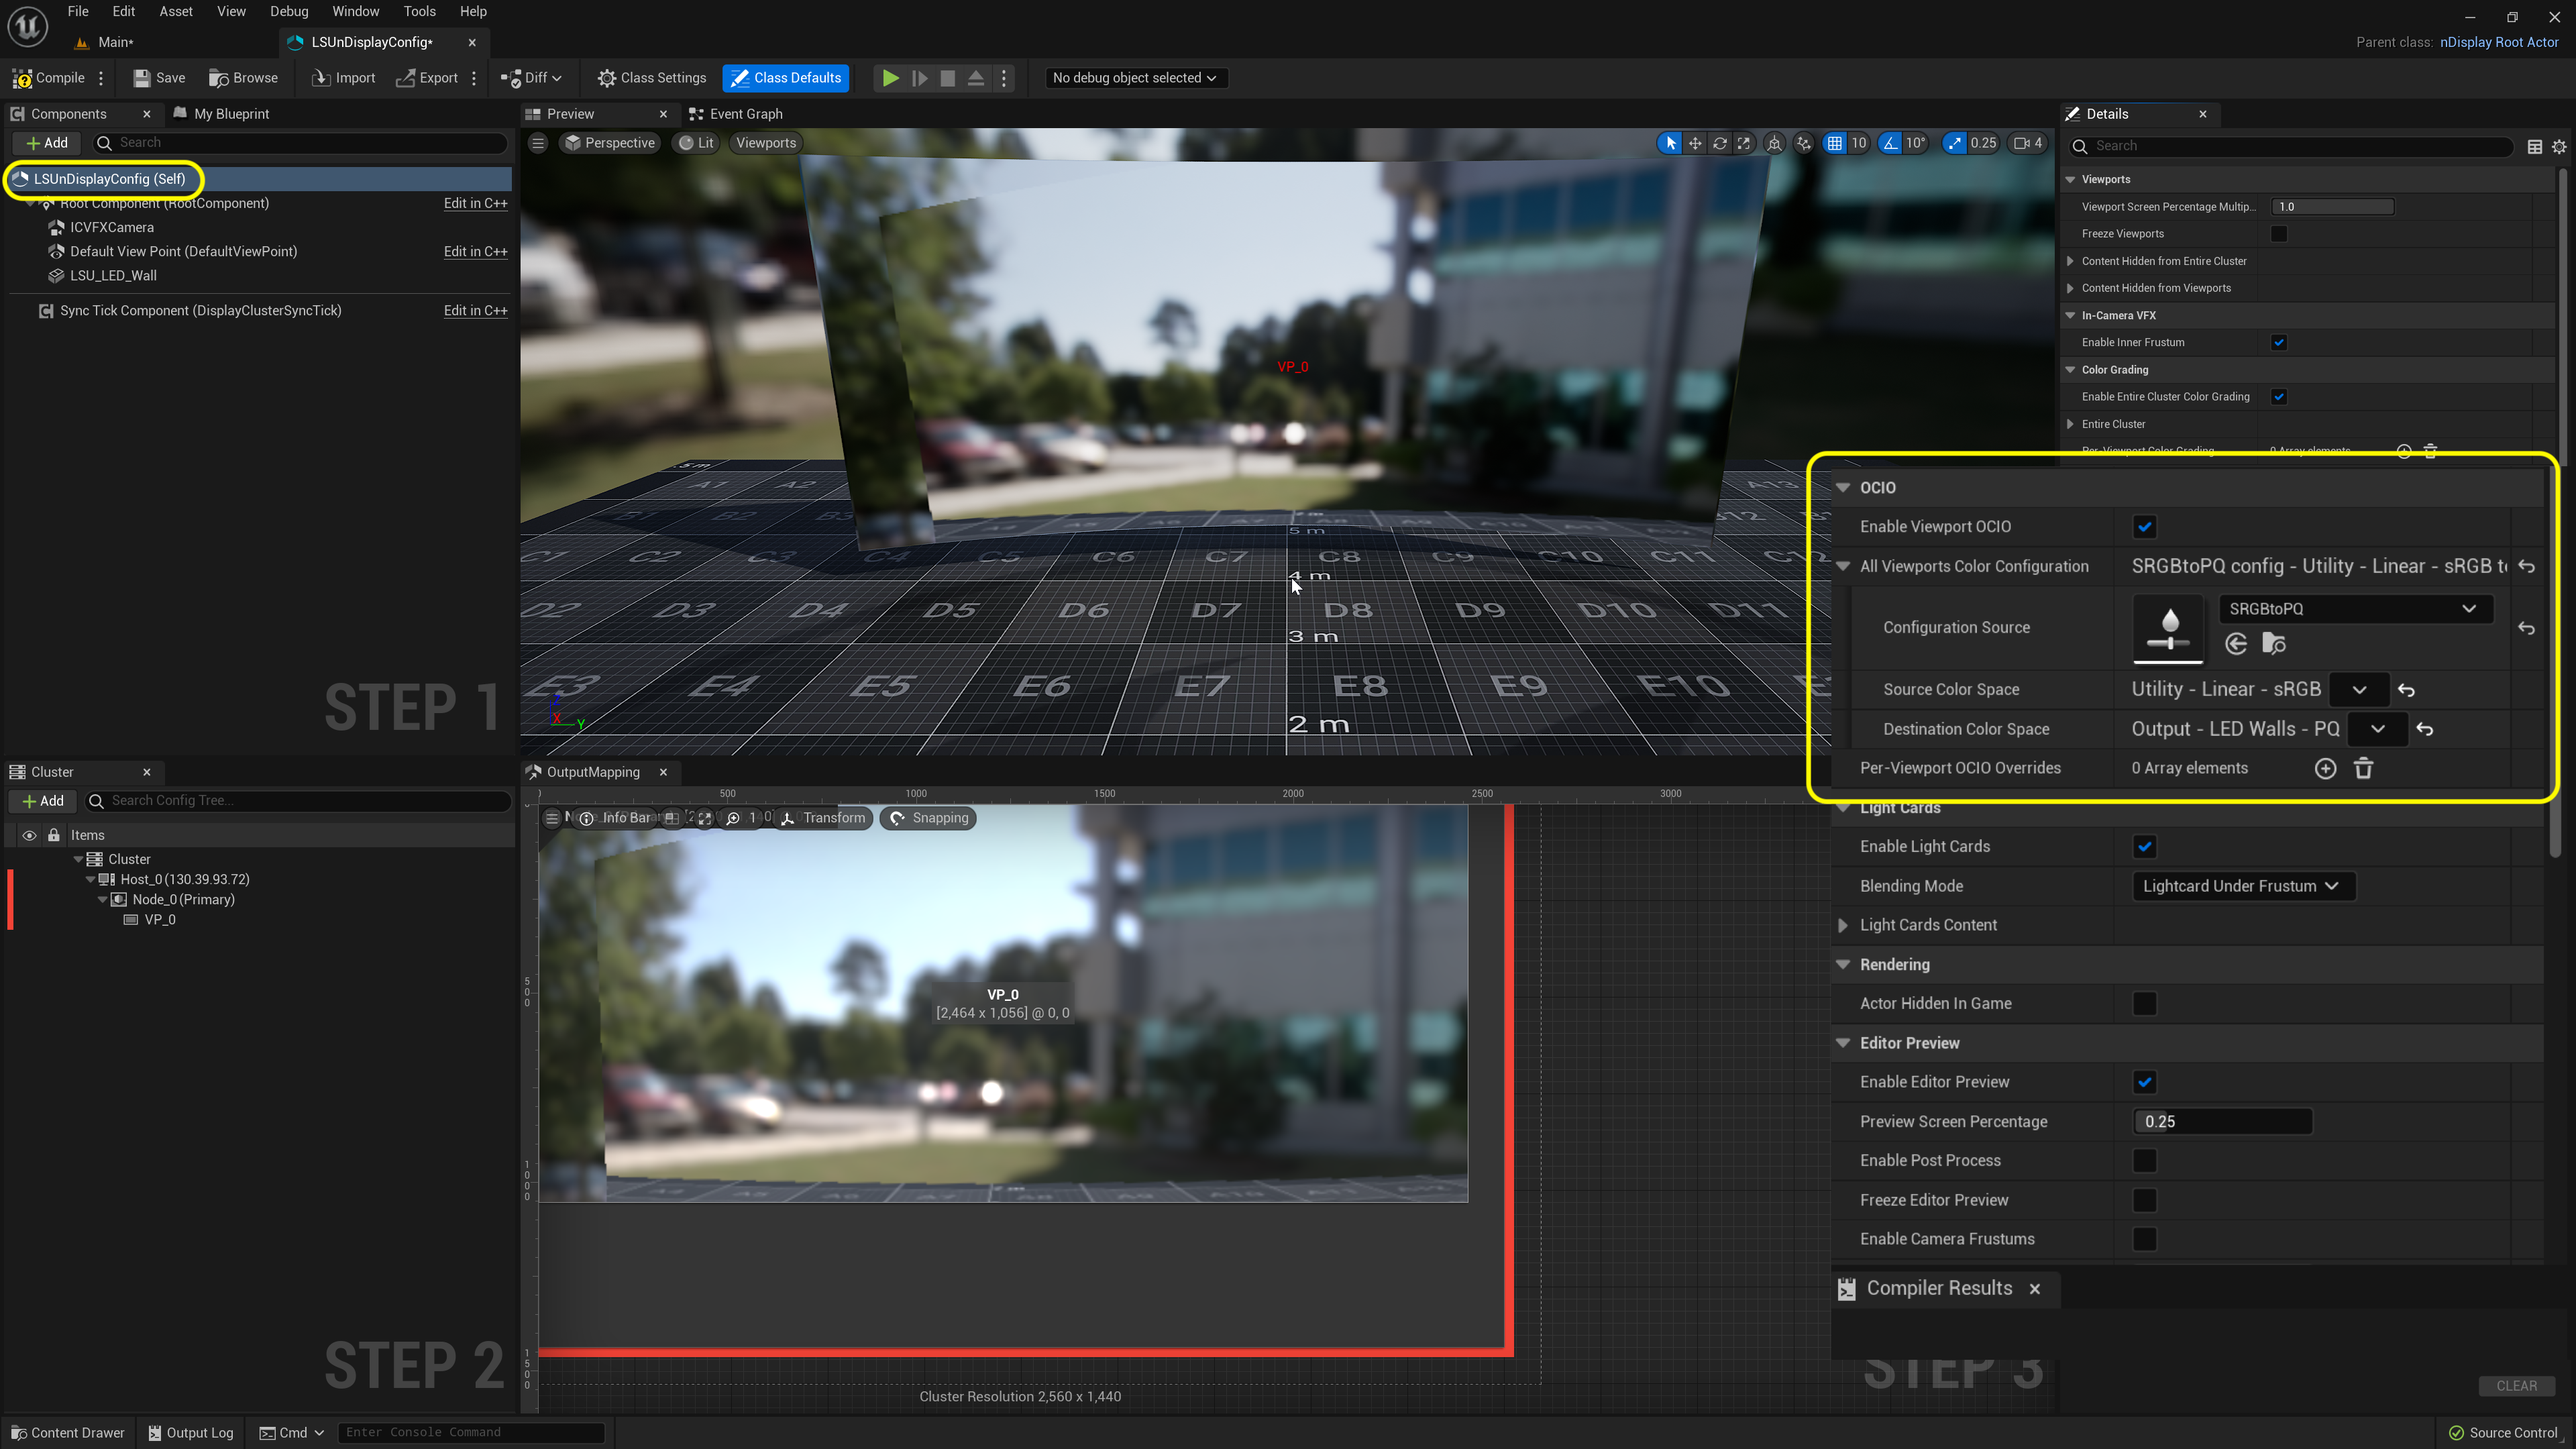
Open the LSUnDisplayConfig Blueprint and select the OCIO > Configuration Source selecting the SRGBtoPQ item. Then select the Source Color Space as Utility - Linear - sRGB and Destination Color Space as Output - LED Walls - PQ.
Step 9.|BTS|
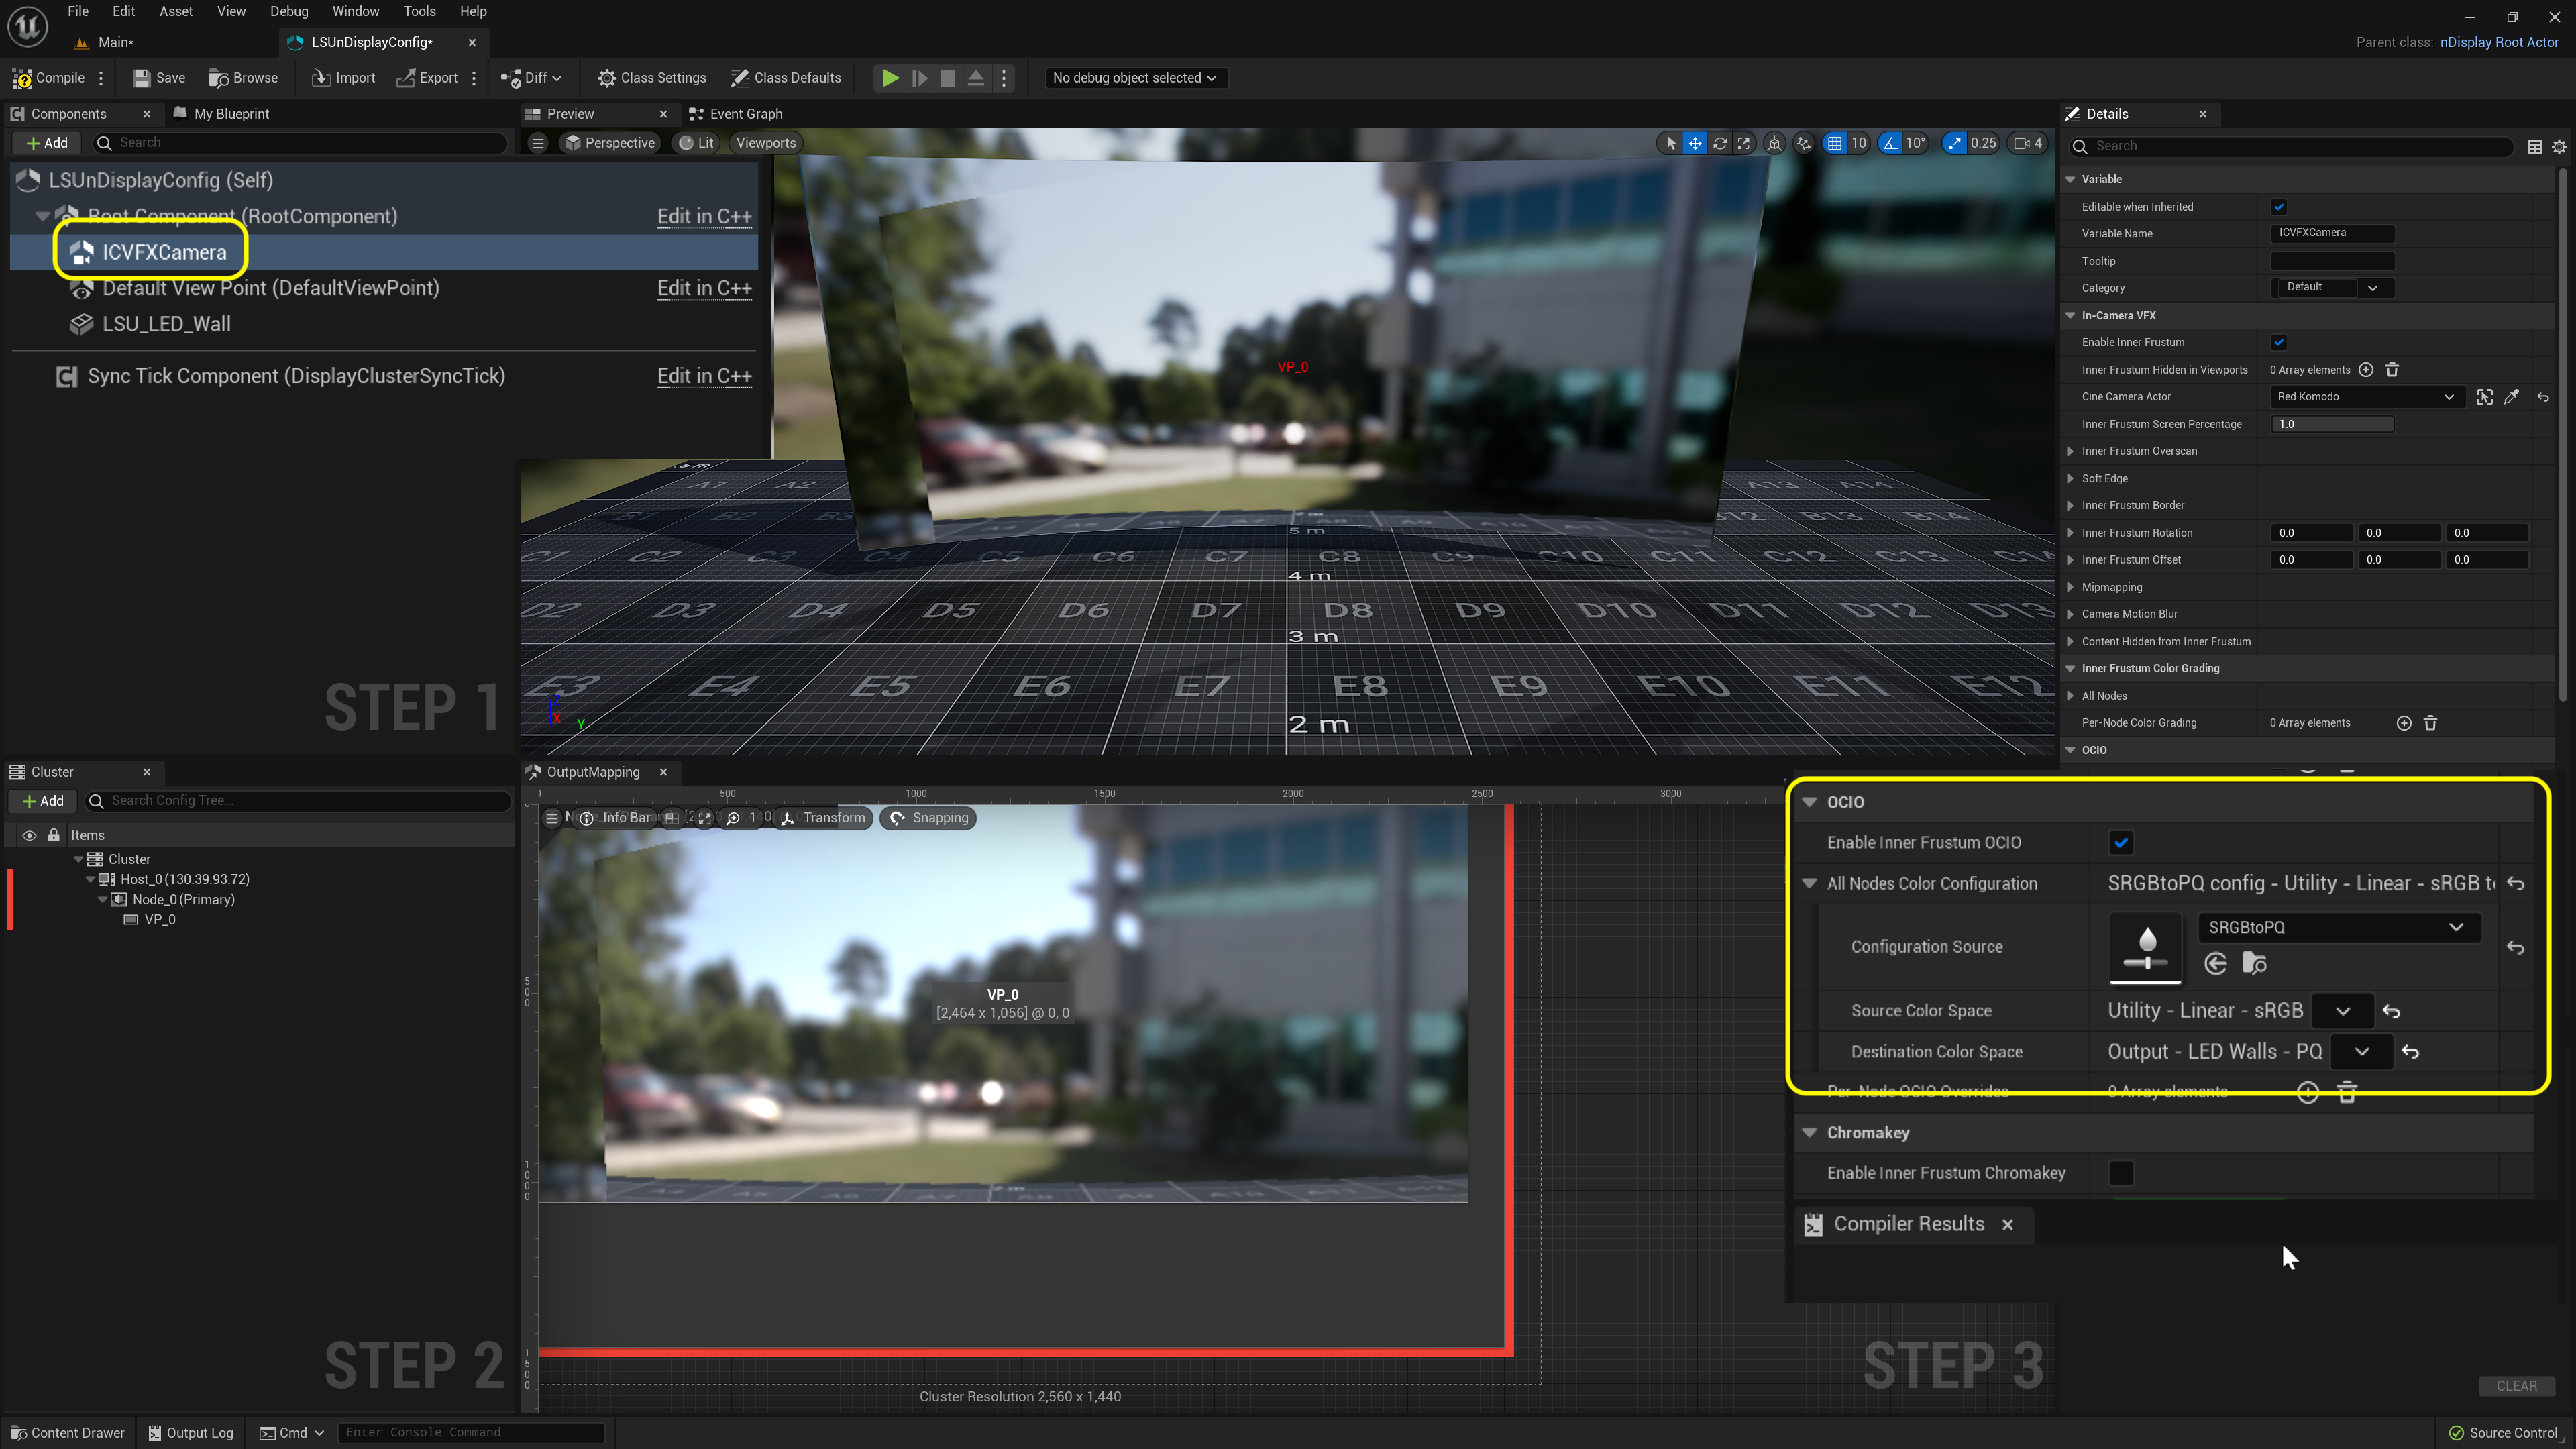
Repeat the above in the ICVFX component in the LSUnDIsplayACong Blueprint. Press the Compile button.
Step 10.|BTS| 
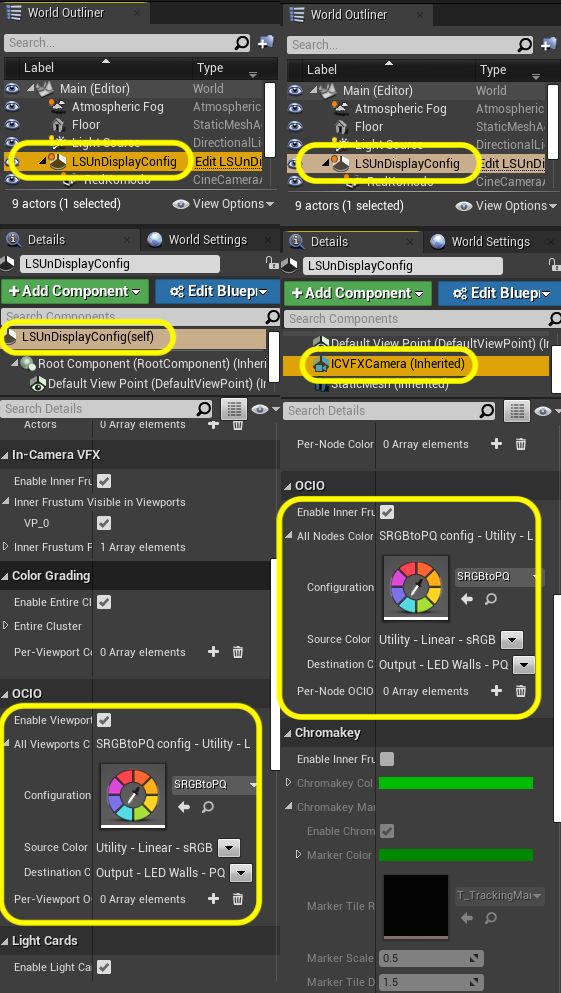
Double check that in game these settings carry over into the LSUDisplayConfig in the World Outliner.
Step 11.|BTS|
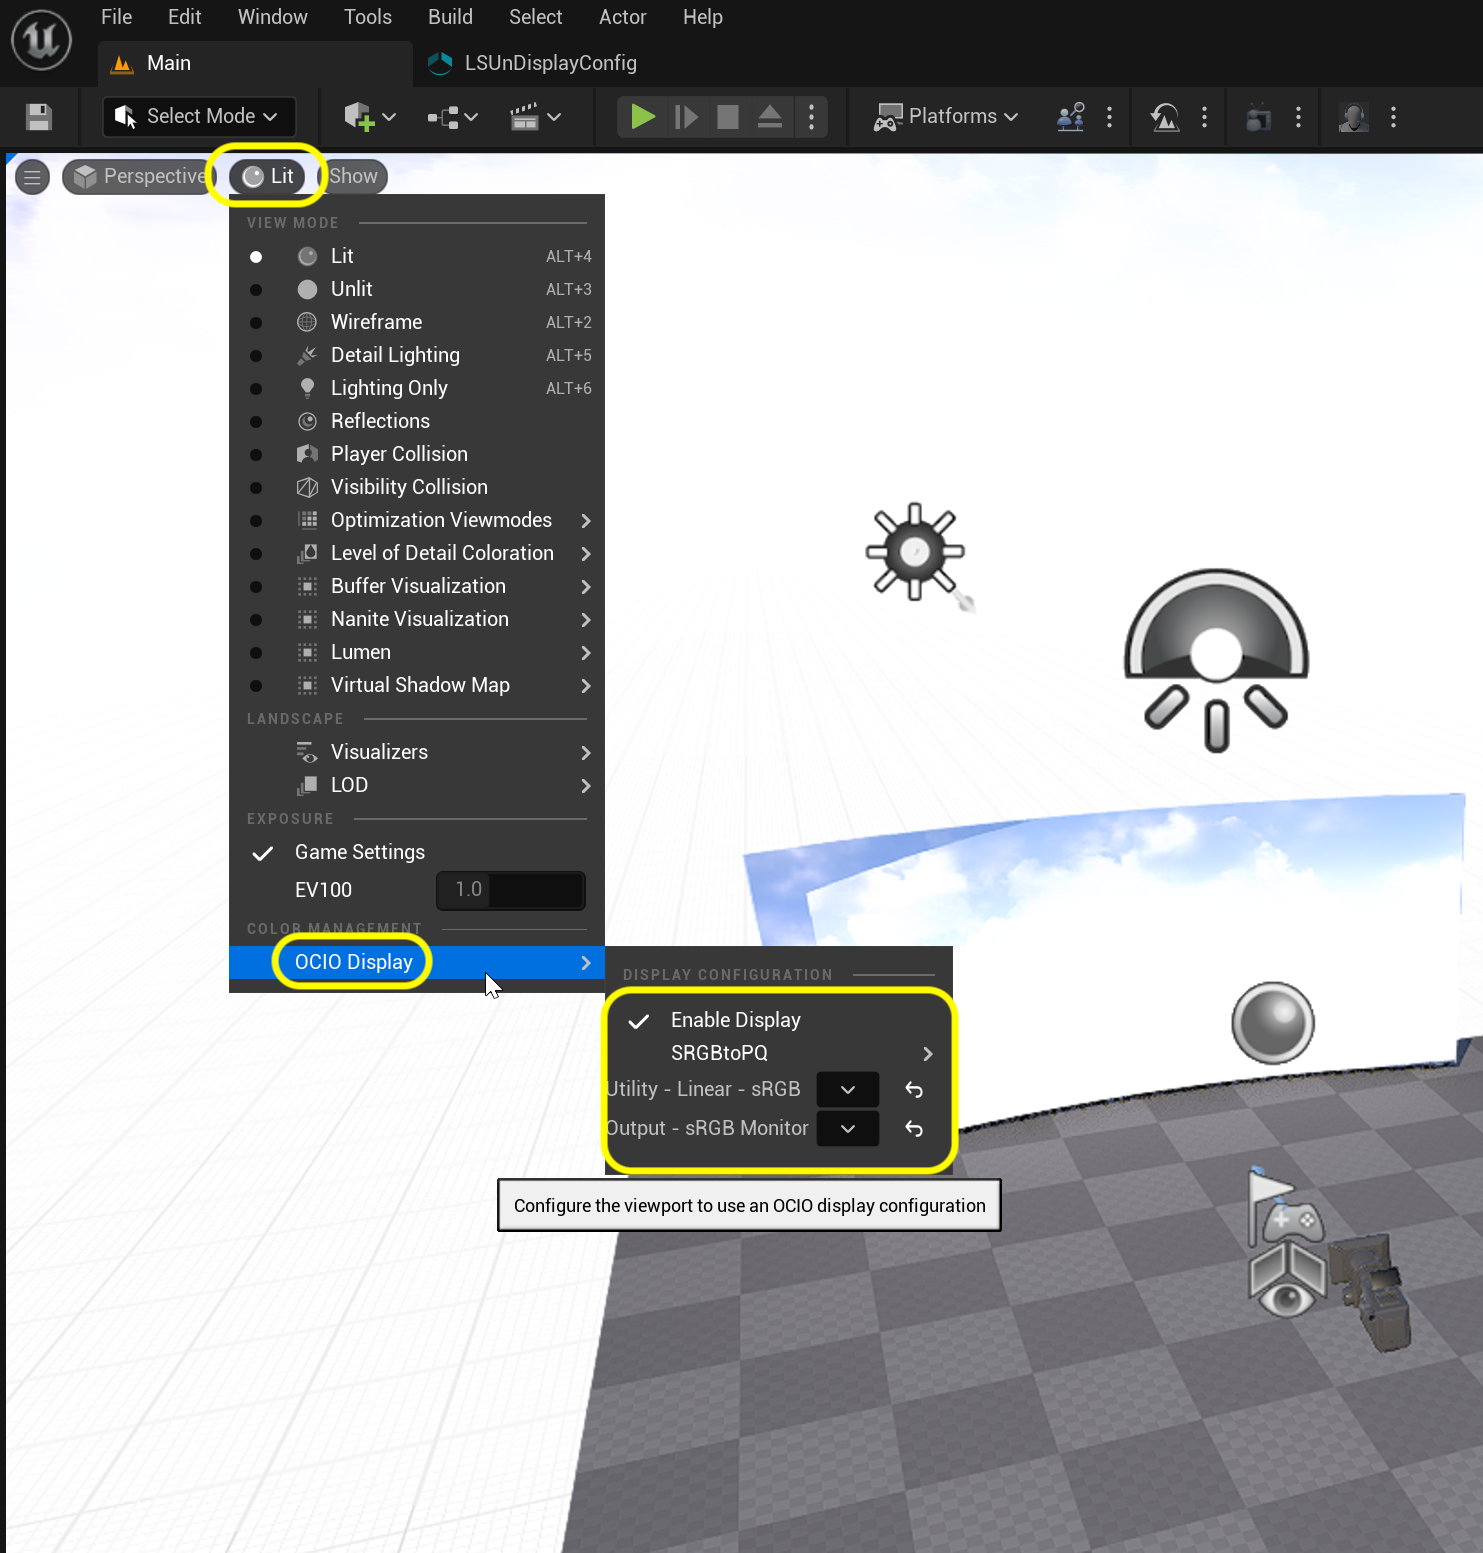
Go back to the game editor and click on Lit and enable OCIO Display > Enable Display with the display going from Linesar - sRGB to sRGB Monitor.
Step 12.|BTS|
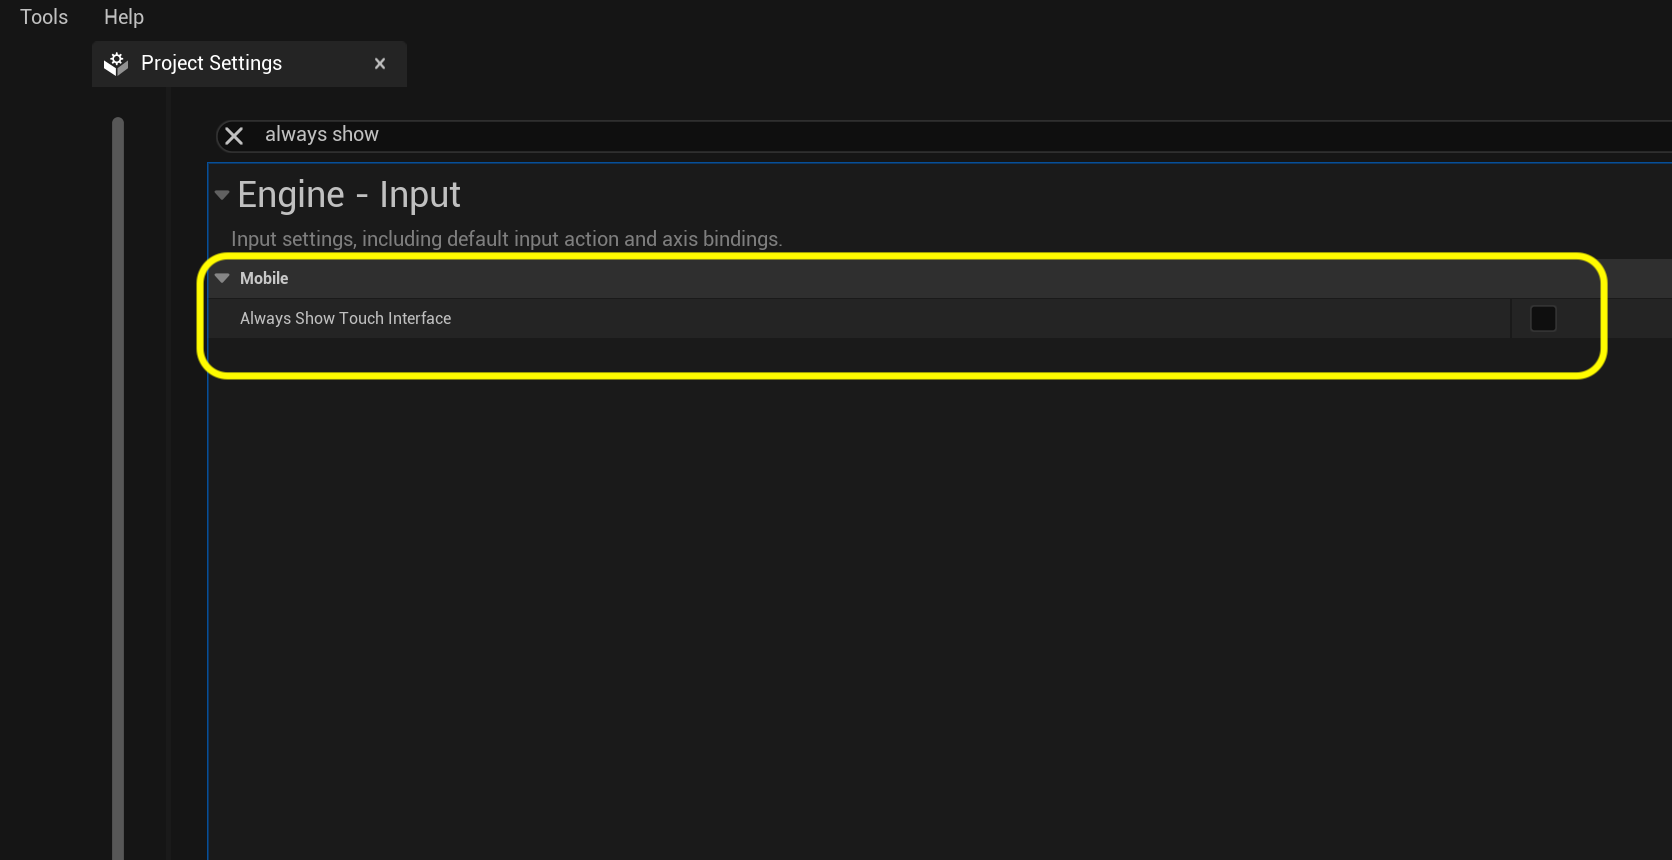
Right now the template defaults to showing the two controller for touch screens. Turn them off by going to Project Settings and turn off Always Show Touch Interface.
Step 13.|BTS|
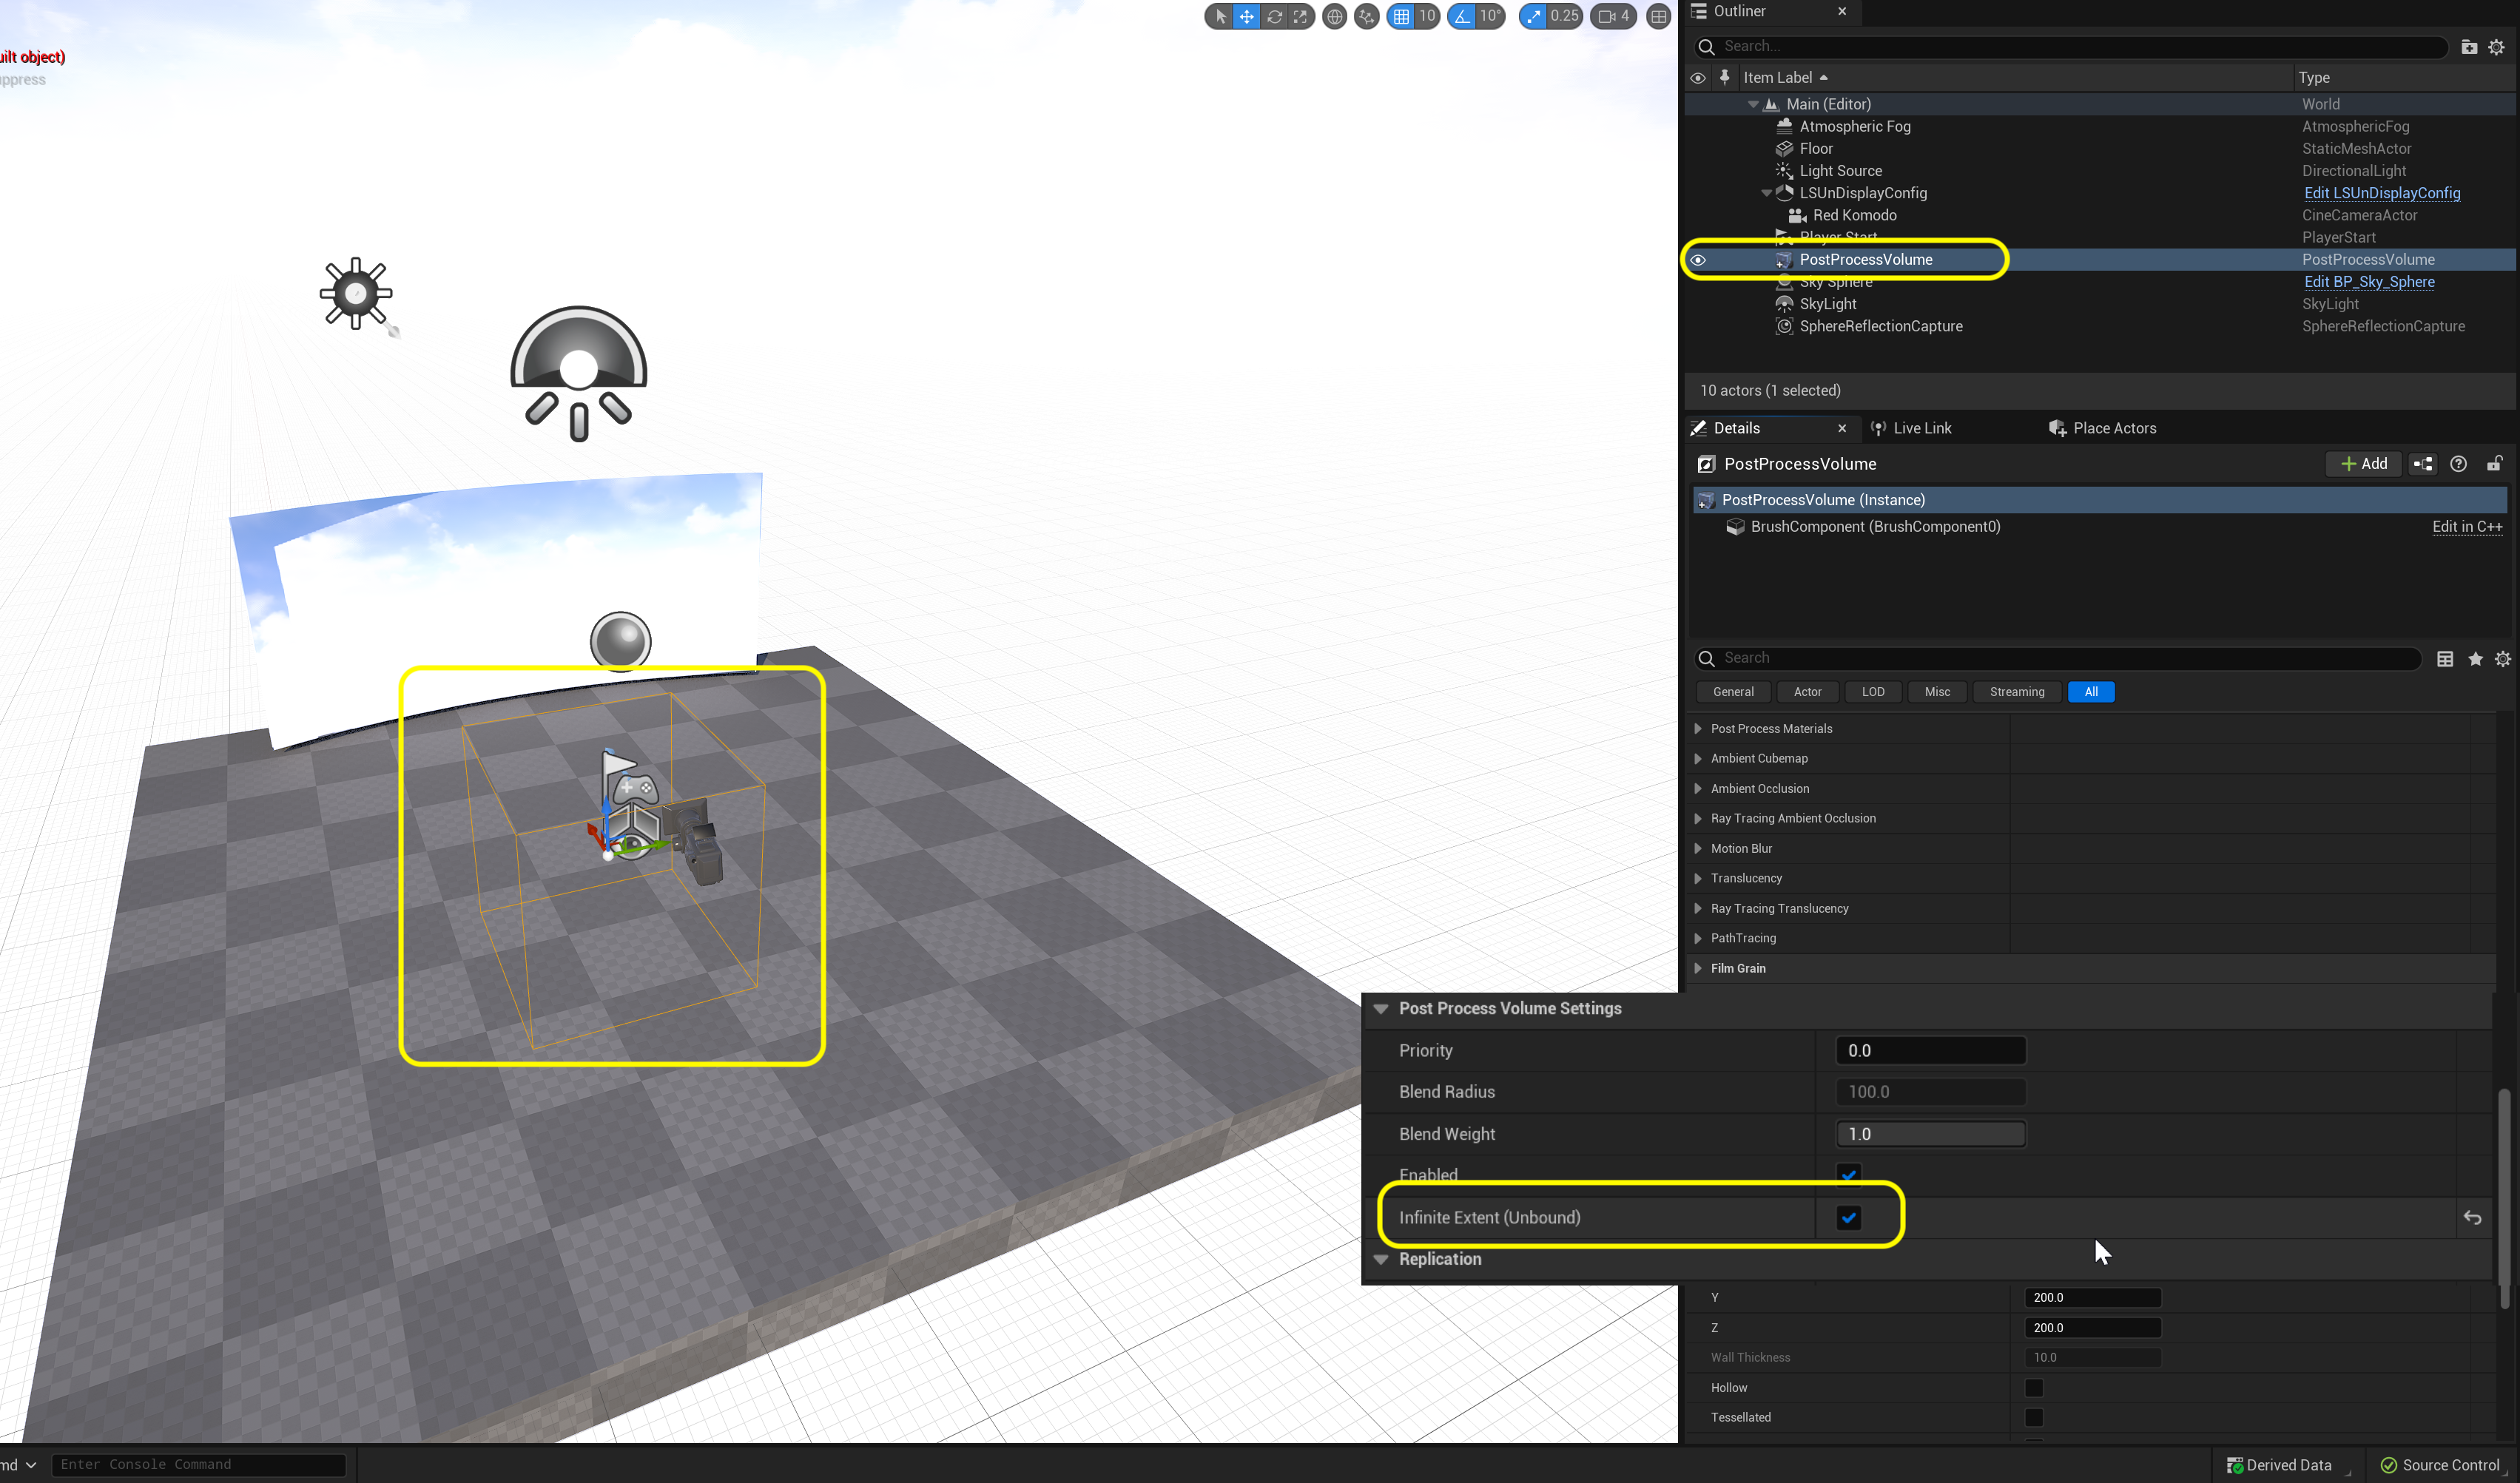
Now we need to turn off some of the game rendering features that are trying a mimic a real lens (like Bloom) as we want our camera on set to do these effects natively in camera. Add a Post Process Volume to the room. Make sure you set Infinite Extent(Unbound) to true.
Step 14.|BTS|
In the Post Production Volume set the Bloom > Intensity to 0, the Vignette Intensity to 0, the Tone Curve Amount to 0, the Expand Gamut to 0 and the Blue Correction to 0.


