Capture, Timecode & Sync

We are almost ready to go. The only thing we need to add is timecode and sync. Timecode allows us to record the live link data and sync it back later in post. Sync is required so that the game engine updates frames at the same time as the camera and monitor. Without it you would have tearing if the game moves the camera in the scene instead of the camera tracker.
Step 1.|BTS|
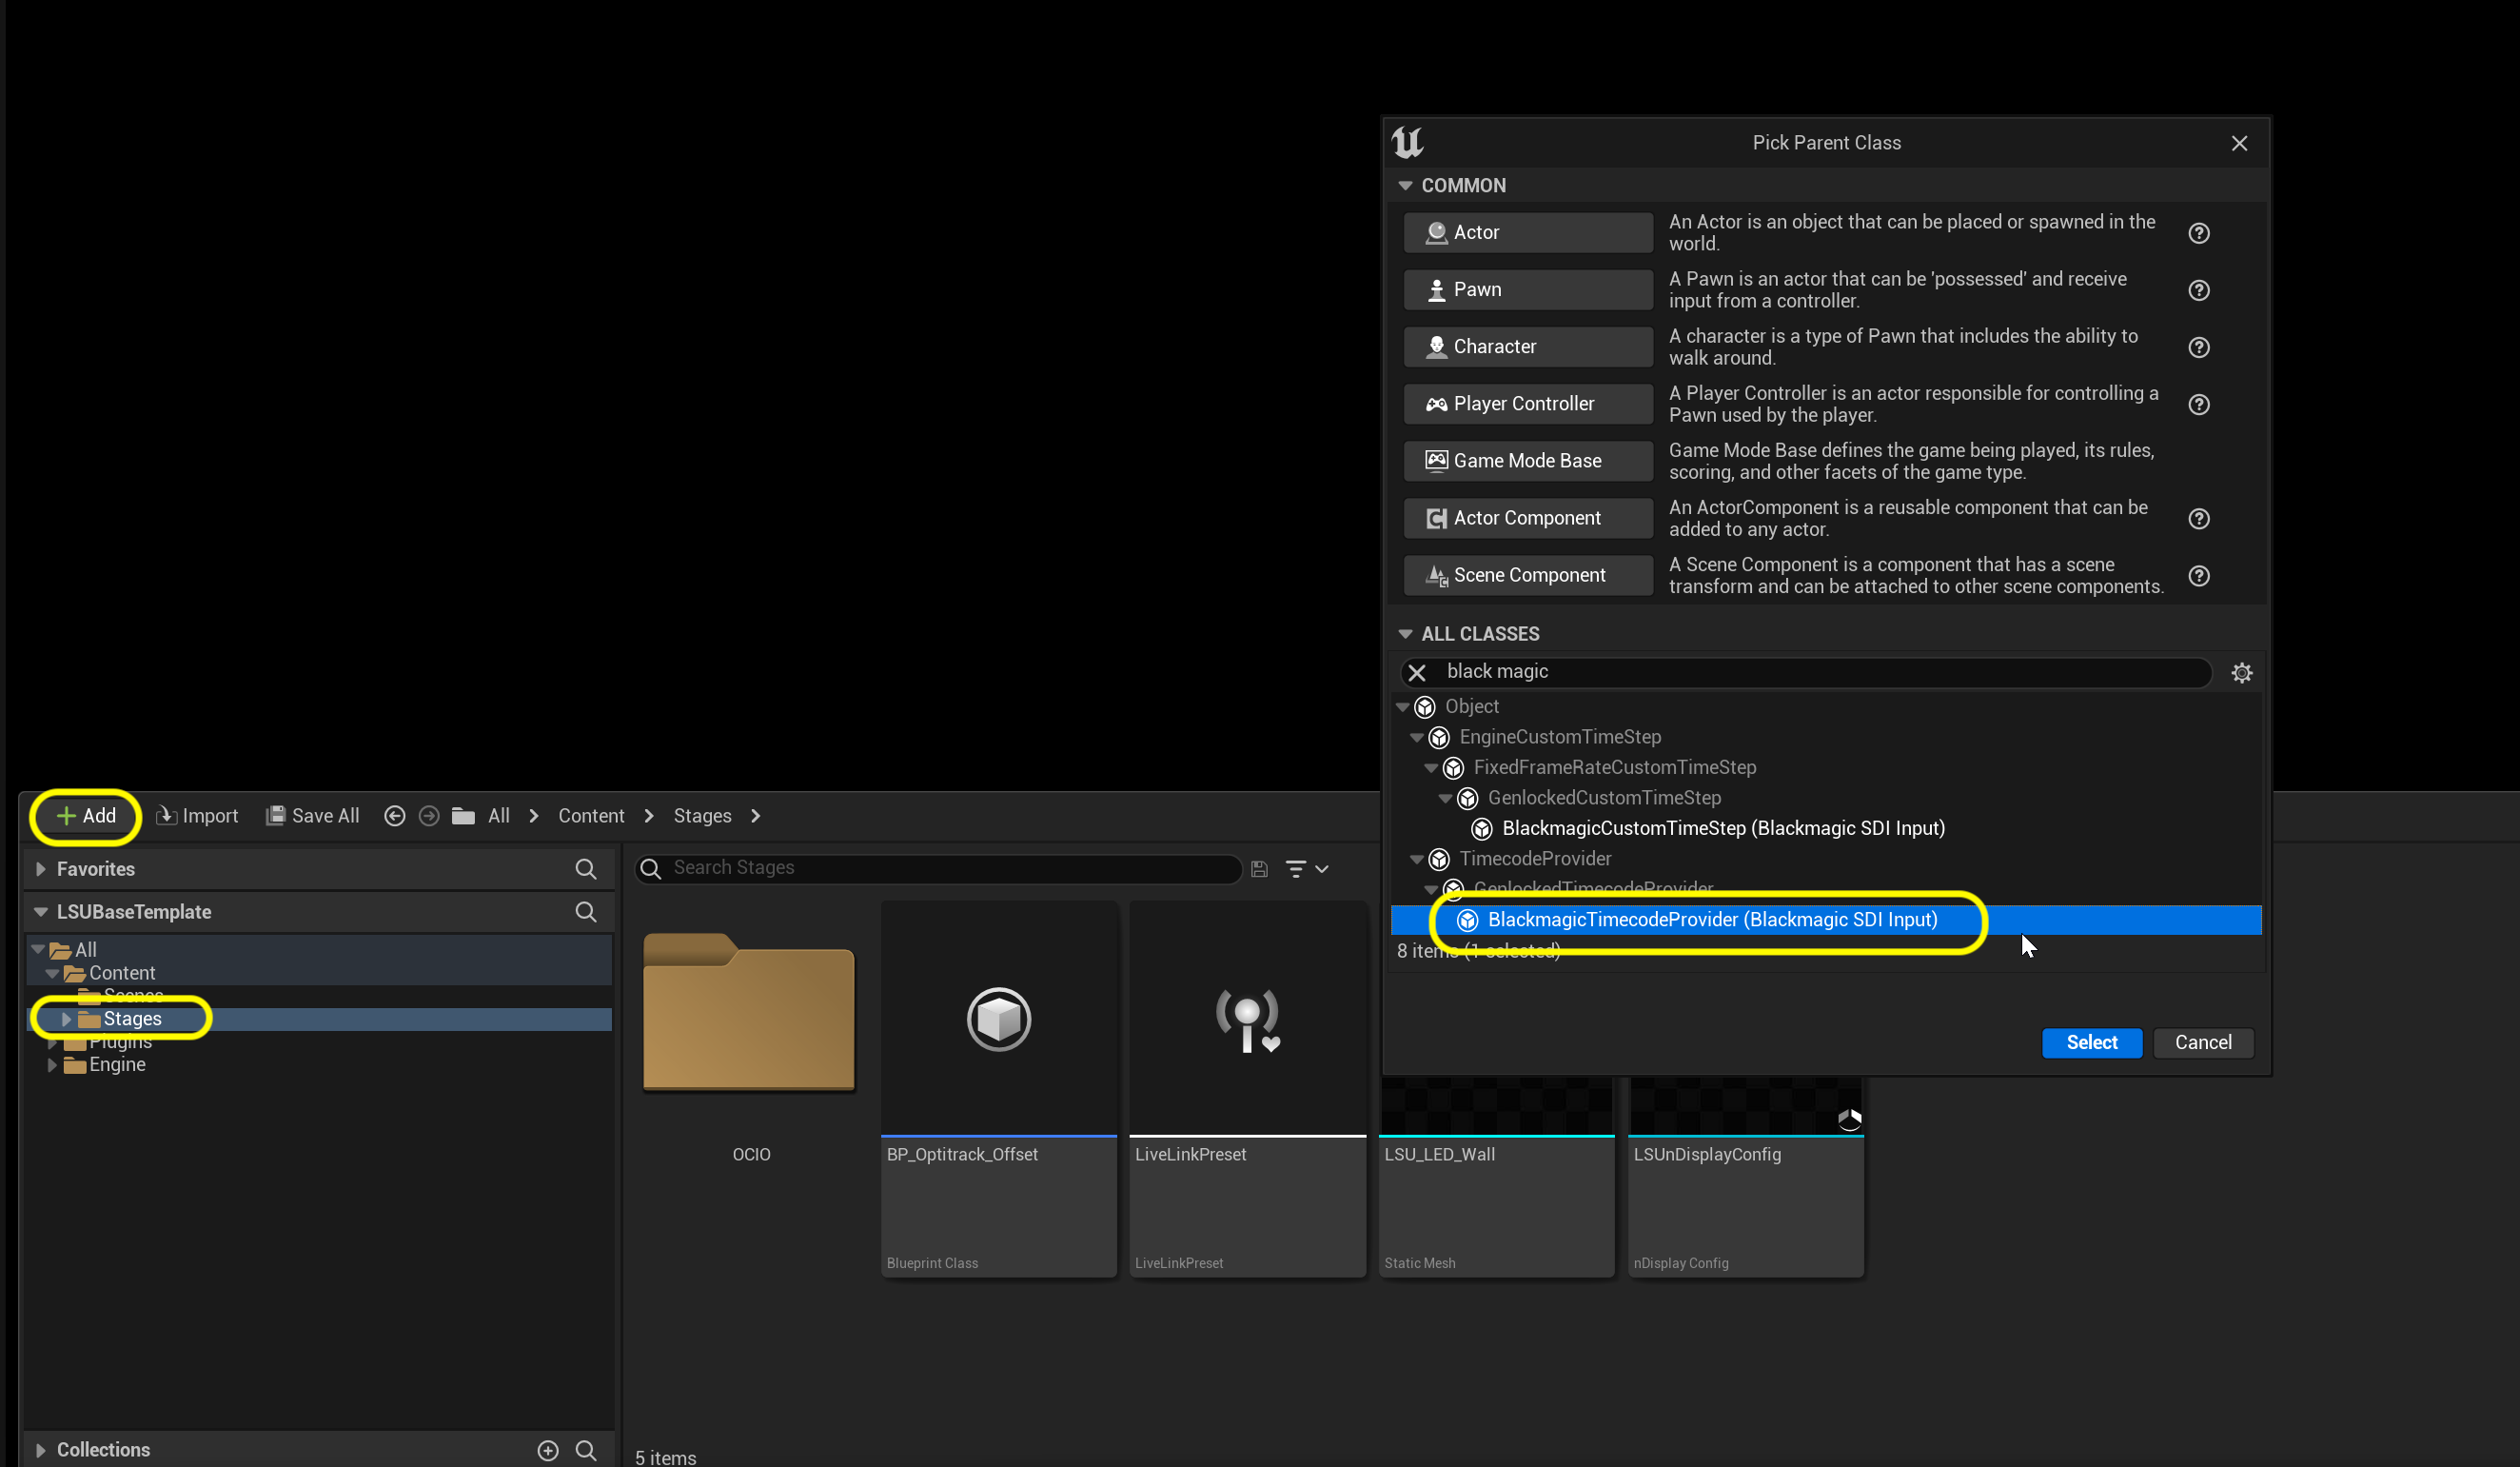
In our case in our Caputure PC we have a BlackMagic Decklink 8K card. Our RED Komodo camera goes into the black magic by SDI. Go to the Stages folder and press the + Add and open up ALL CLASSES and select BlackmagicTimecodeProvider(Balckmagic SDI Input). It is VERY importnat that this card is getting genlock sync from our sync generator.

Step 2.|BTS|
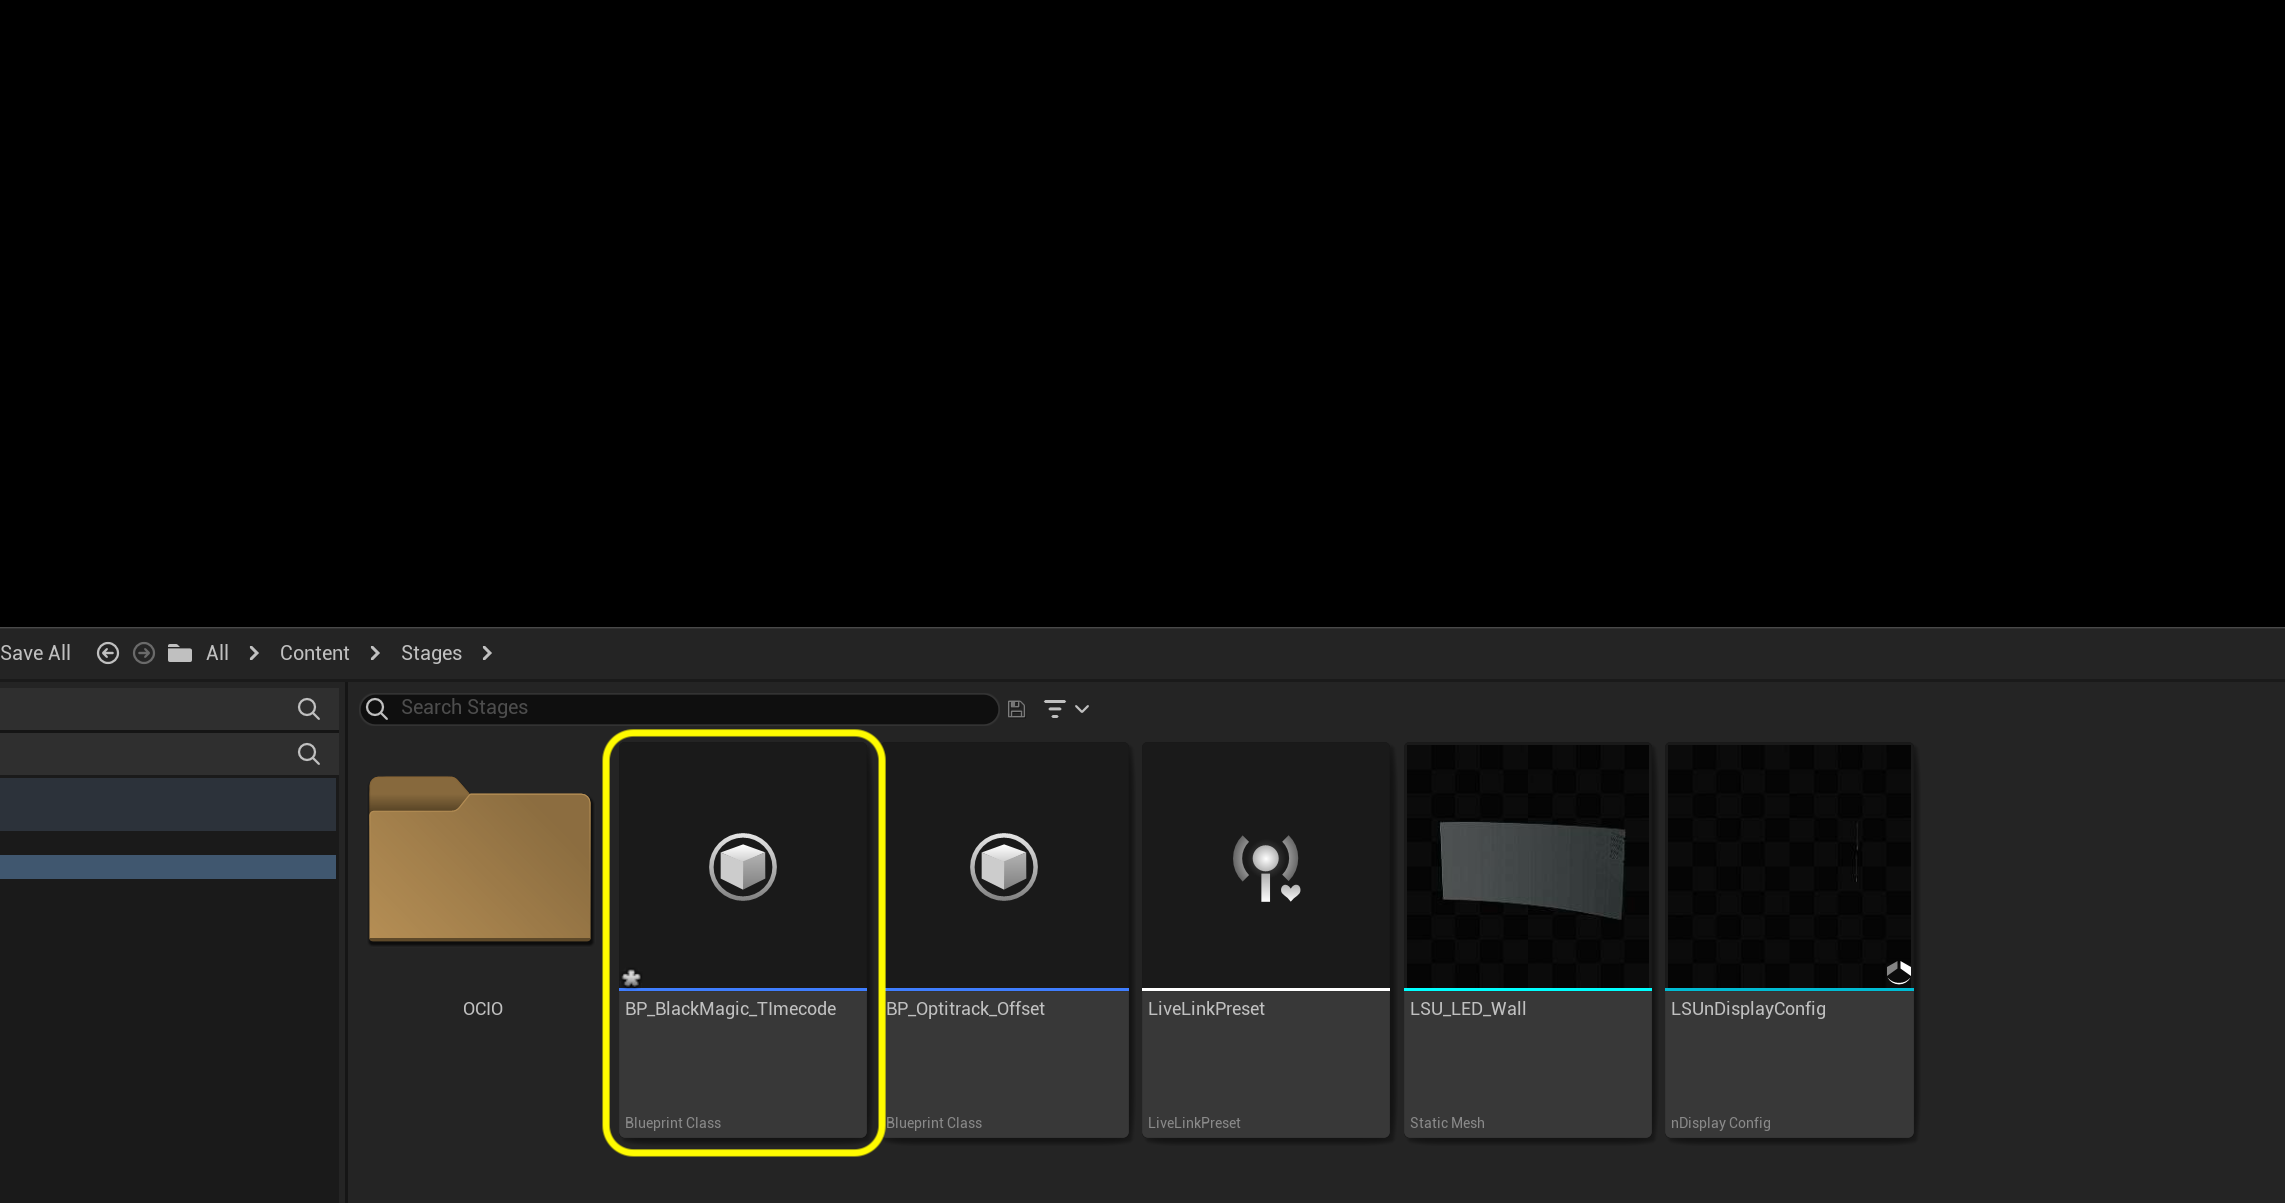
Call the blueprint BP_BlackMagic_Timecode.
Step 3.|BTS|
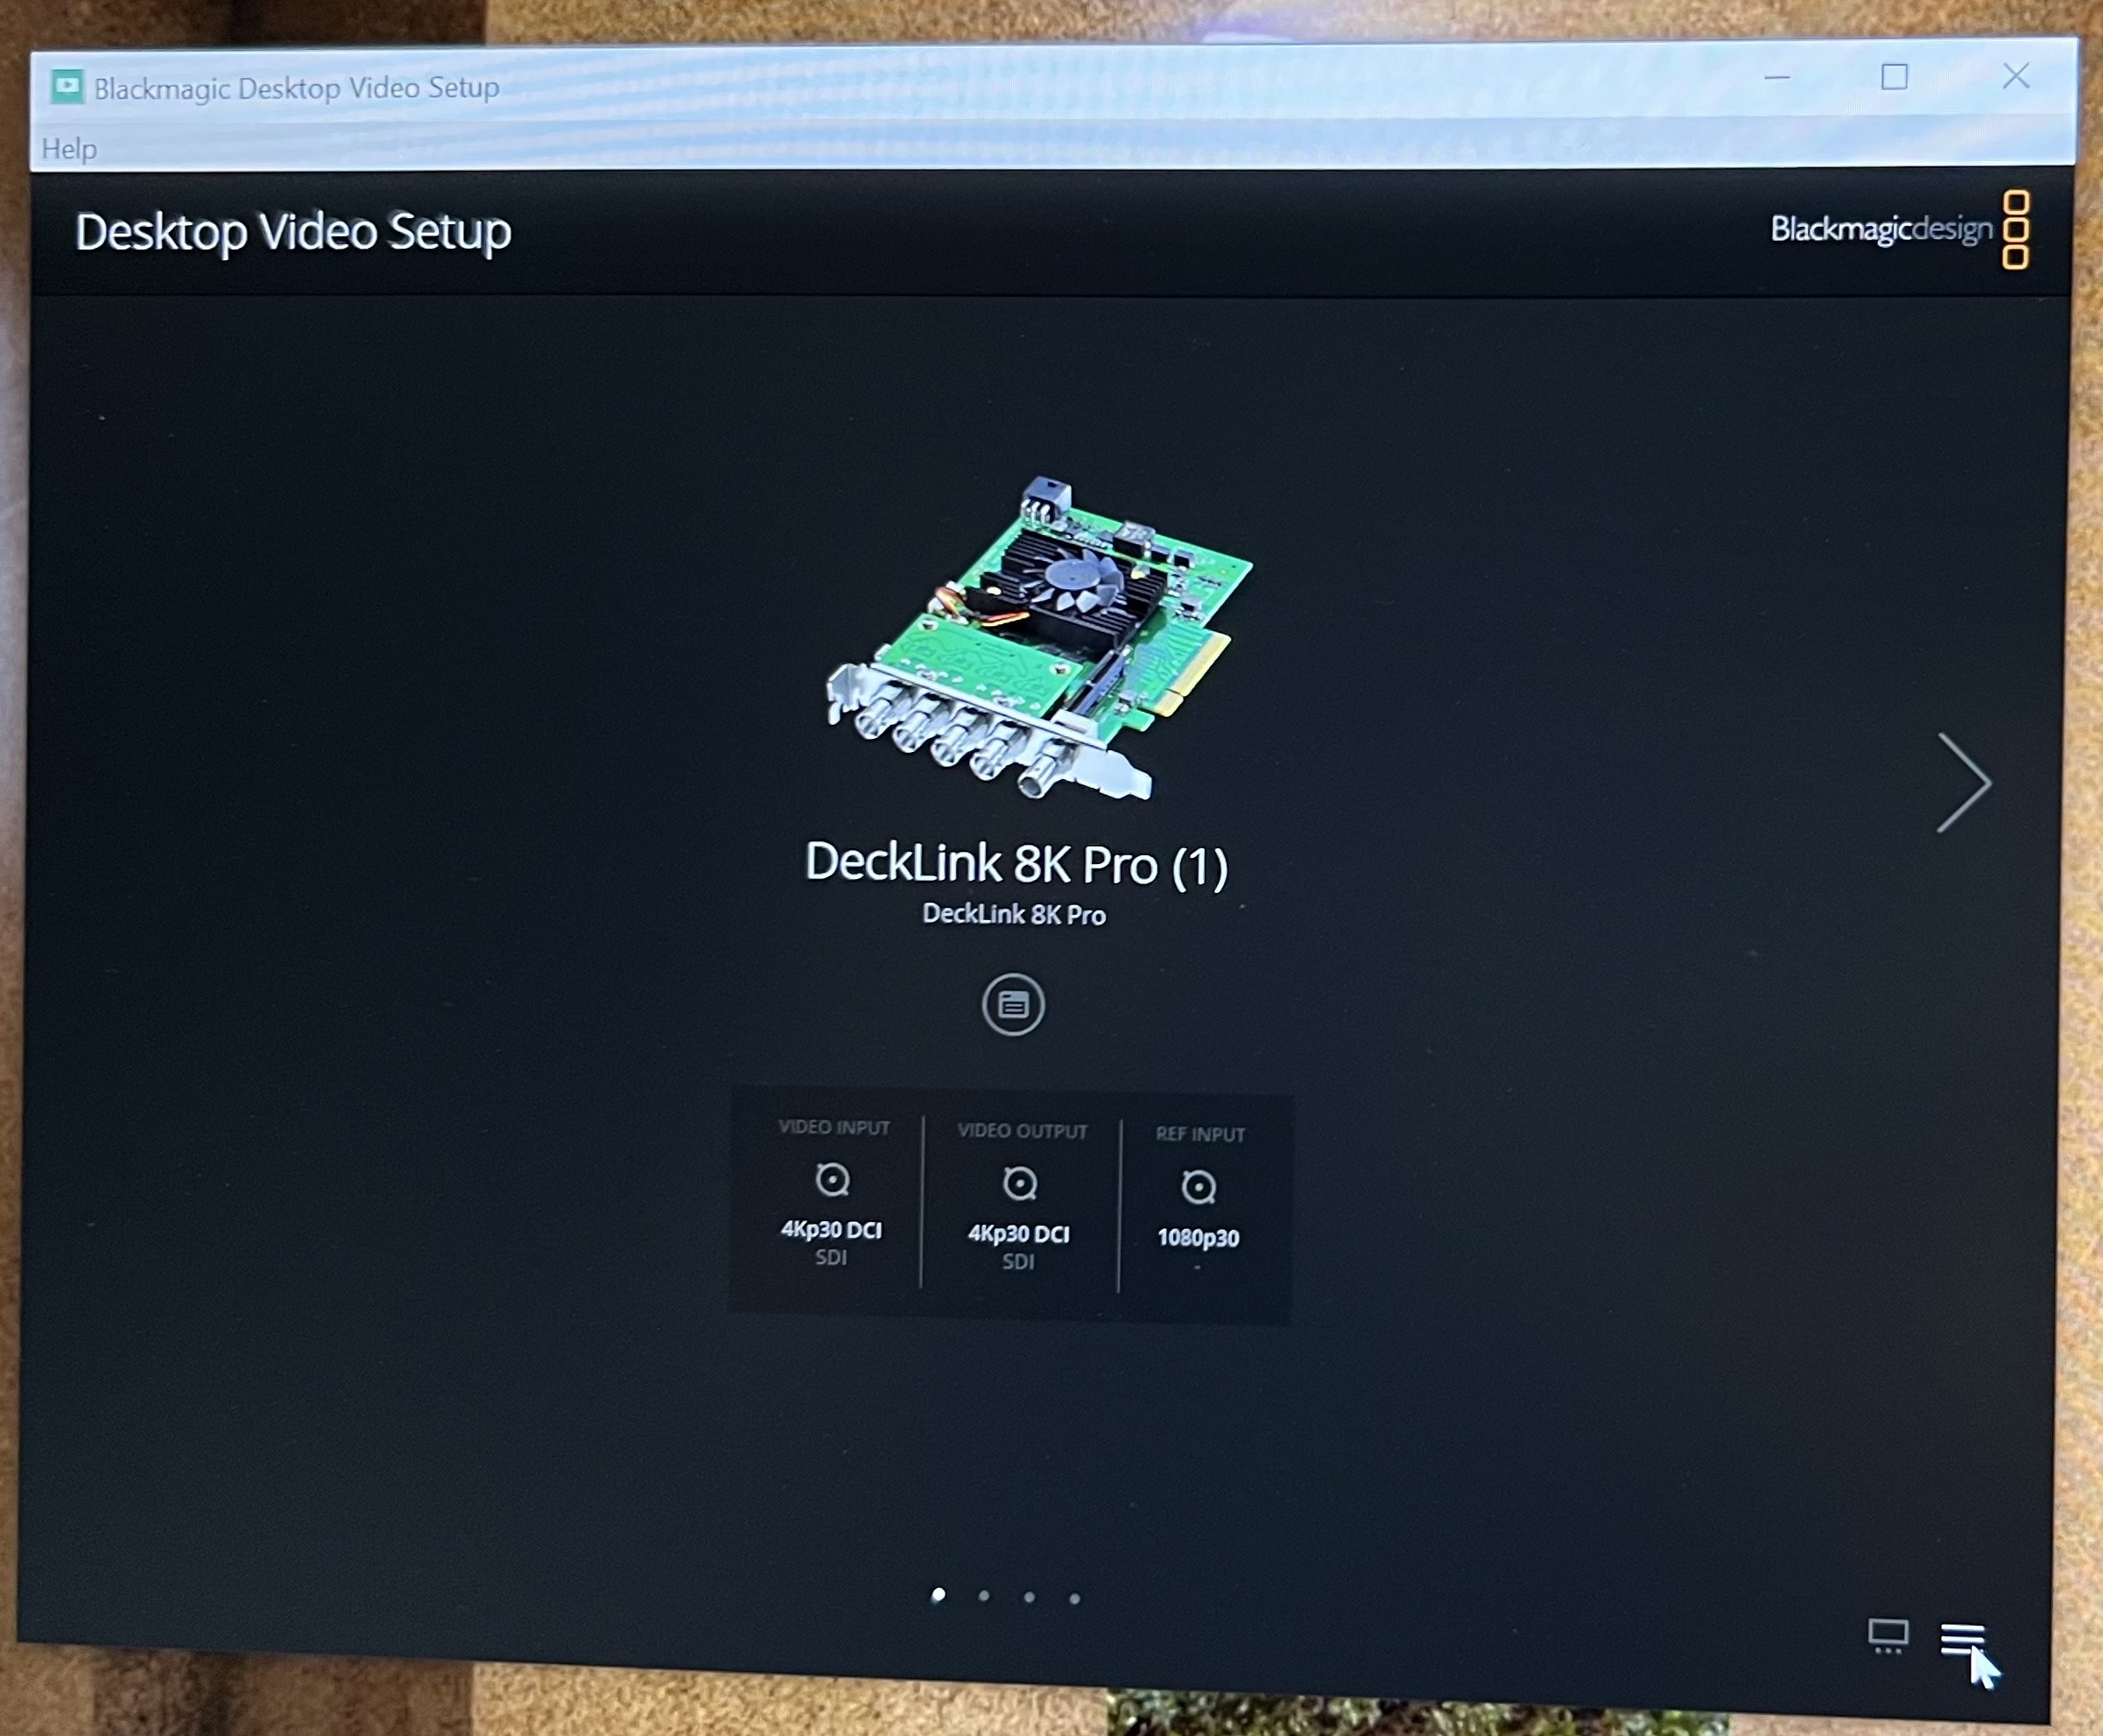
The black magic capture card that receives the camera signal in our capture PC then sends it to the operator machine to feed it timecode. We can open up Desktop Video Setup and see that it is inputing 4K30 DCI and outputing 4K30 DCI. This is consistent with the signal coming from the camera.
Step 4.|BTS|
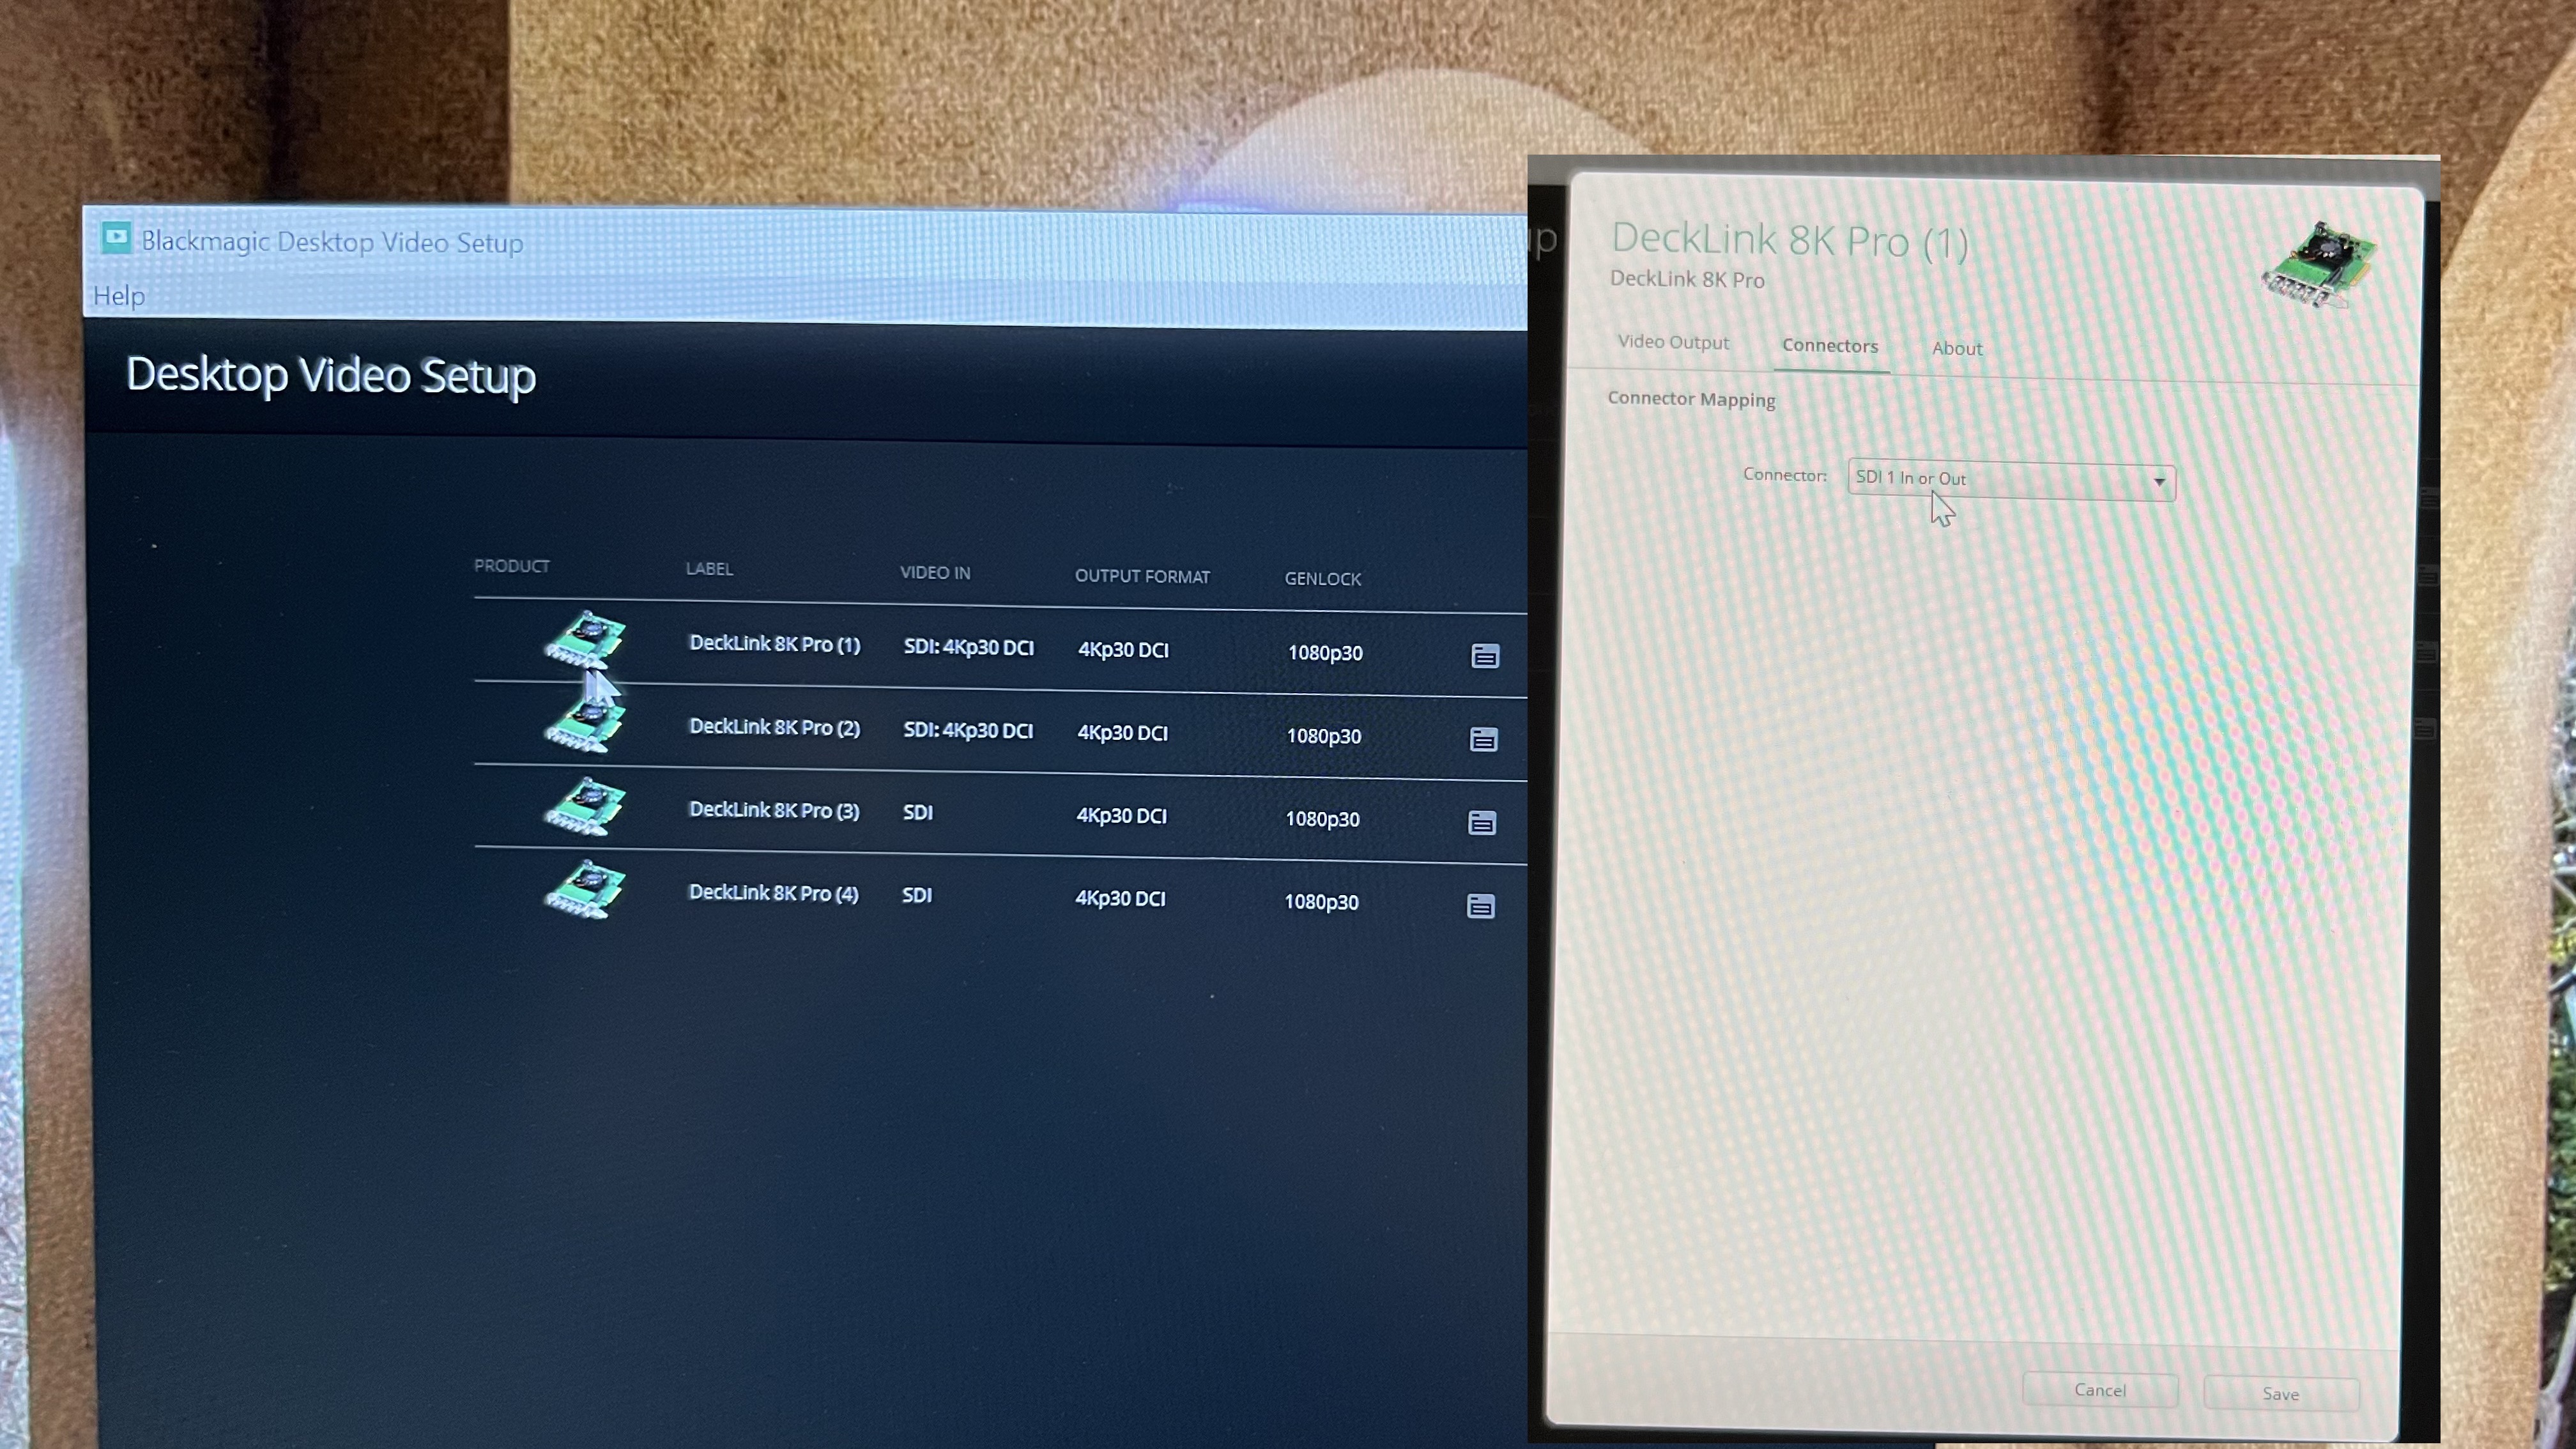
We have setup the BlackMagic Decklink card so that any of the SDI connectors can be inputs or outputs. It recognizes that we are using channel 1 as an input and channel 2 as an output. You have to click every single connector number in Desktop Video Setup and change their connector mapping to SDI # In or Out.
Step 5.|BTS| 
Now we are using Assimilate Live-FX to record and feed timecode to our opertaor machine. Open up Live Effects and select Settings.
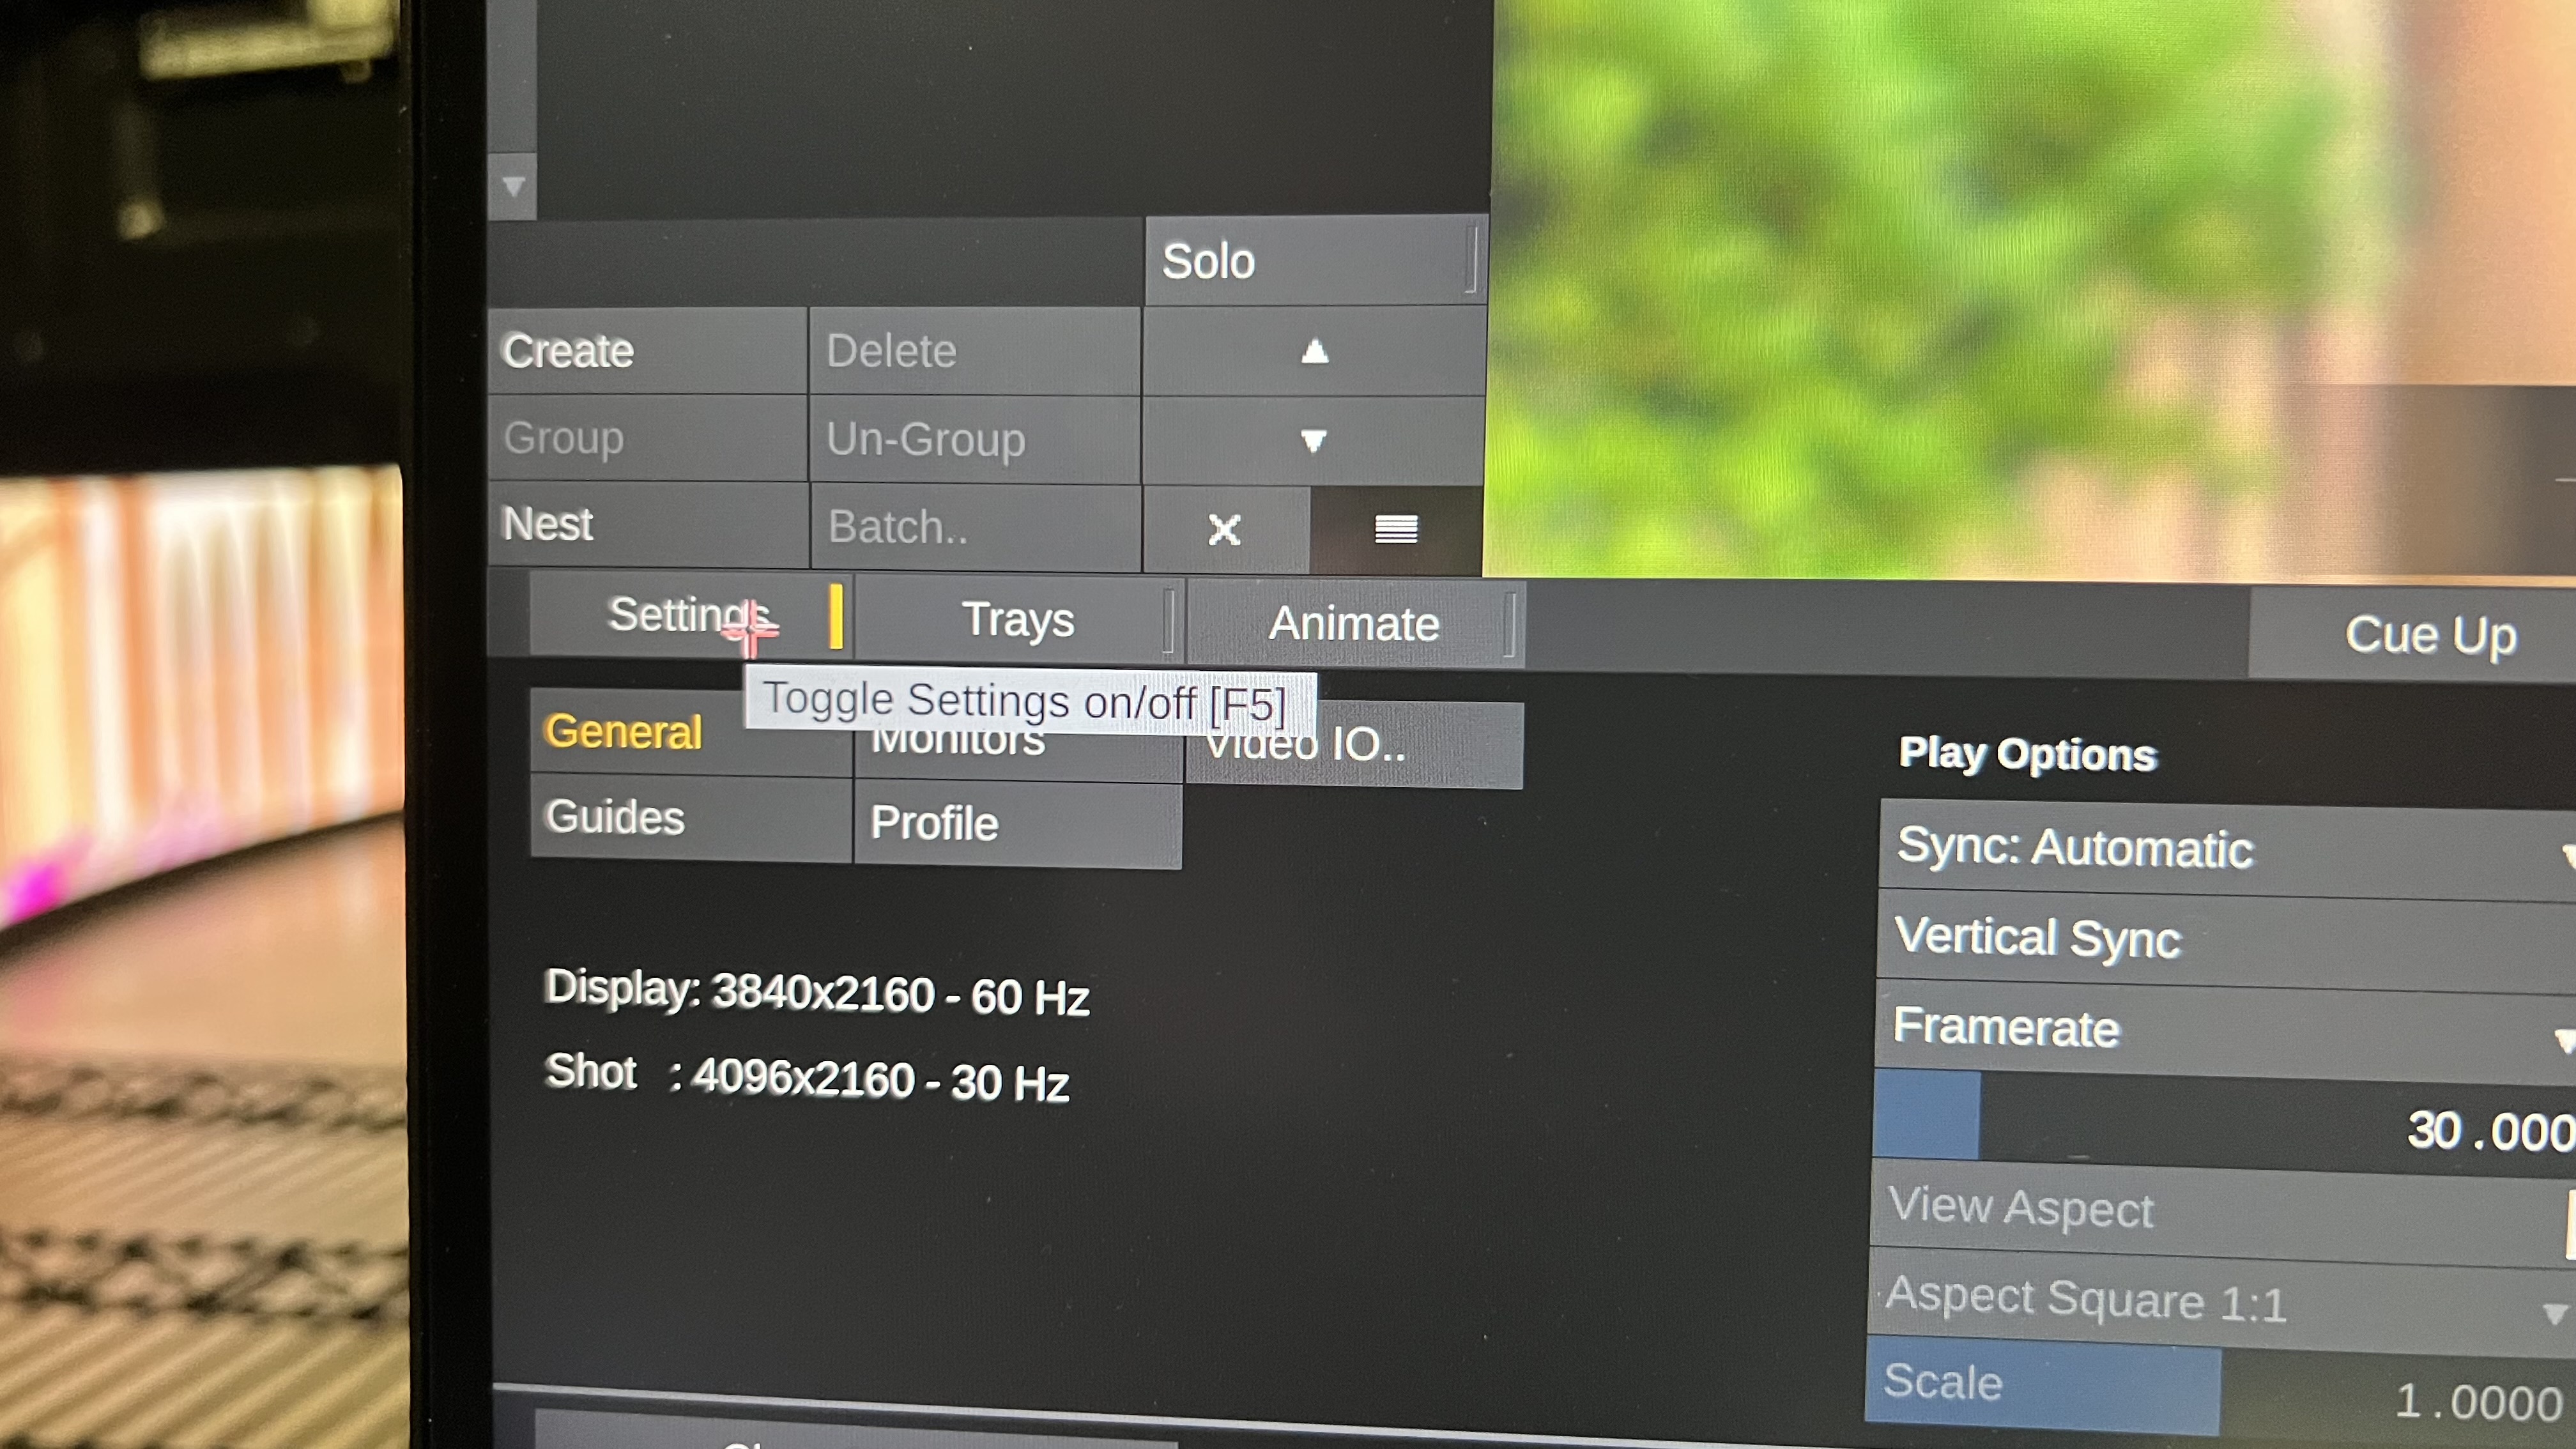
Step 6.|BTS|
Now select Video IO...
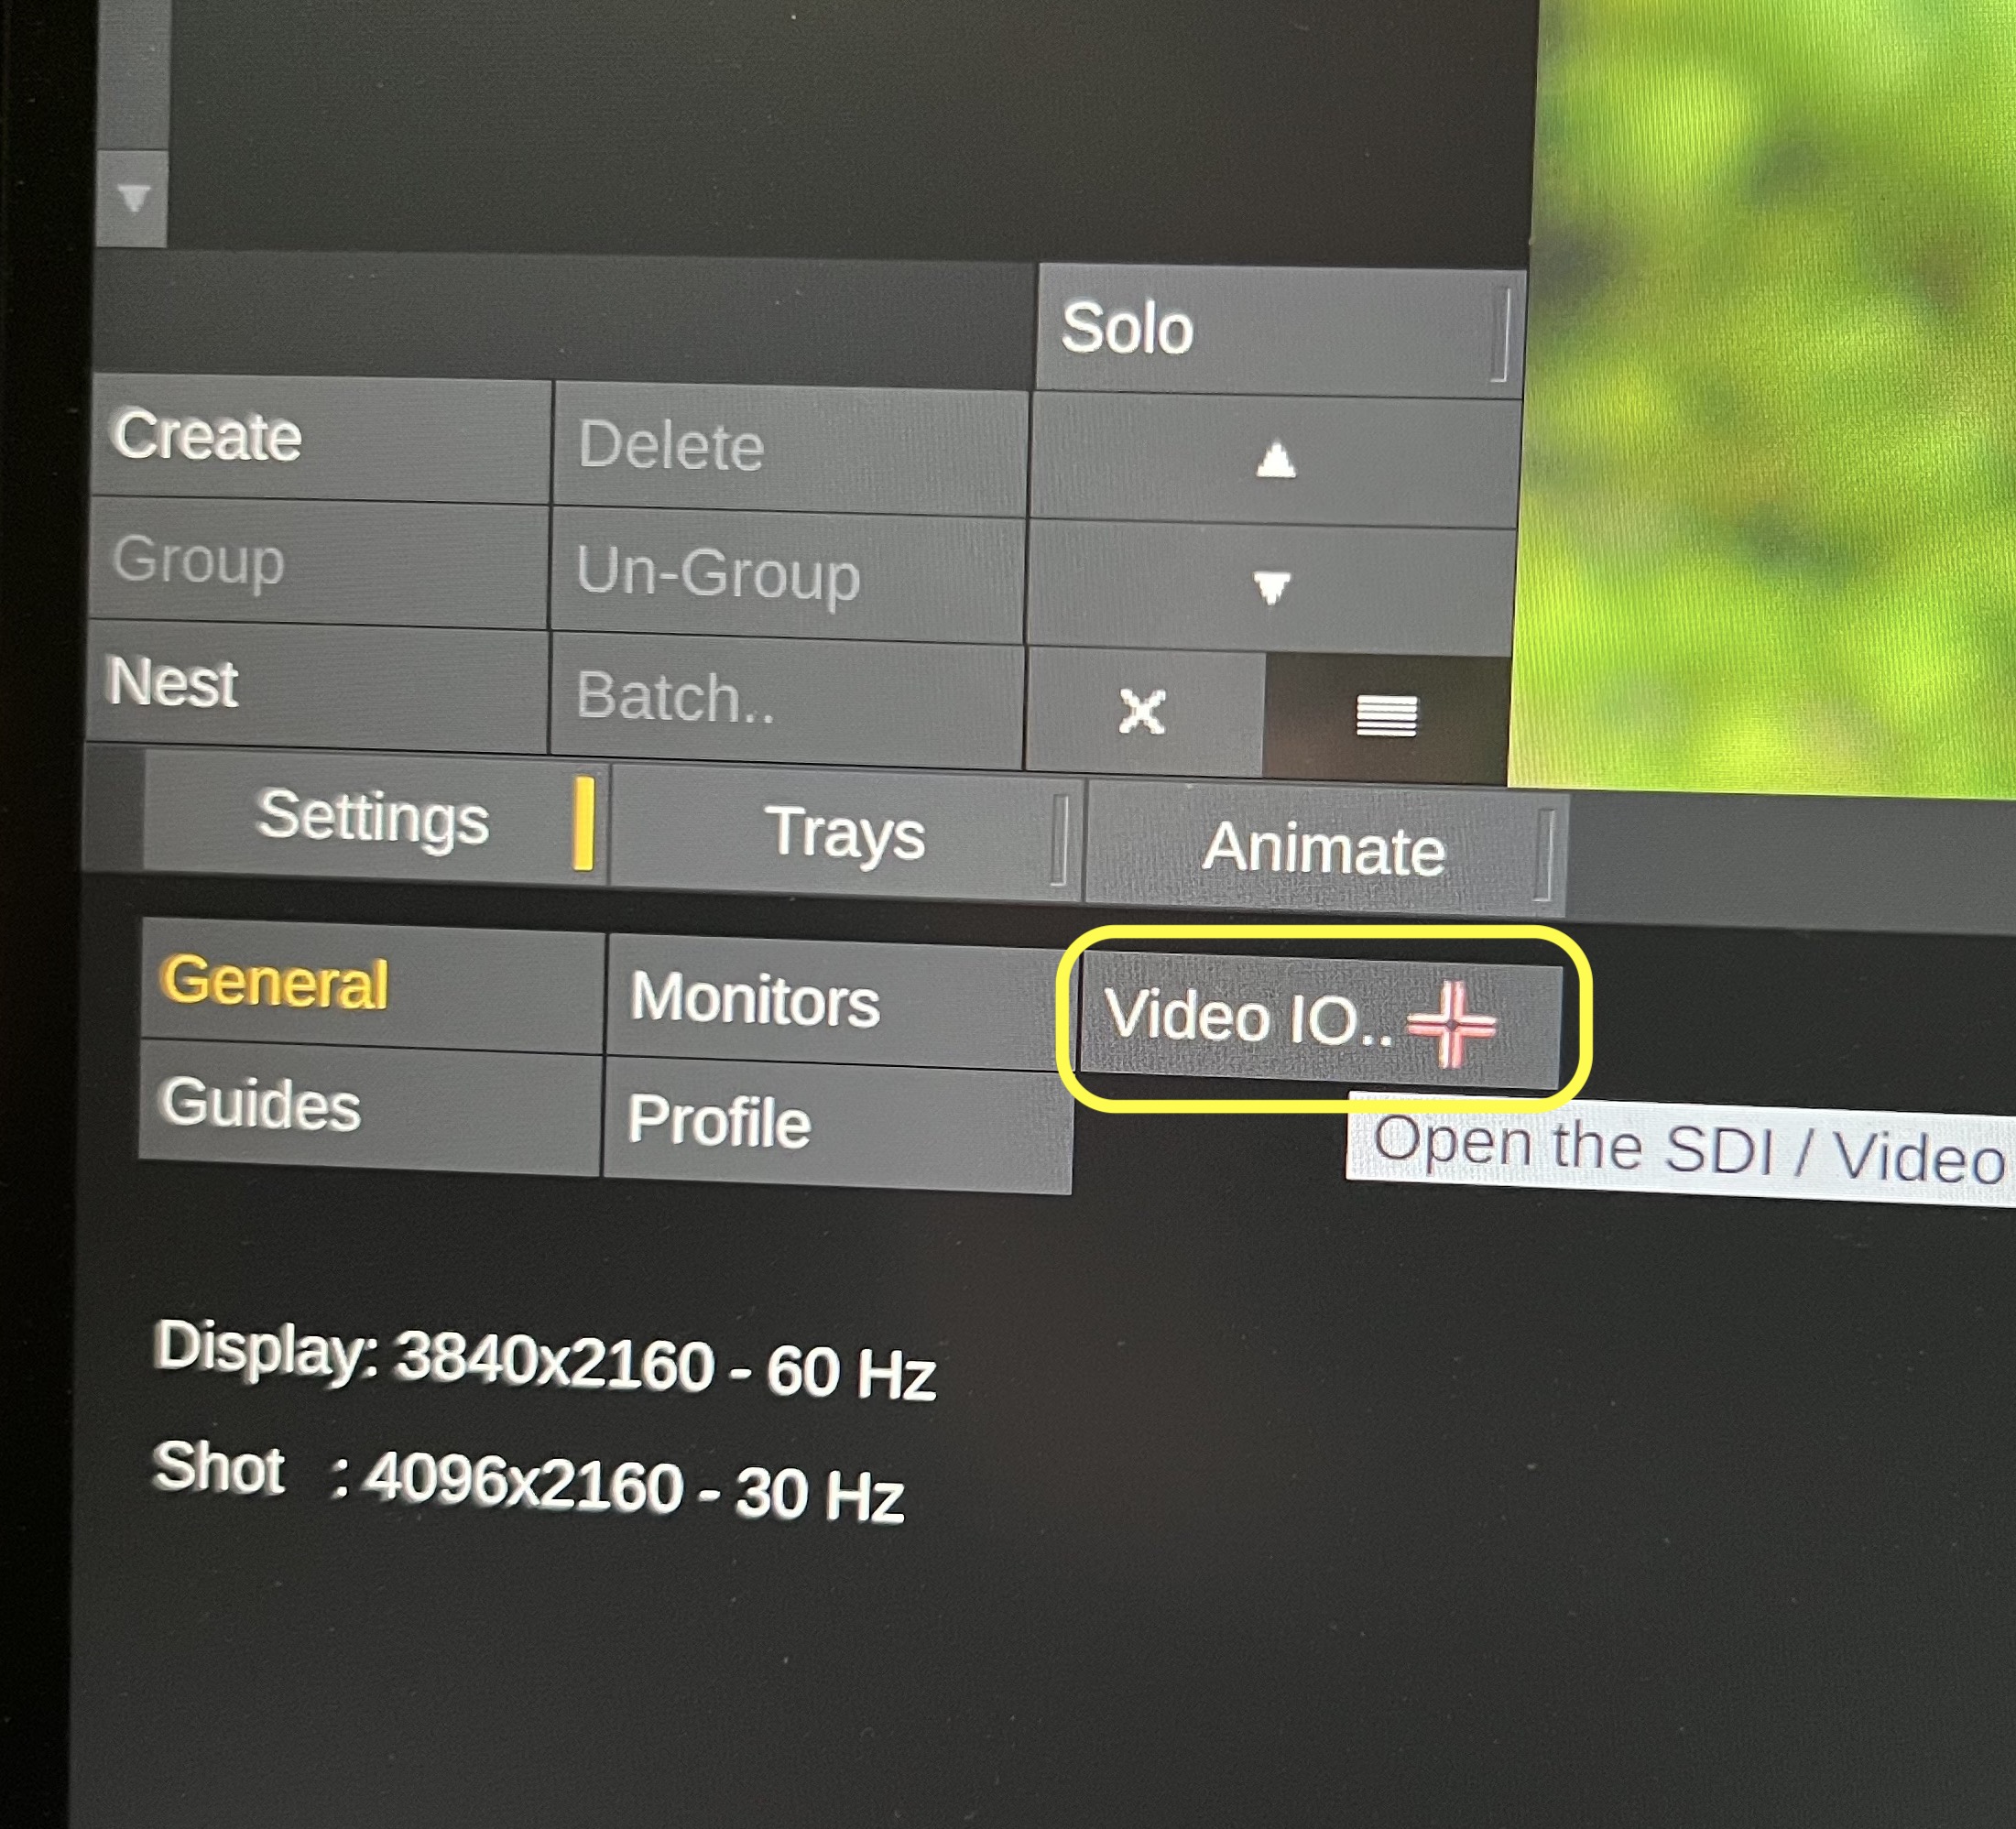
Step 7.|BTS|
Select the DeckLink 8K Pro as the device that we are inputting. The camera is wired into channel 1. Turn this On and set it as the Input. Our second channel is going from this decklink to the BlackMagic card in the operator PC that needs this signal to read the timecode. So we set channel 2 to On and set it as Output. We also set this to our camera format which is 4Kp30 DCI at 4096 x 2160.
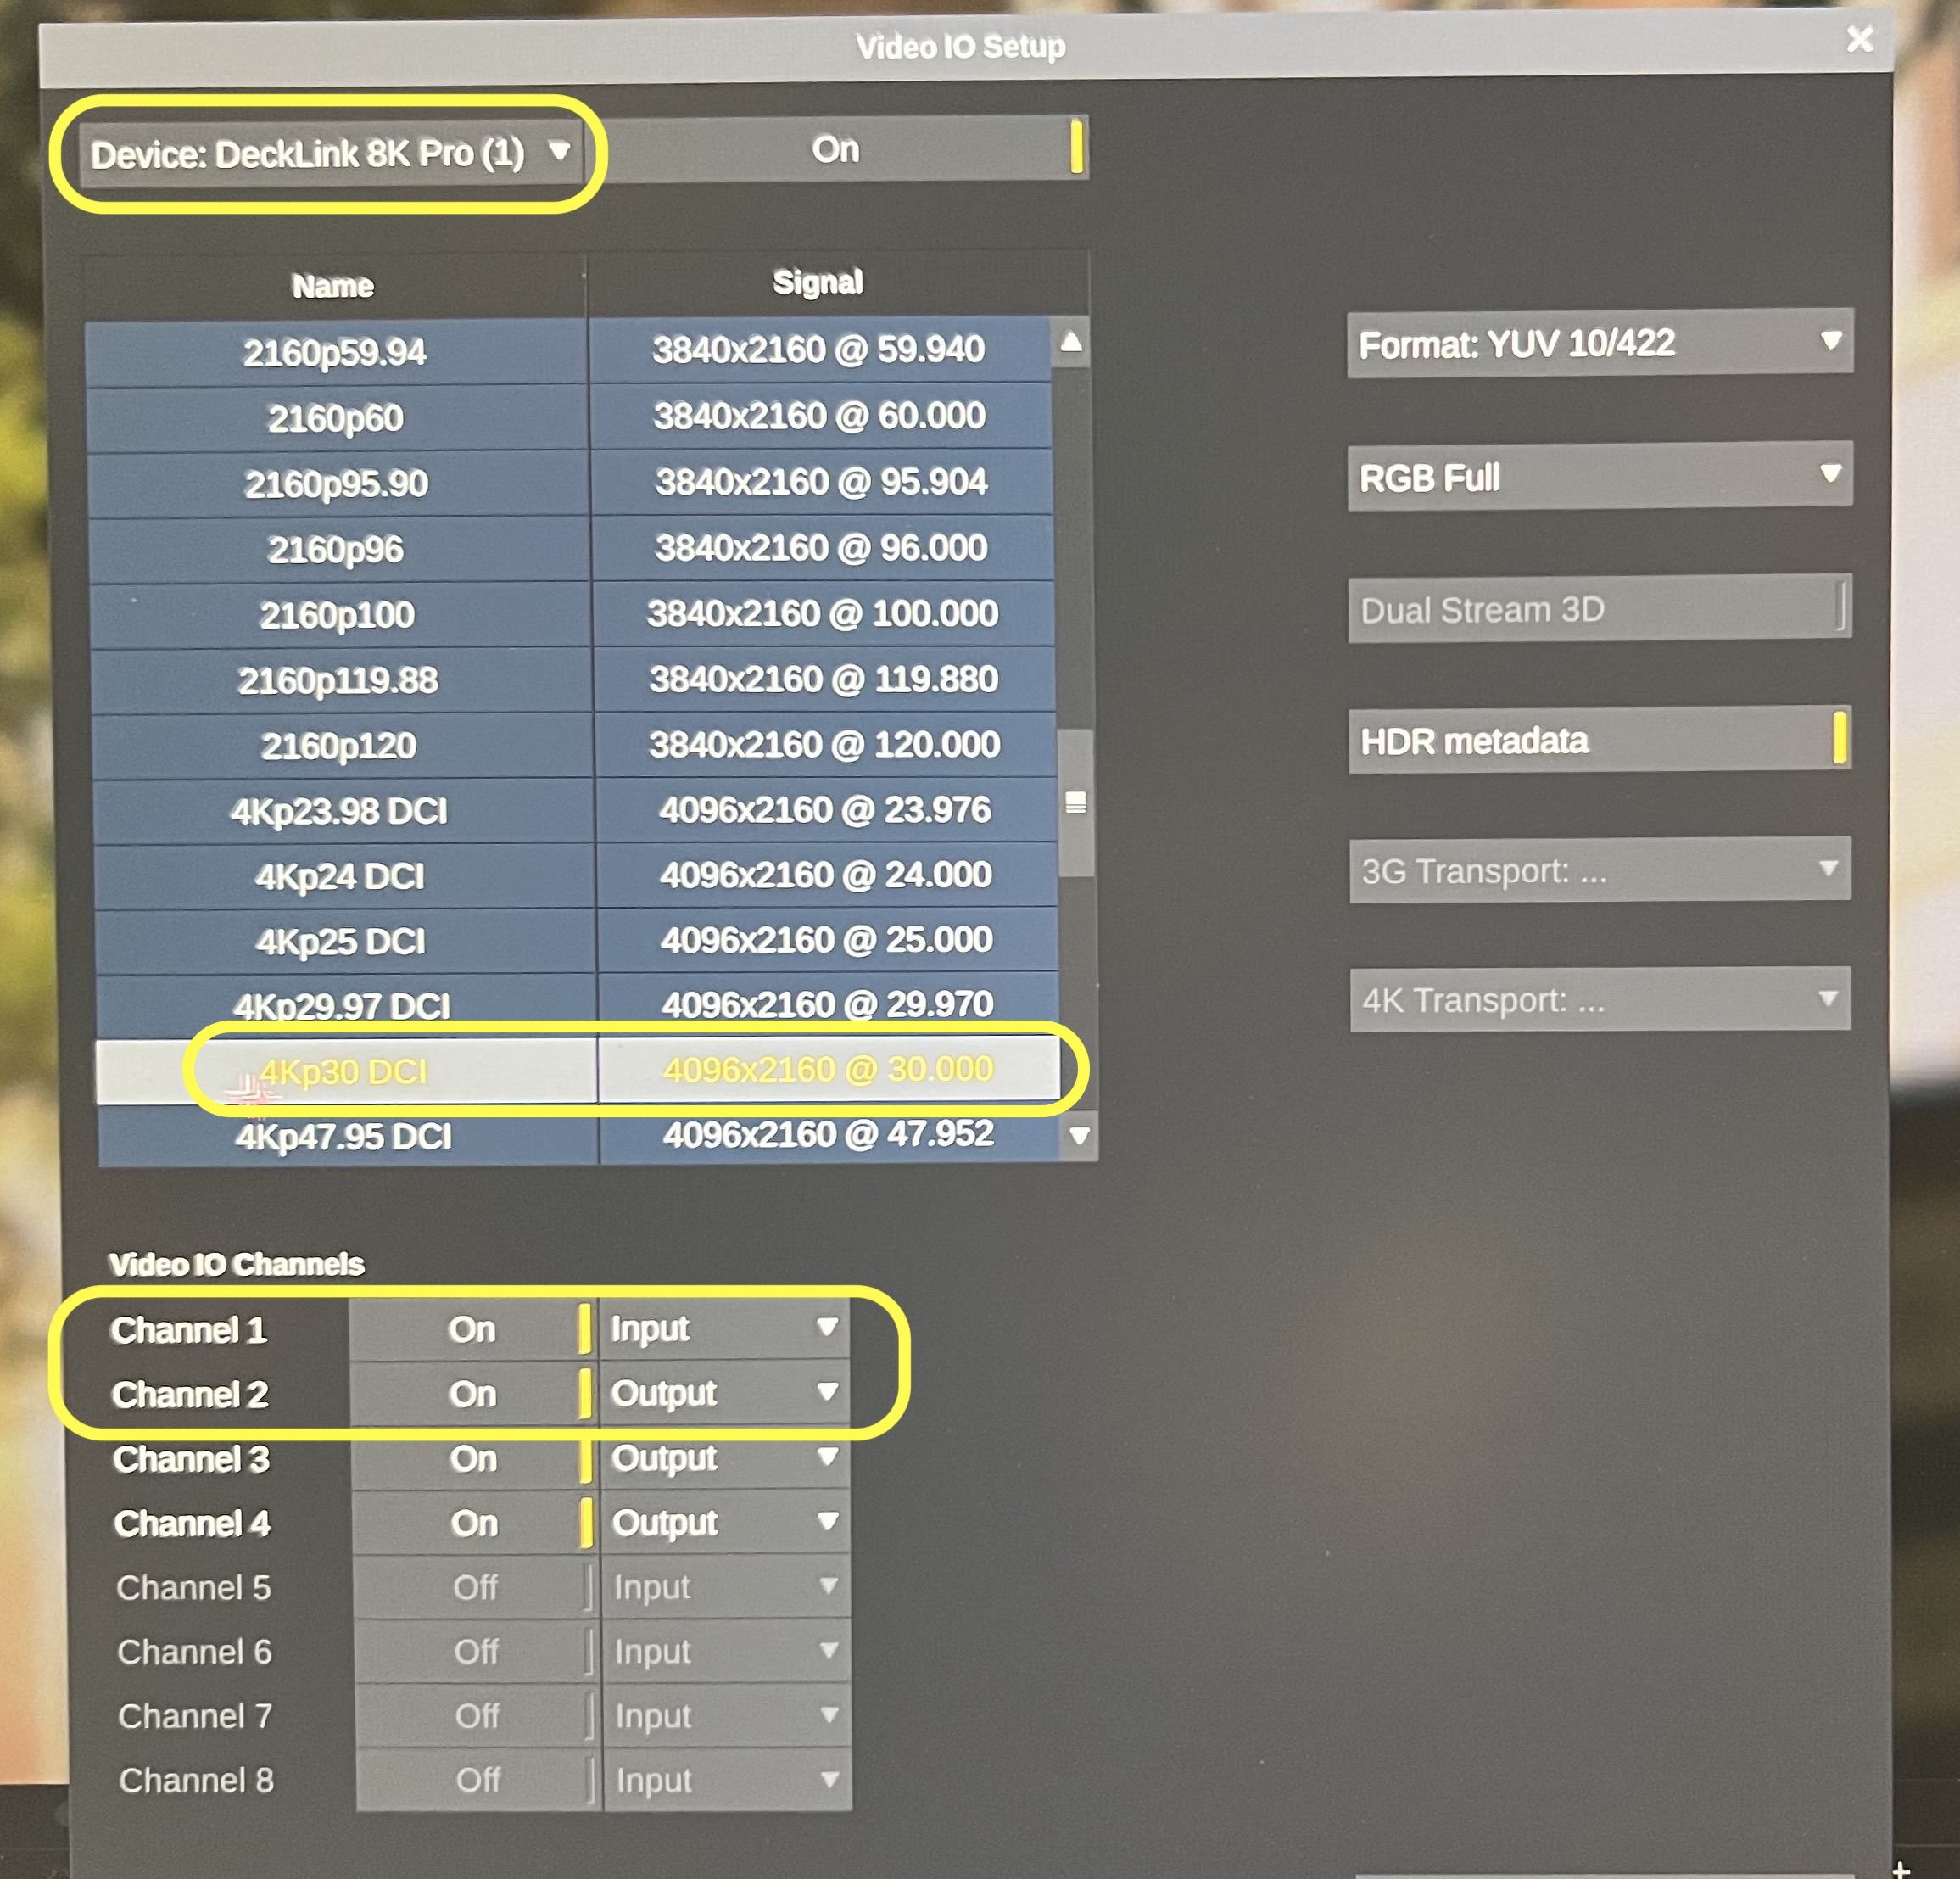
Step 8.|BTS|
Now go to the Operator machine and we have another black magic card set up to ingest the video. Run the Black Magic software and confirm you are receiving a video signal. If it is working you will see the camera in the operator computer (make sure Unreal is not running at this time). Remember, only one piece of software can get a video input at a time.
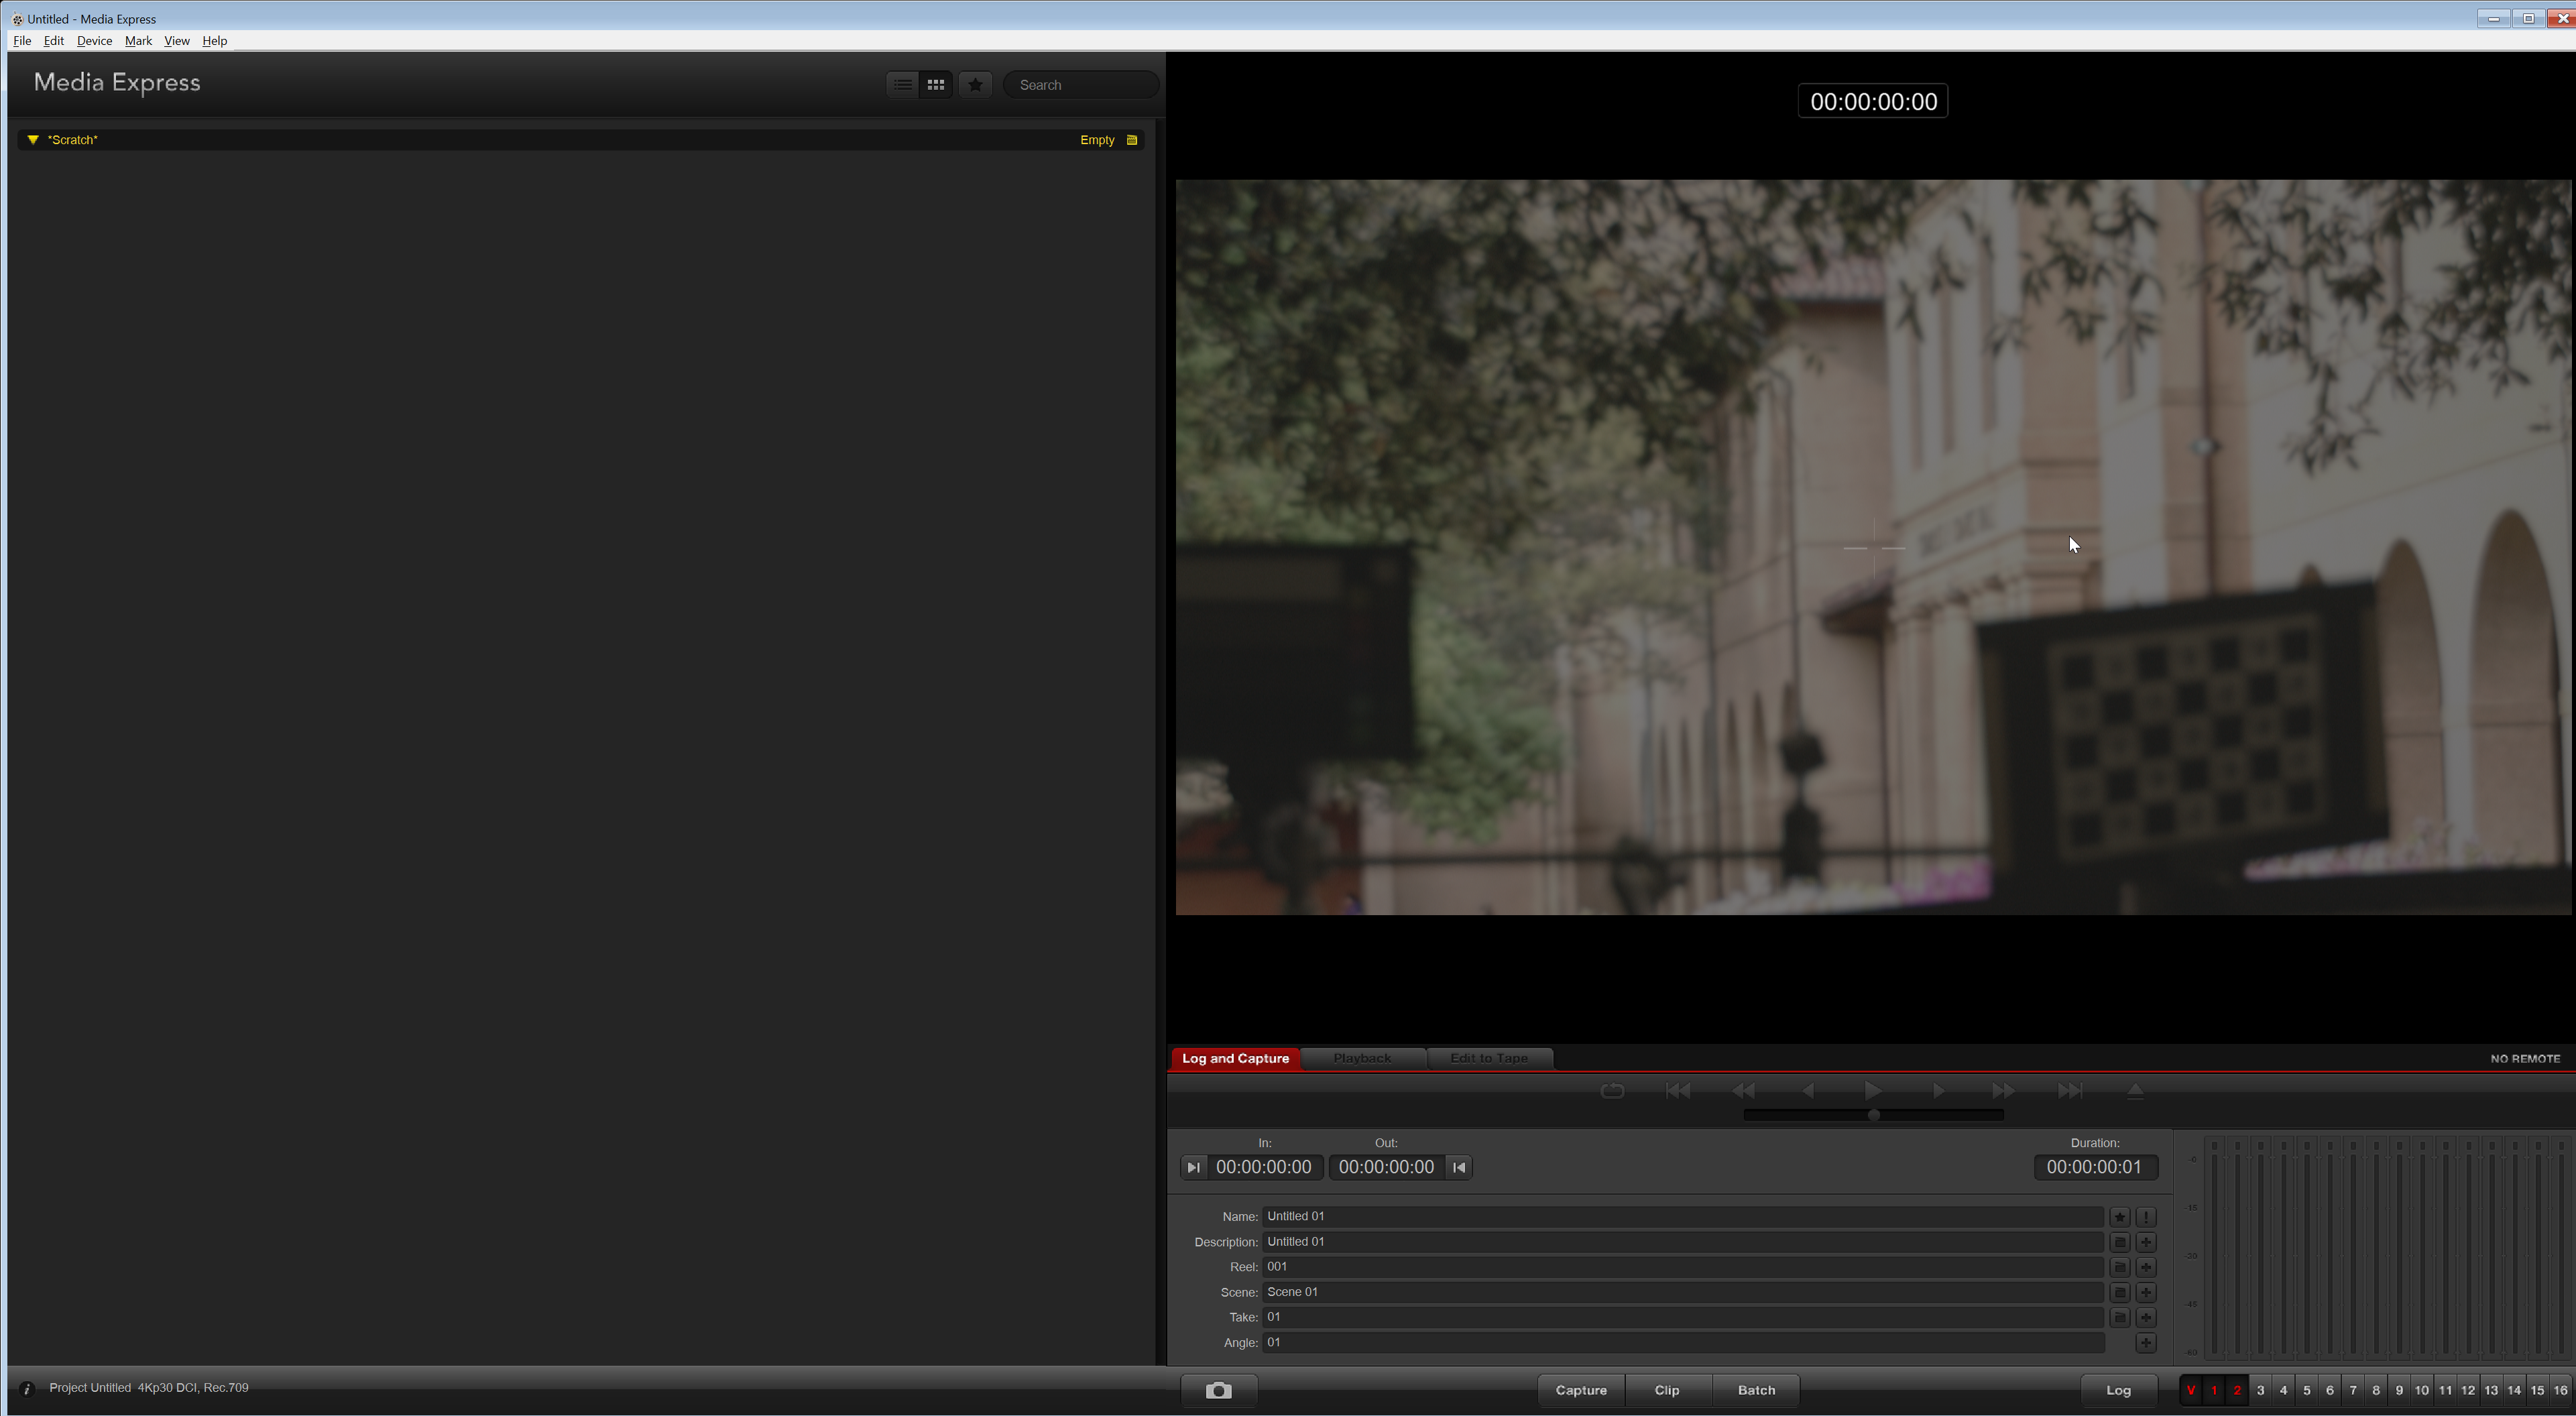
Step 9.|BTS|
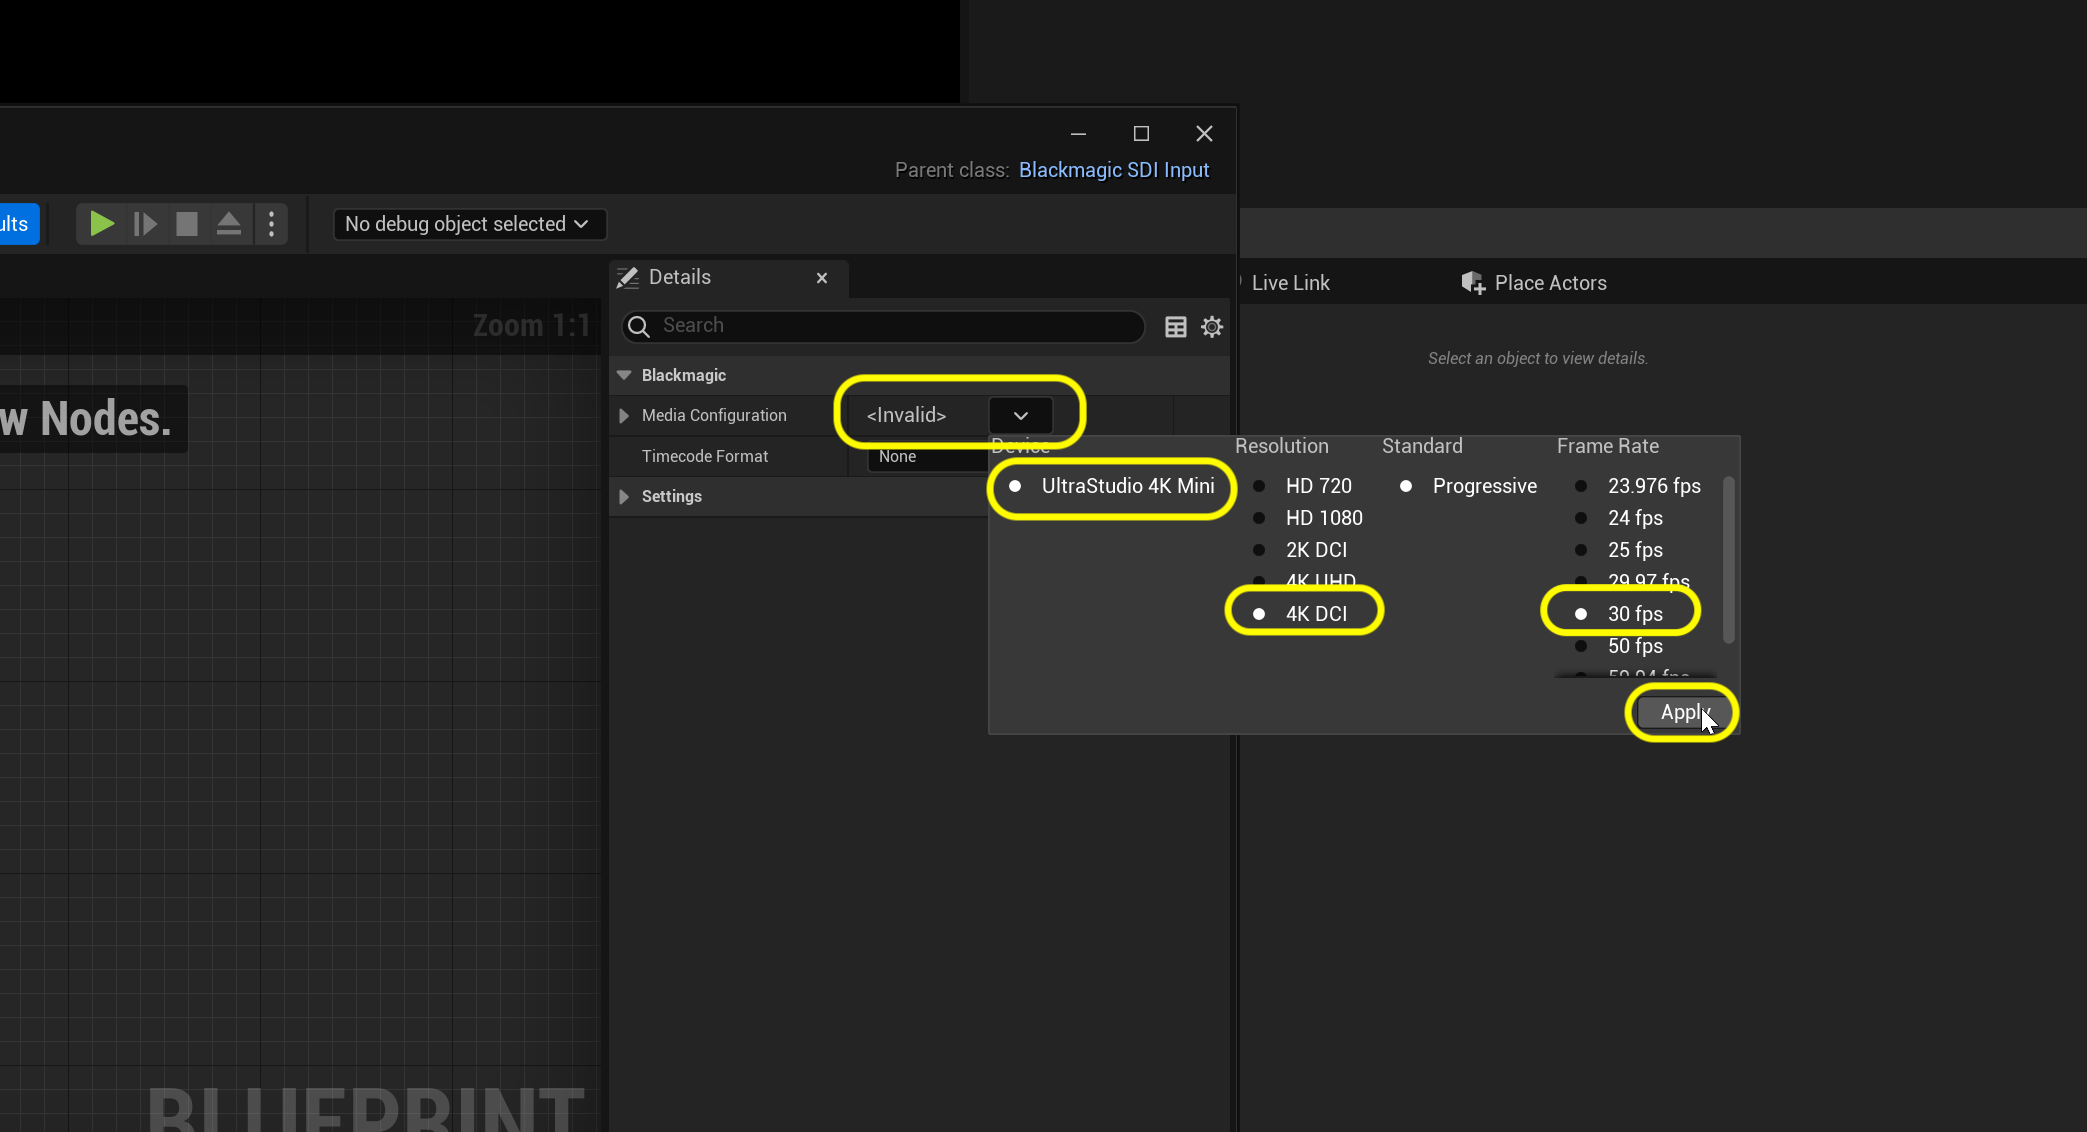
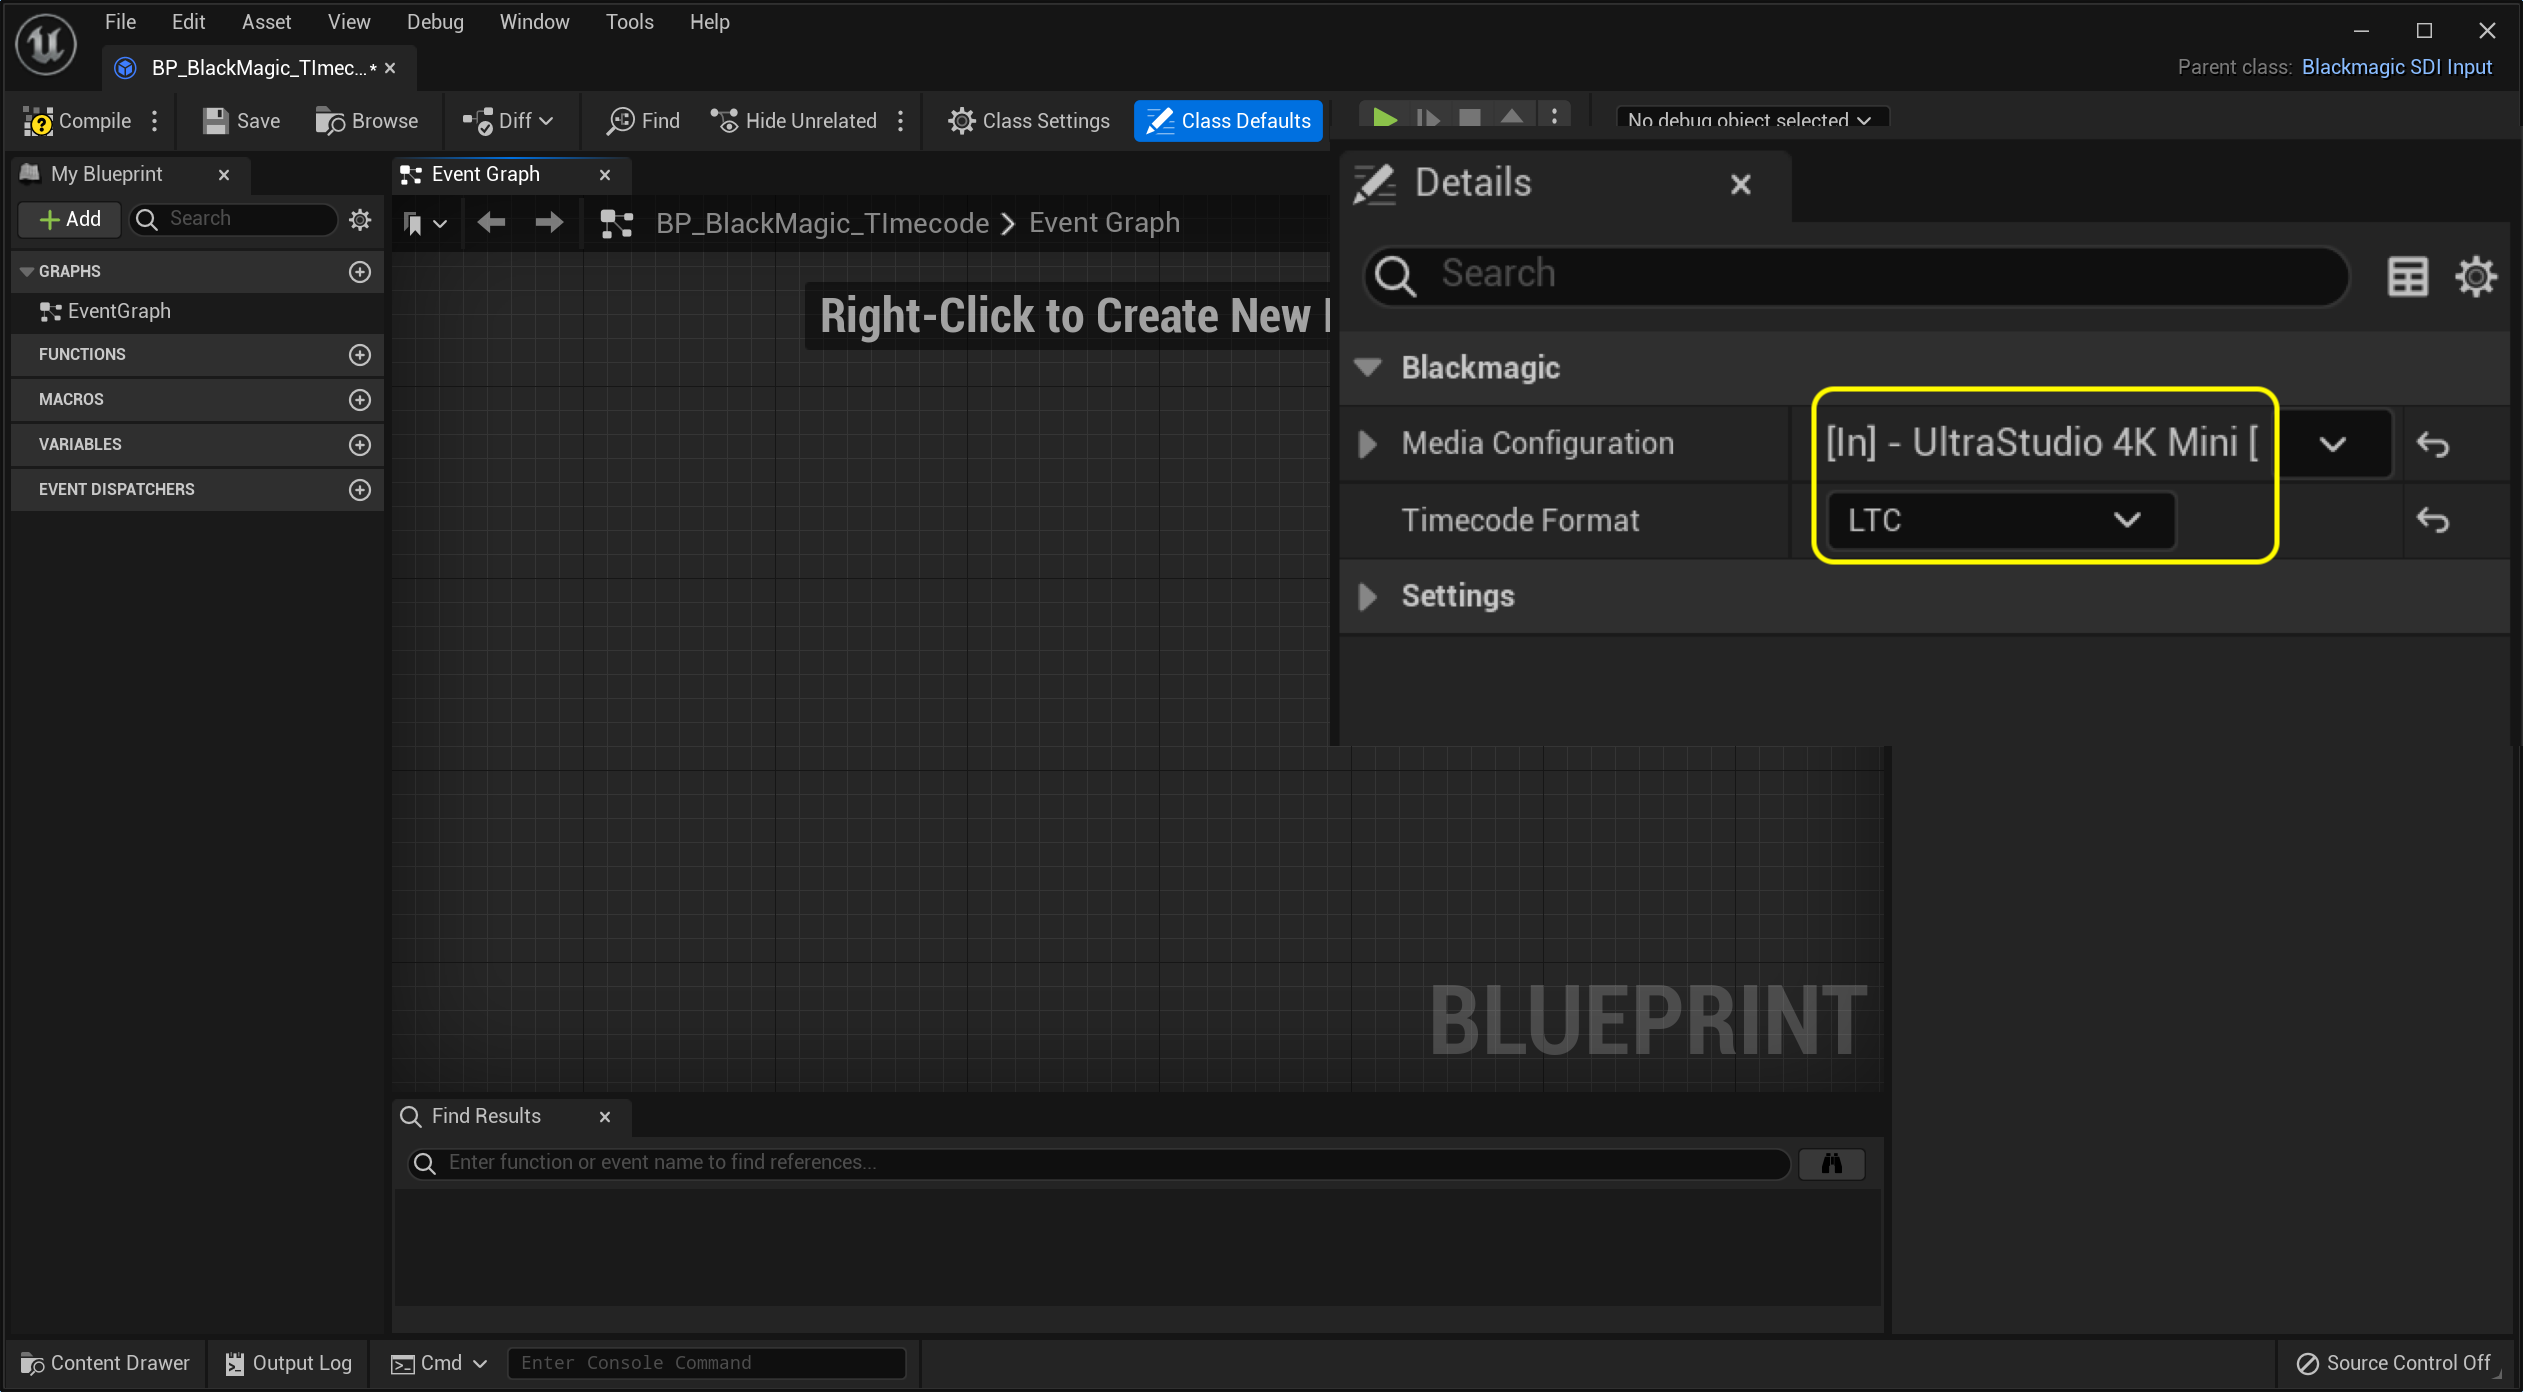
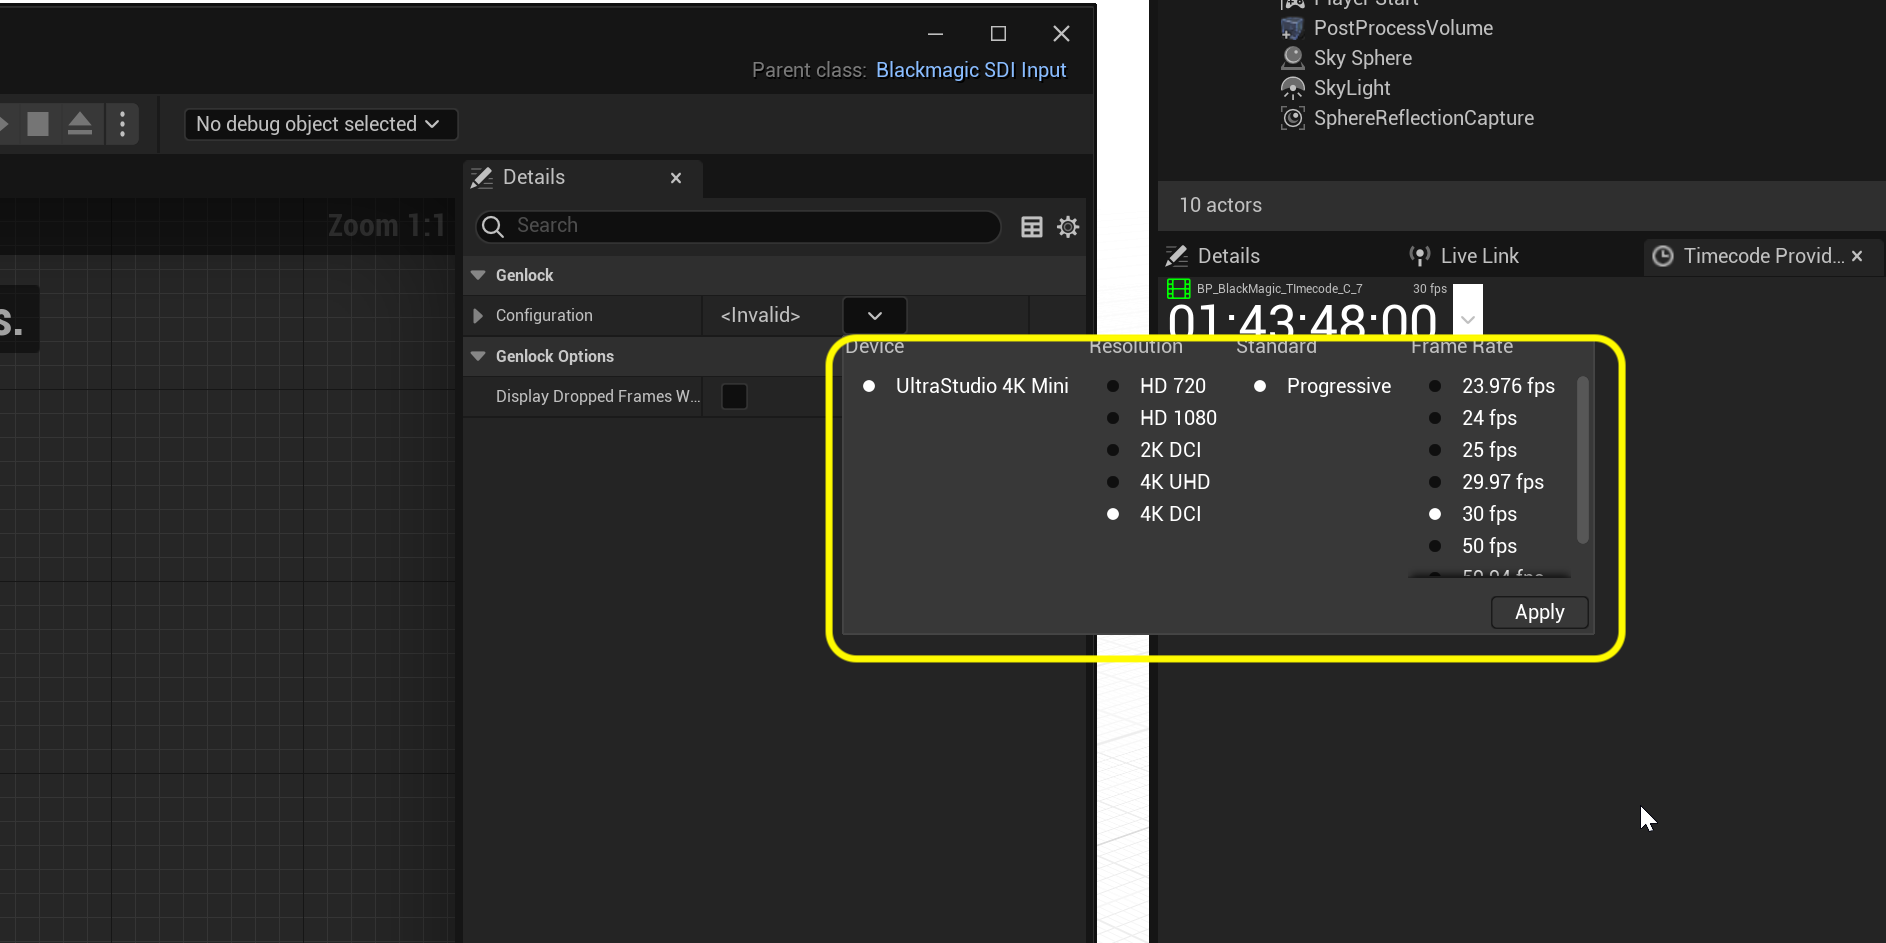
Quit the black magic software and open the project in Unreal. Now open up BP_BlackMagic_Timecode and our input card for the Operator 1 is an UltraStudio 4K Mini. Set this as the input card at 4K DCI and 30 fps then press the Apply button.
Step 10.|BTS| 
Now set the Timecode Format to LTC.
Step 11.|BTS|
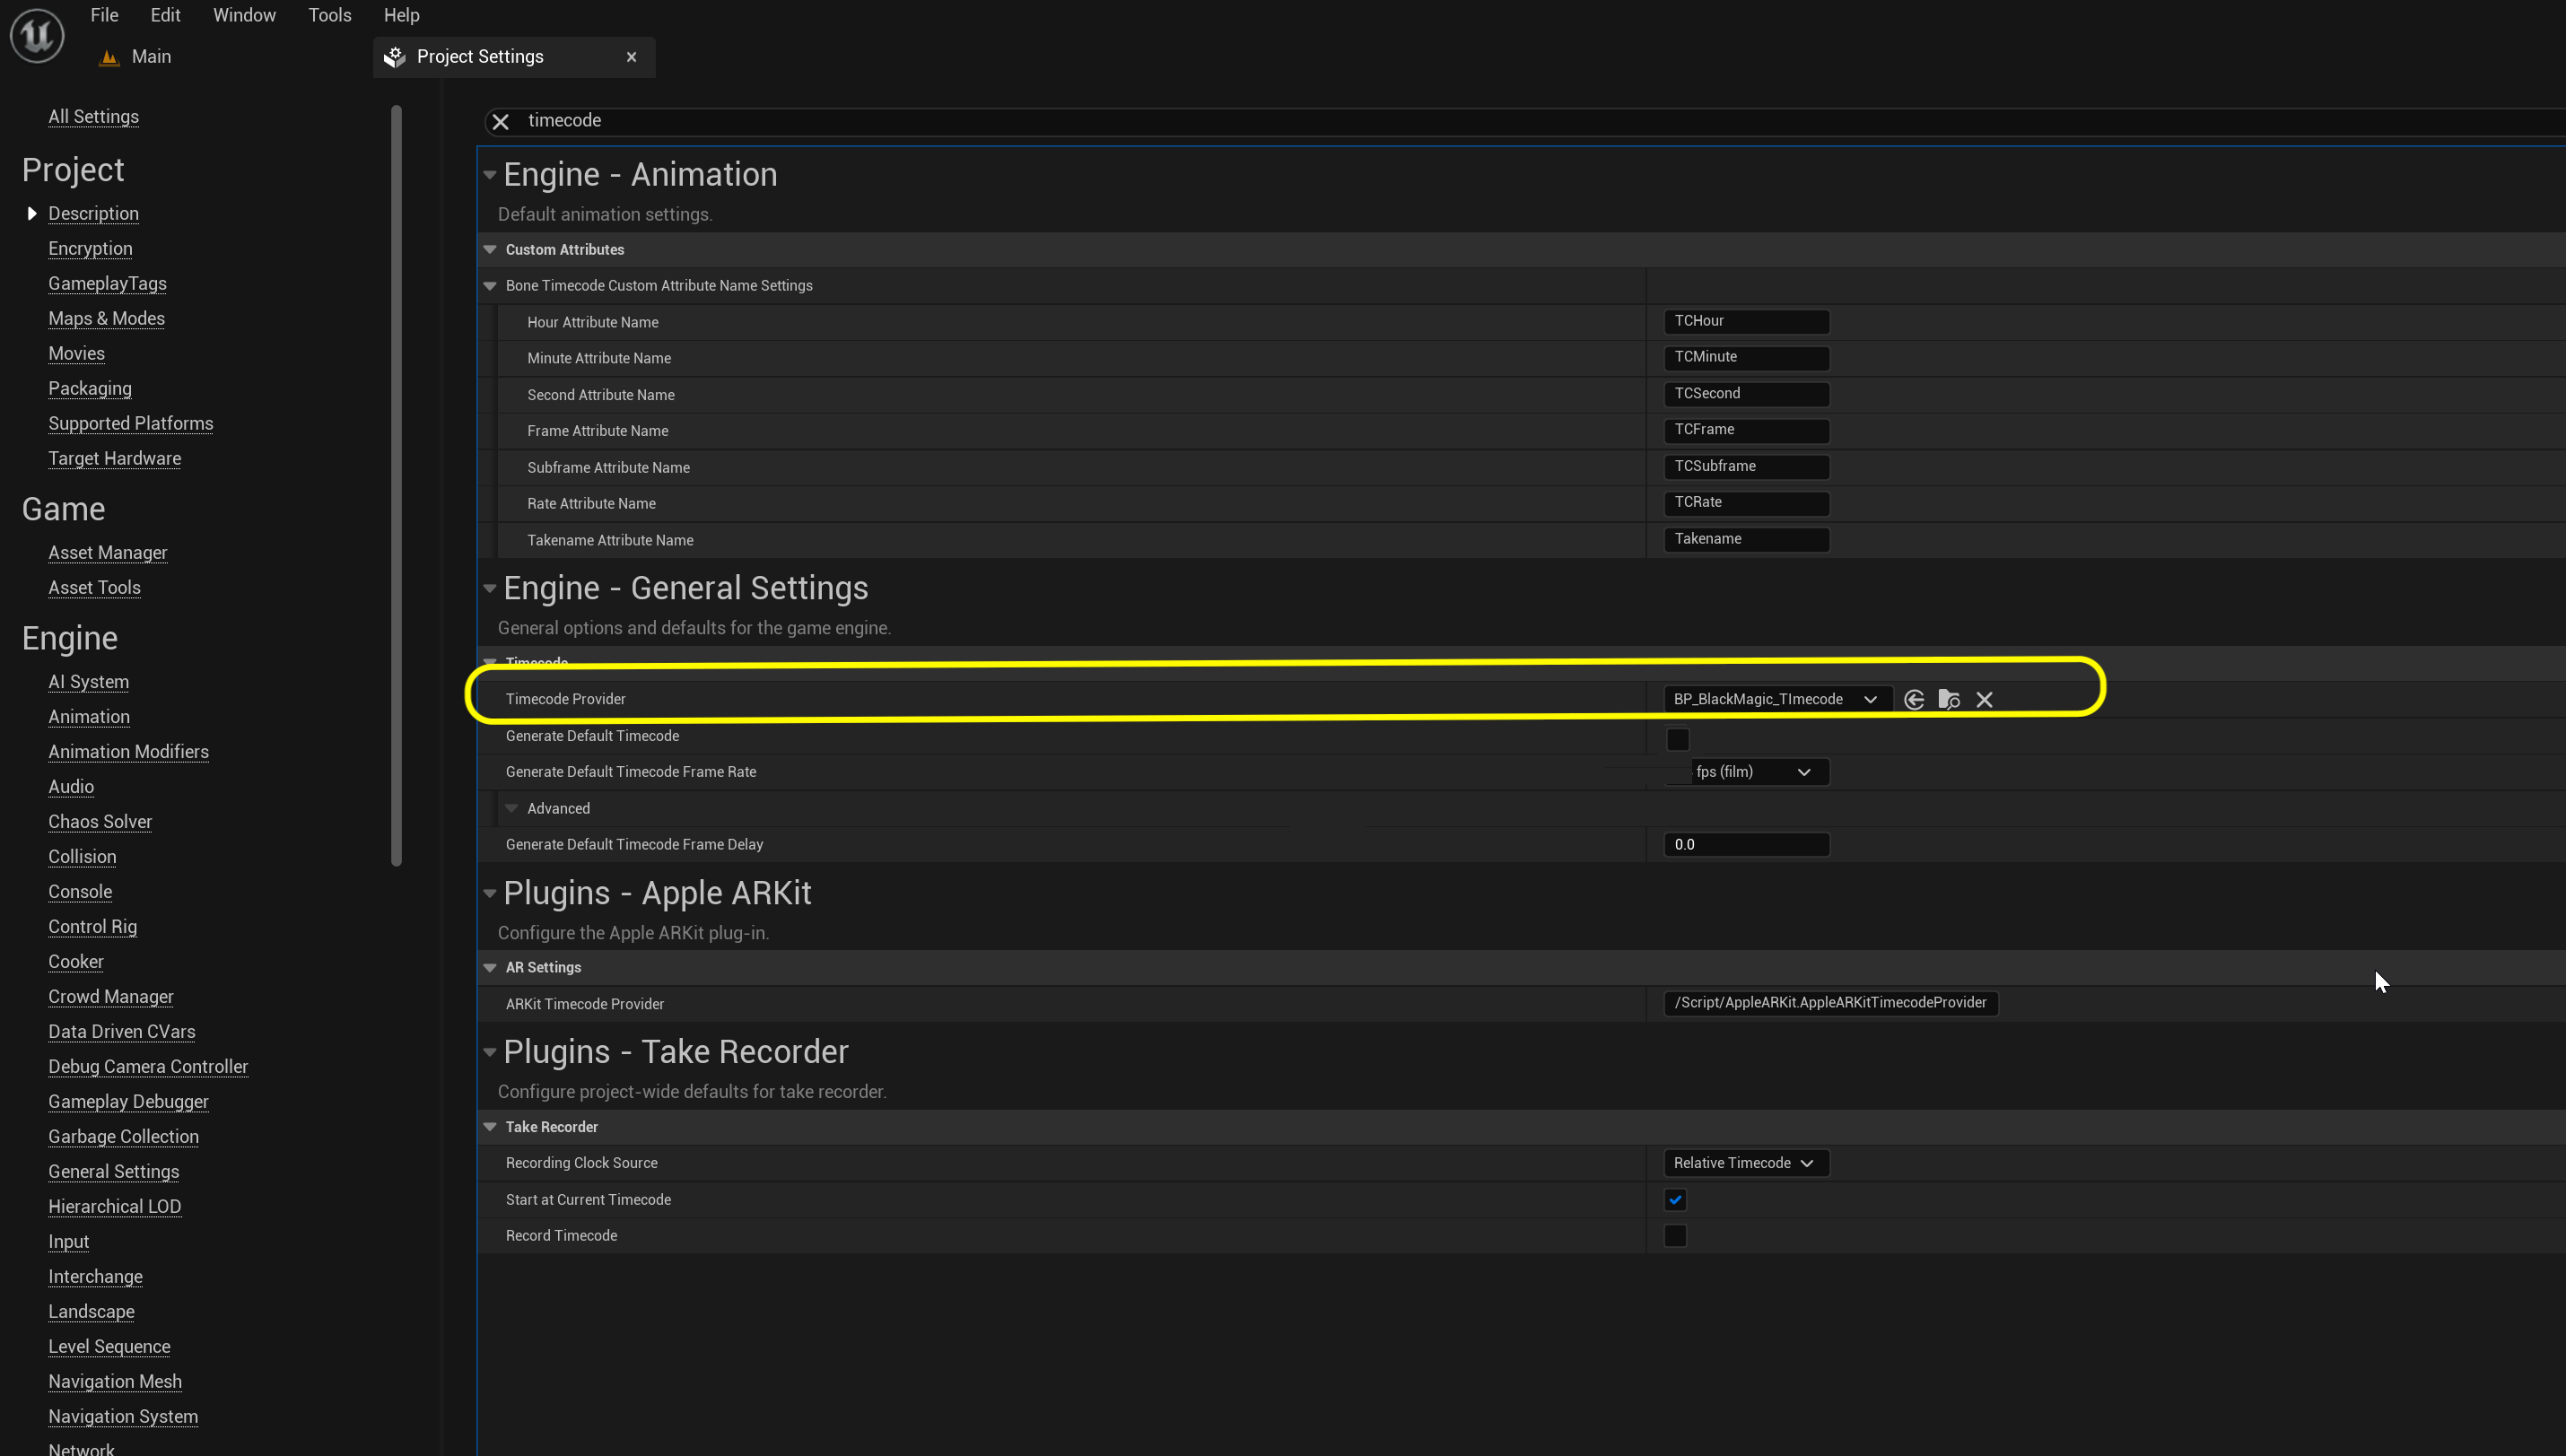
Now to make this all work the final step is to open Edit | Project Settings and set the Timecode Provider as the blueprint we just configured BP_Blackmagic_Timecode.
Step 12.|BTS|
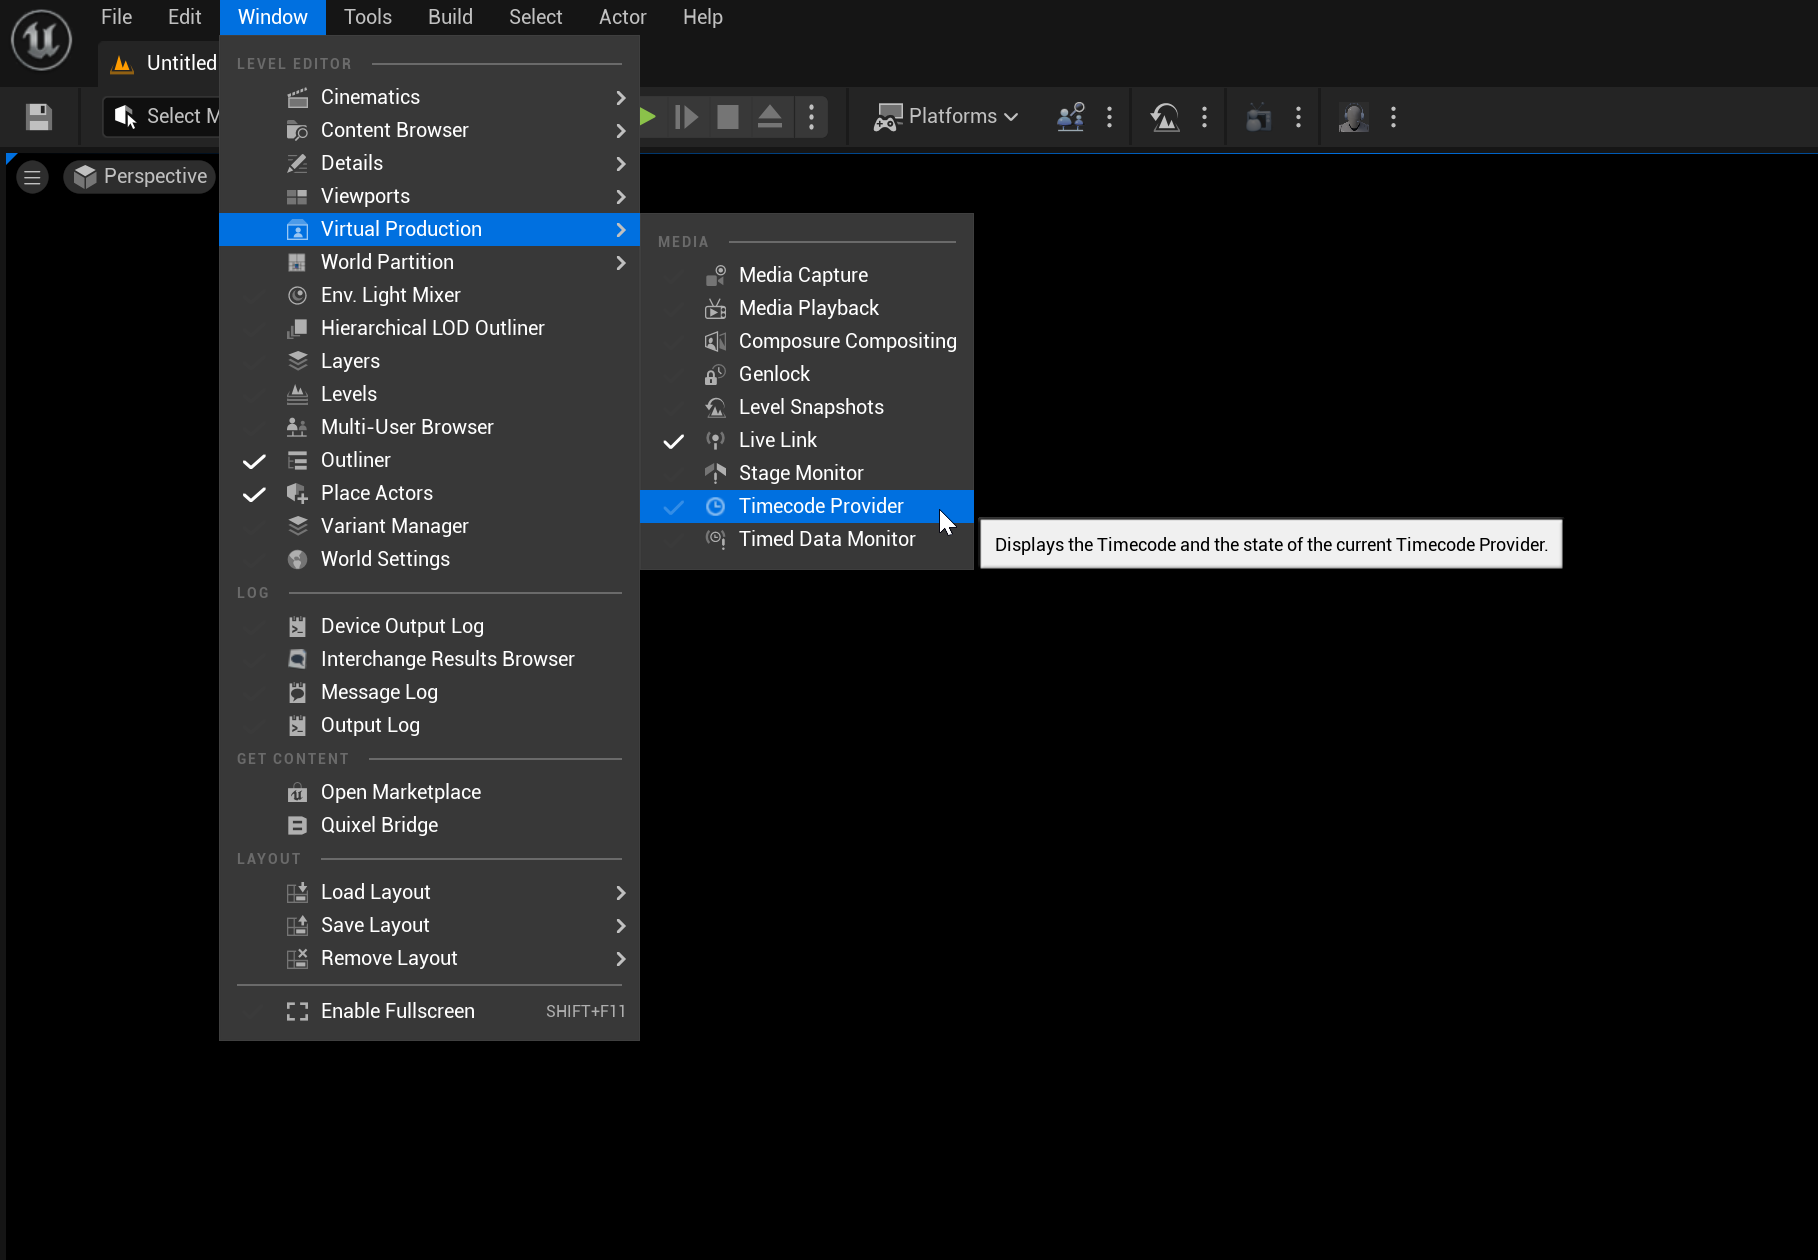
To see the timecode open up Window | Virtual Production | Timecode Provider.
Step 13.|BTS|
Double check that the timecode in Unreal is the same as our source (in this case our timecode source is coming from the camera).

Step 14.|BTS|
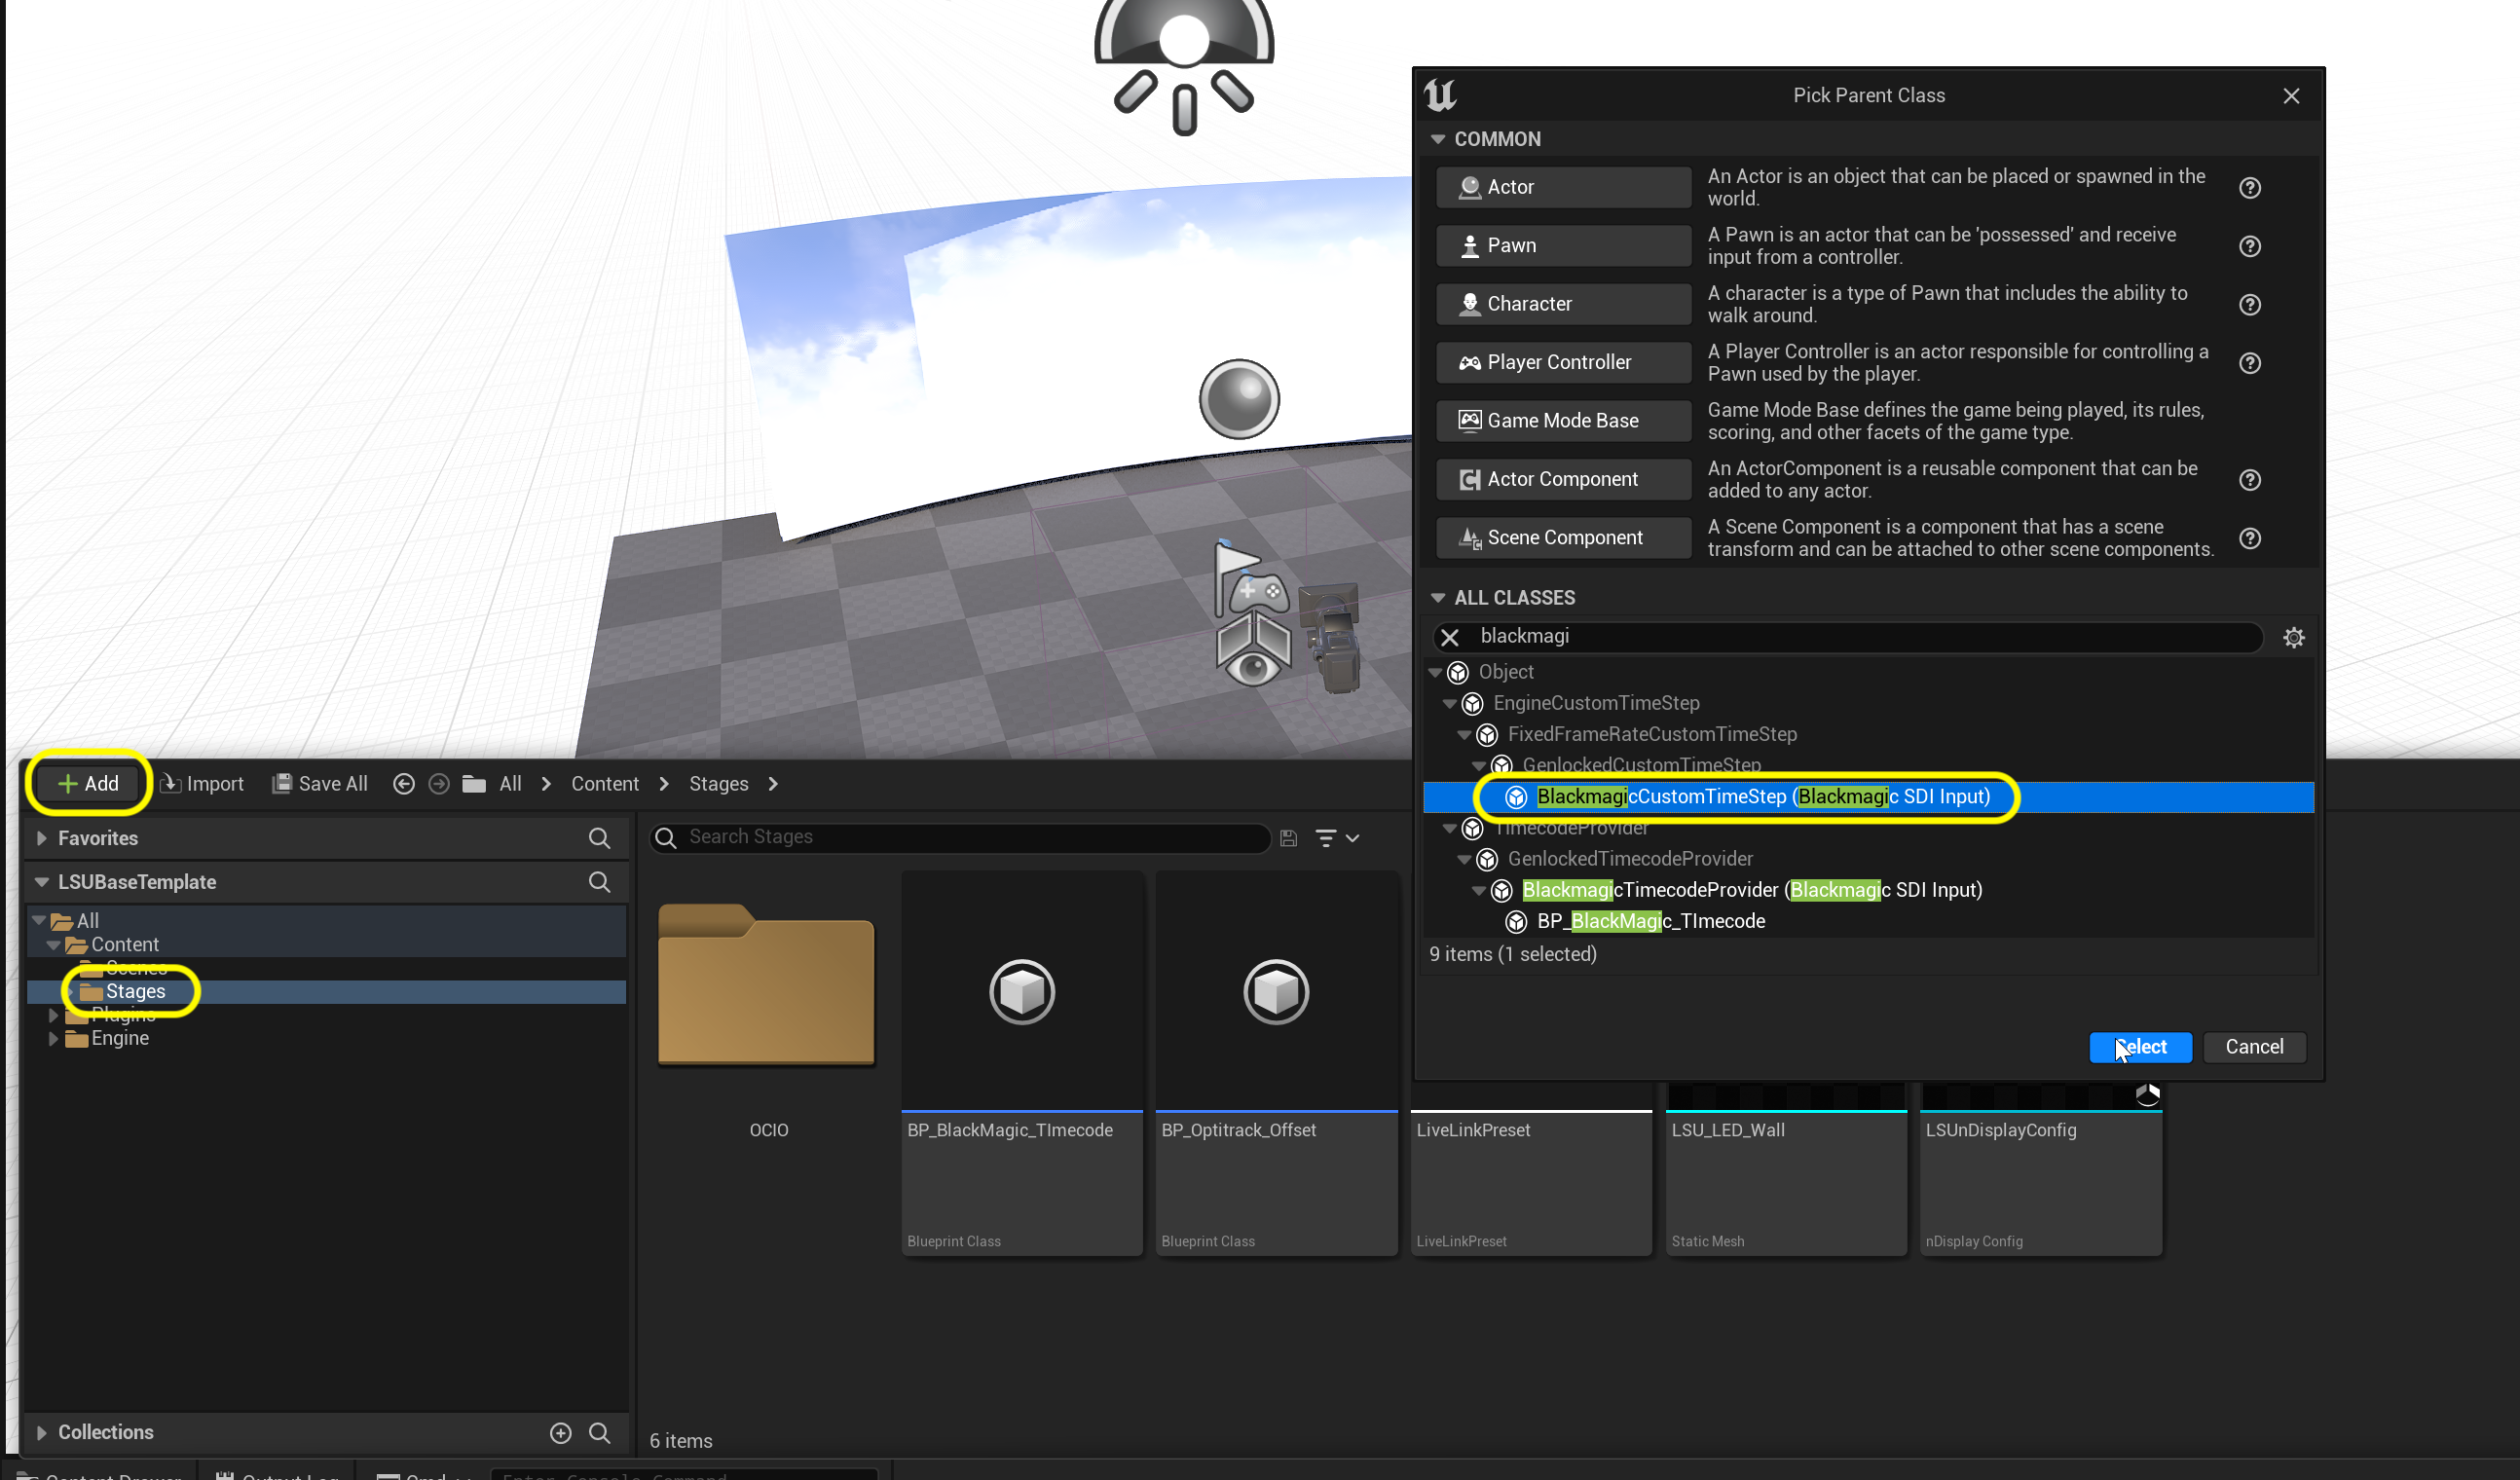
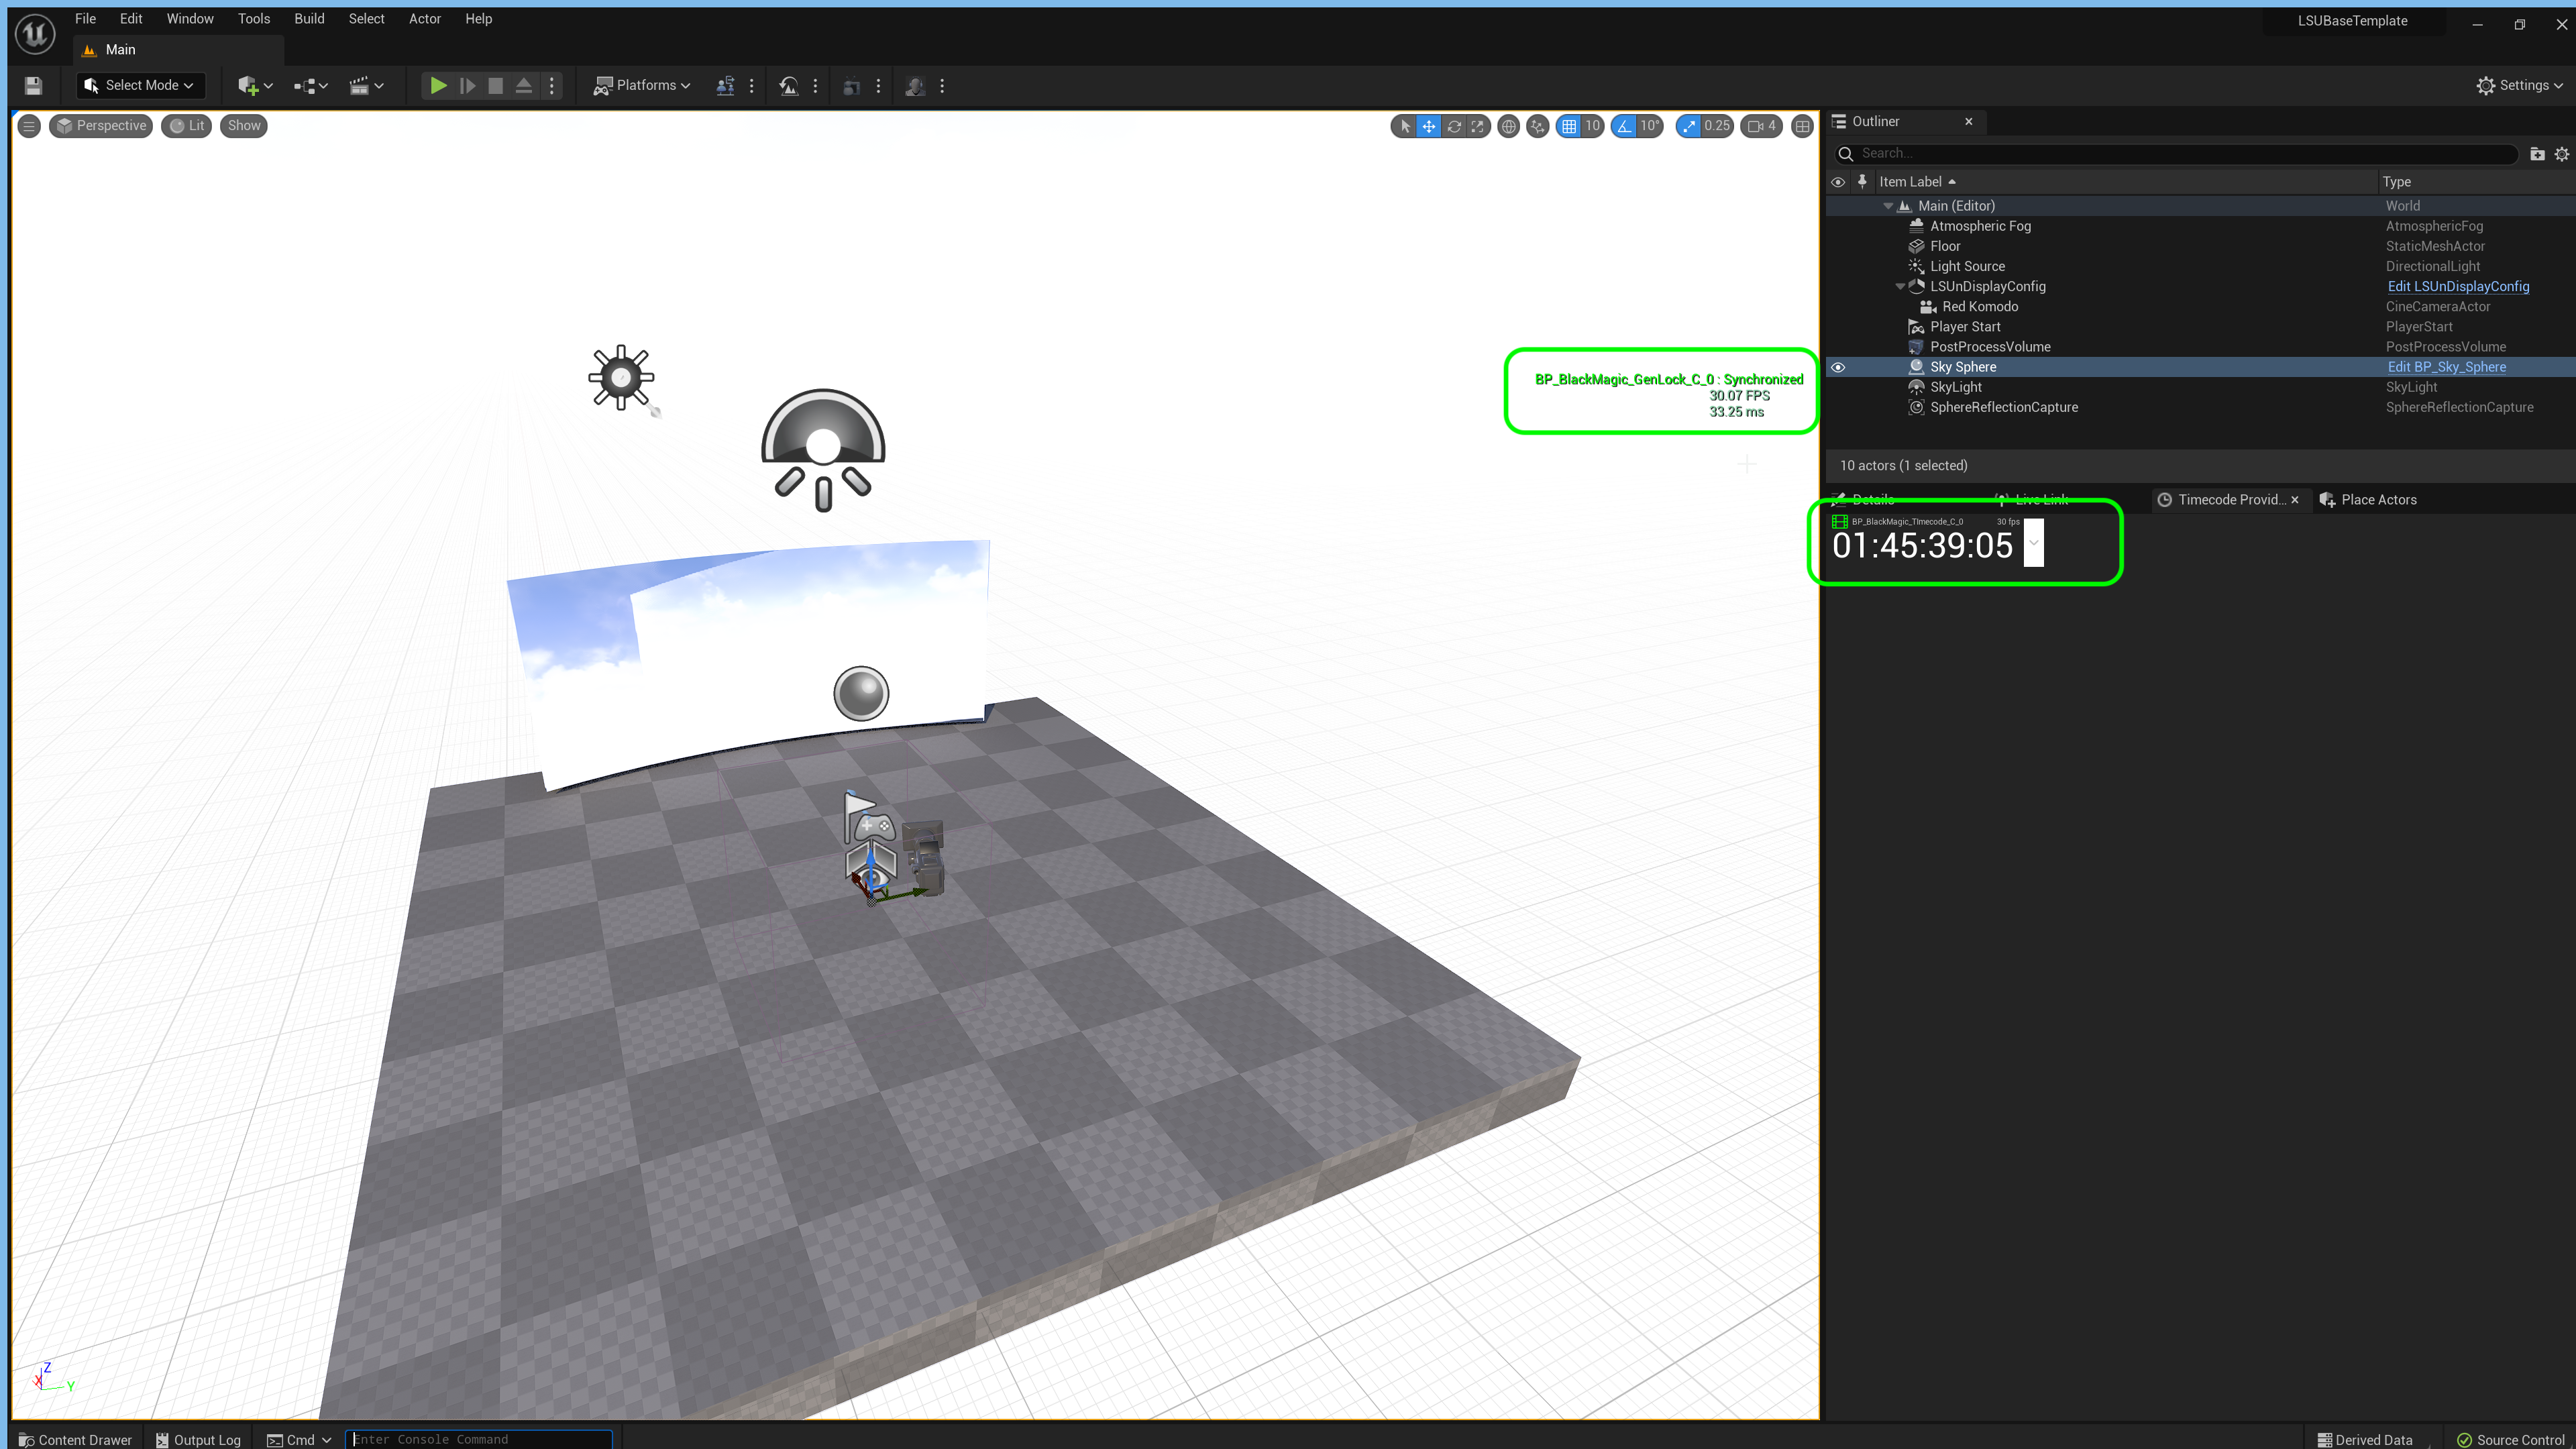
Now we can stripe timecode to our digital content in Unreal. We also want to sync our Unreal game to match the rest of the system (camera, opti track cameras, both Blackmagic sync cards, render node pc). Select the Stages folder and press the + Add button and select Blueprint. Open up ALL CLASSES and select BlackmagicCustomTimeStep(Blackmagic SDI Input). Call the blueprint BP_BlackMagic_GenLock.
Step 15.|BTS|
Now select the same input card settings we picked for the timecode with UltraStudio 4K Mini with 4K DCI, Progressive scan and 30 fps.
Step 16.|BTS|
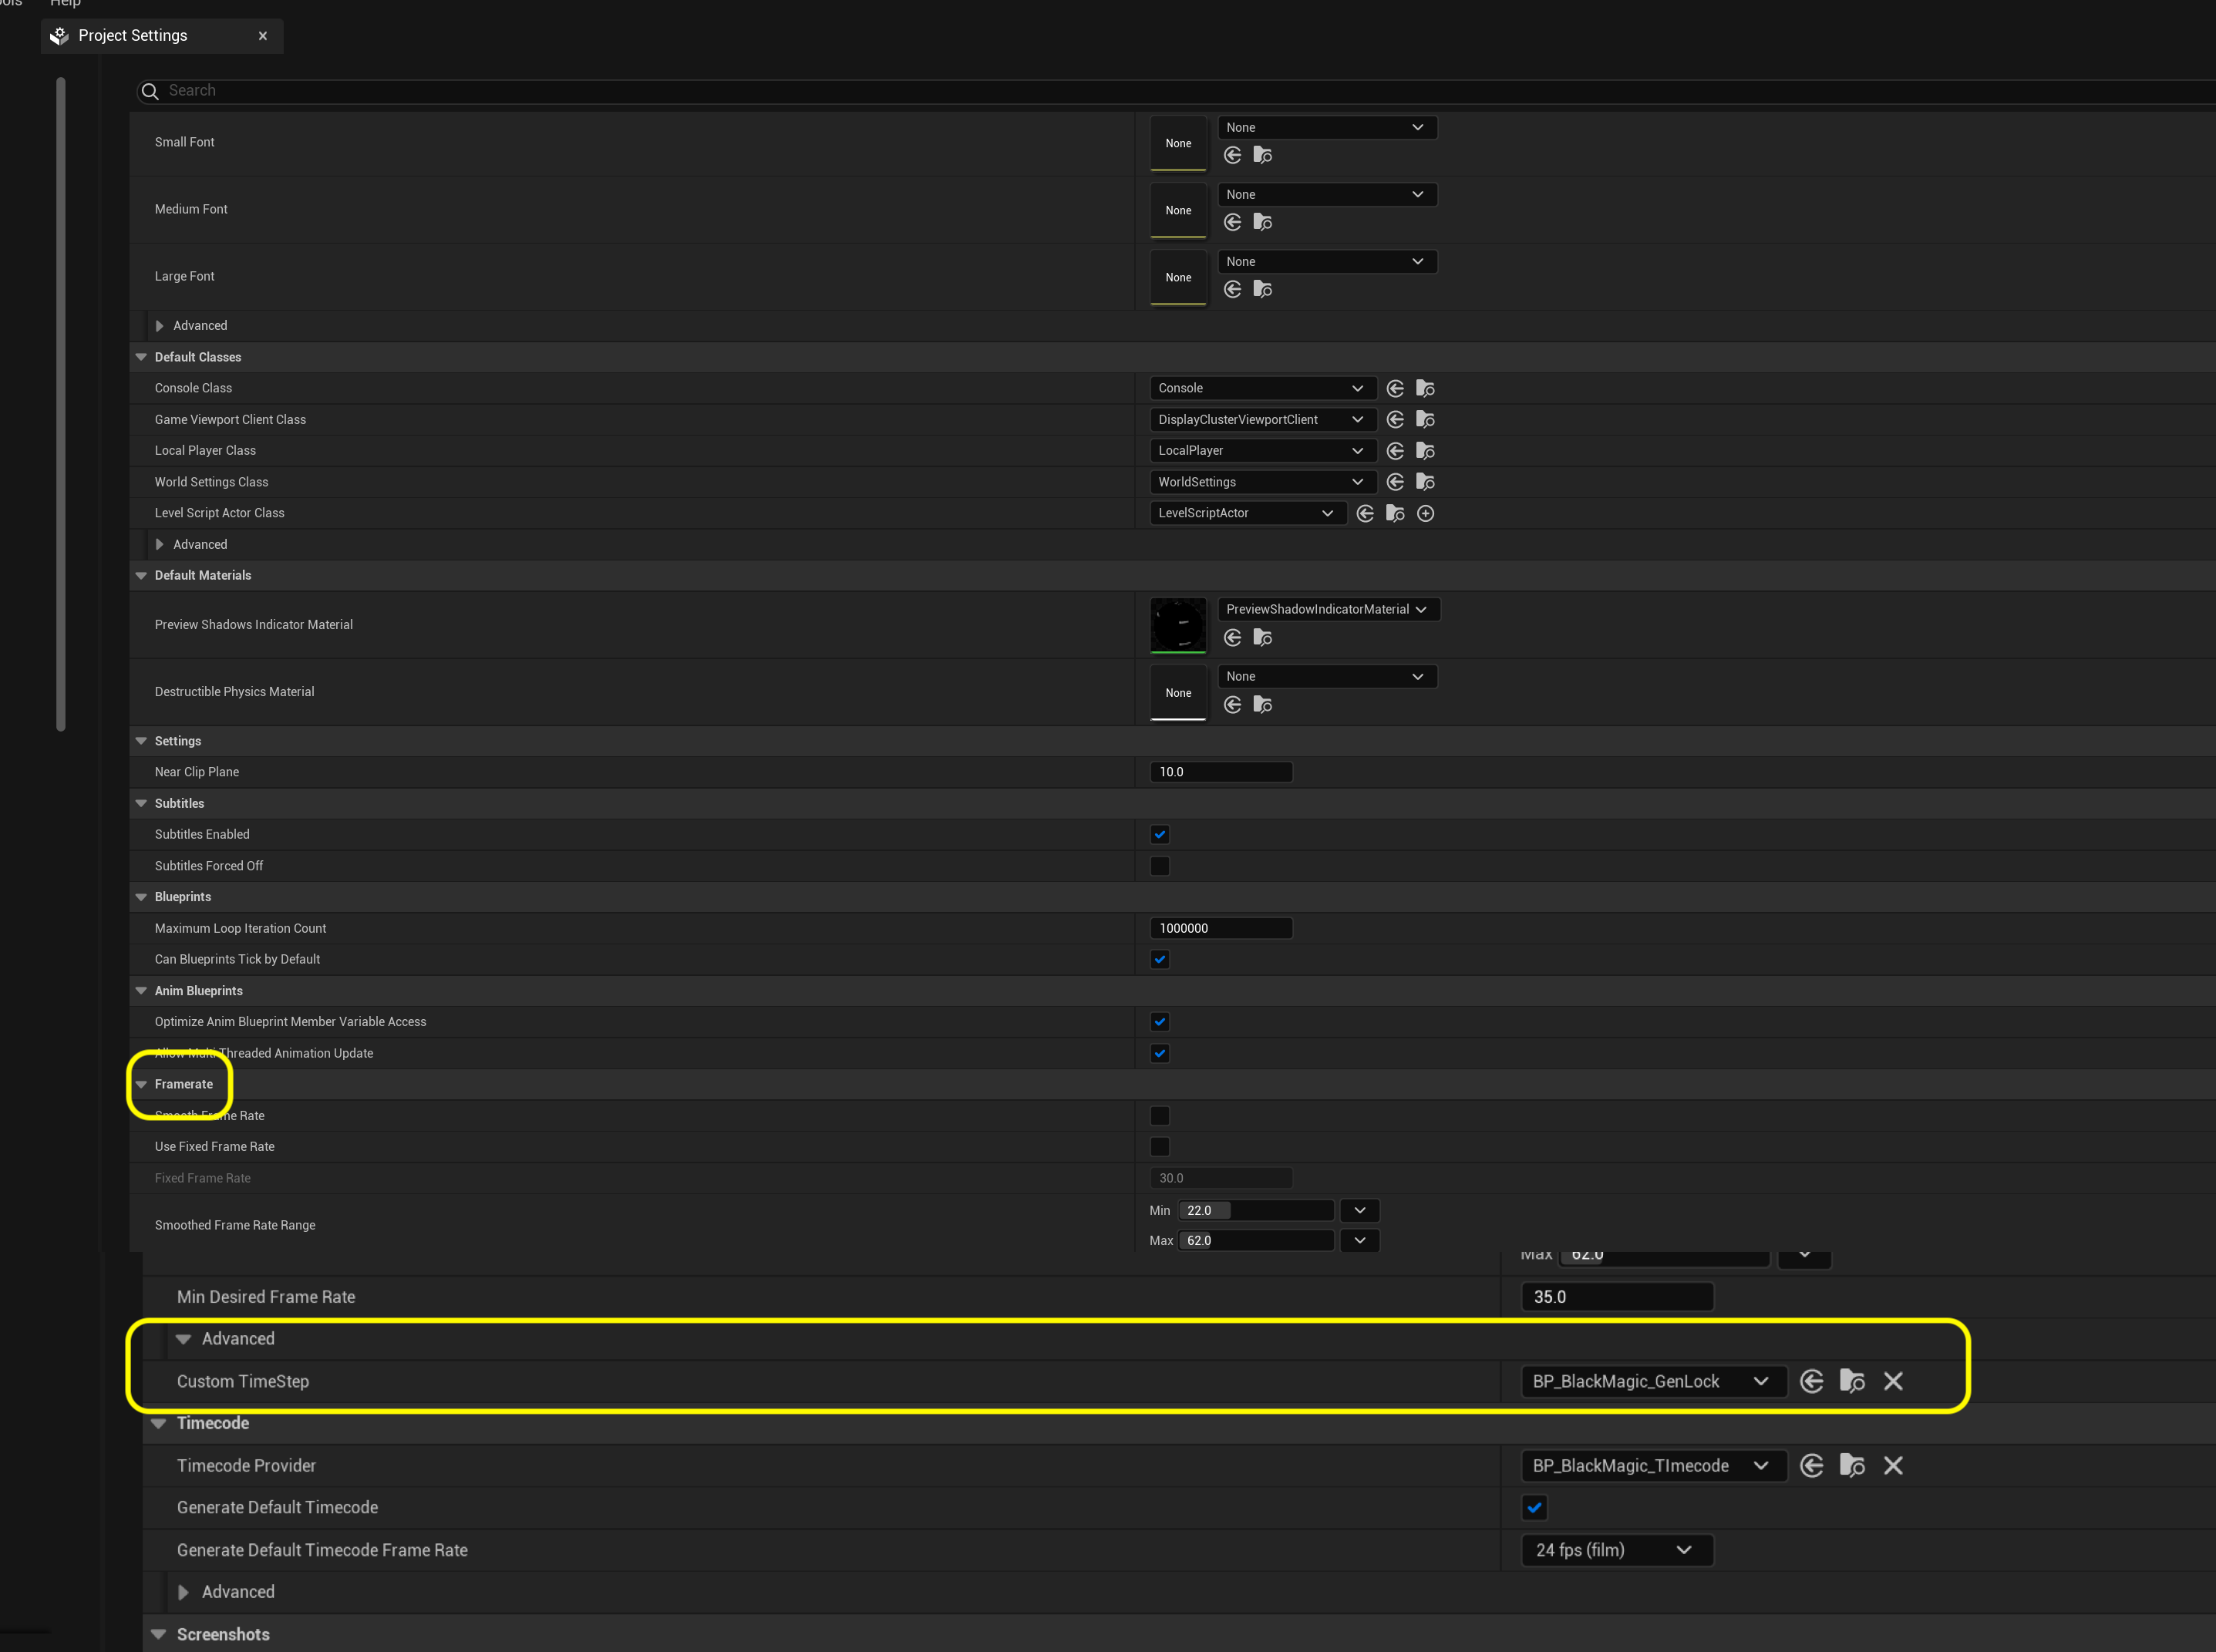
Open up Edit | Project Settings and set the Framerate | Advanced | Custom TimeStep to BP_BlackMagic_GenLock.
Step 17.|BTS|
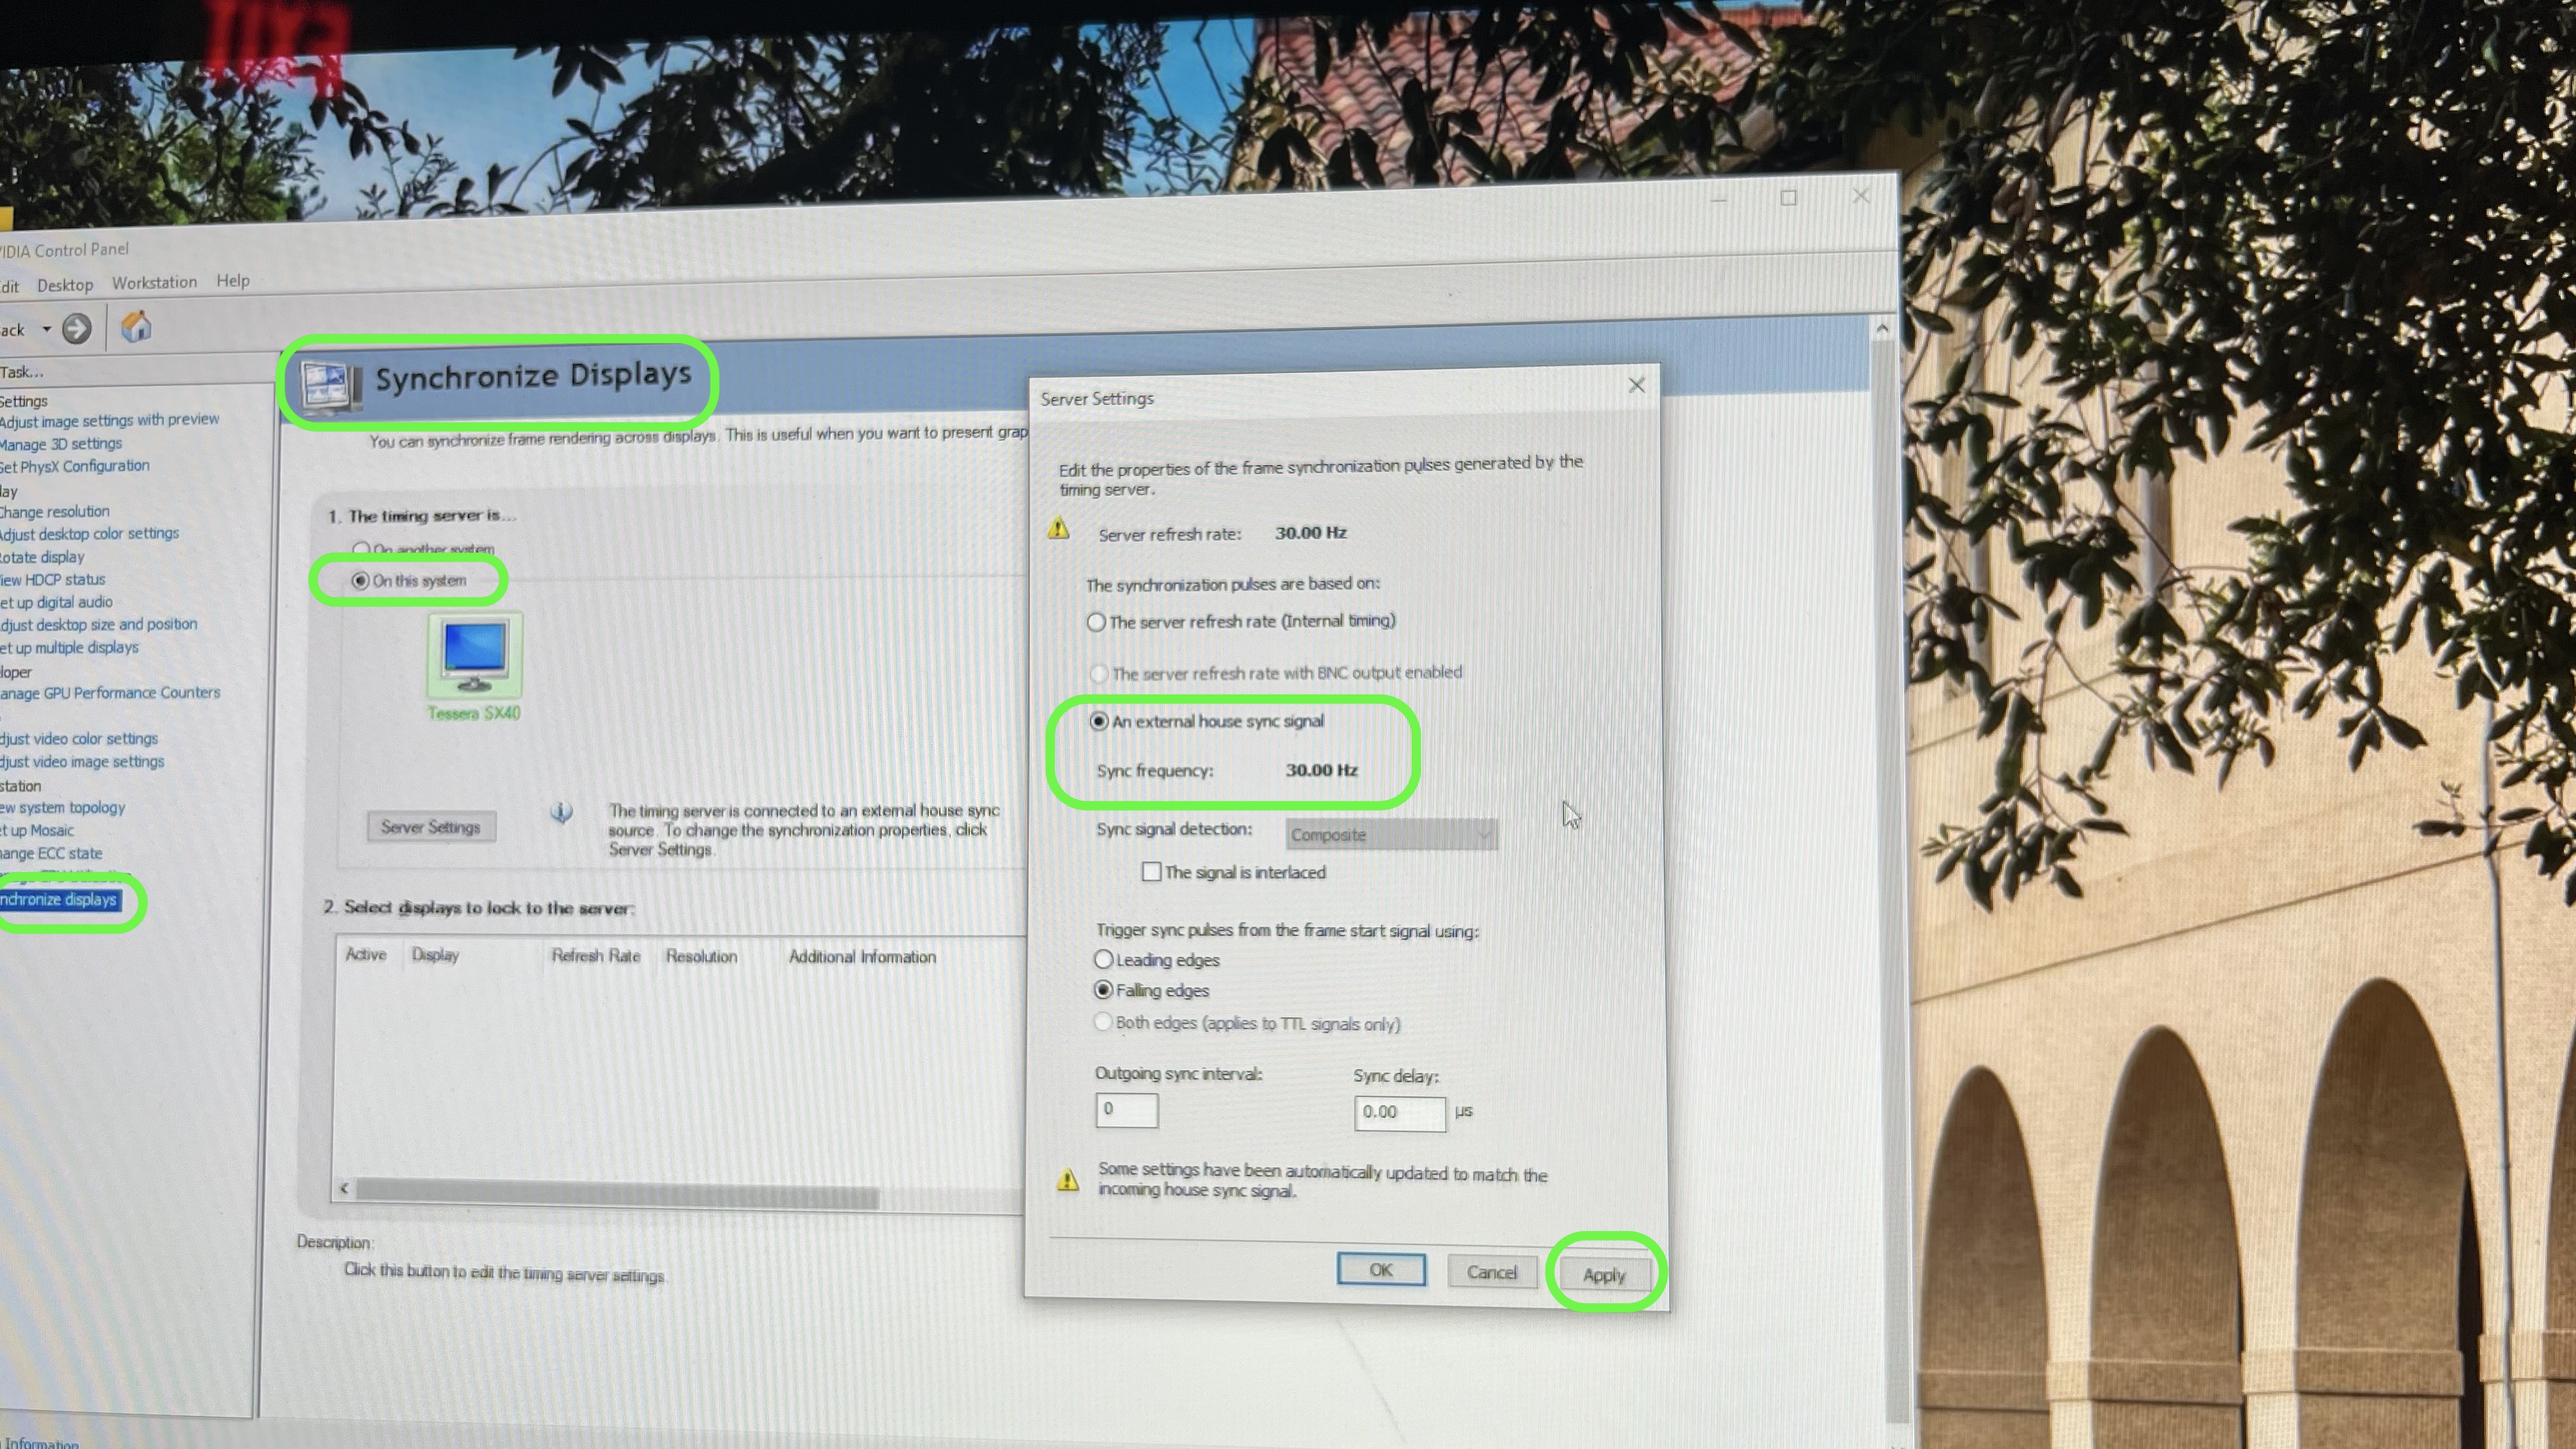
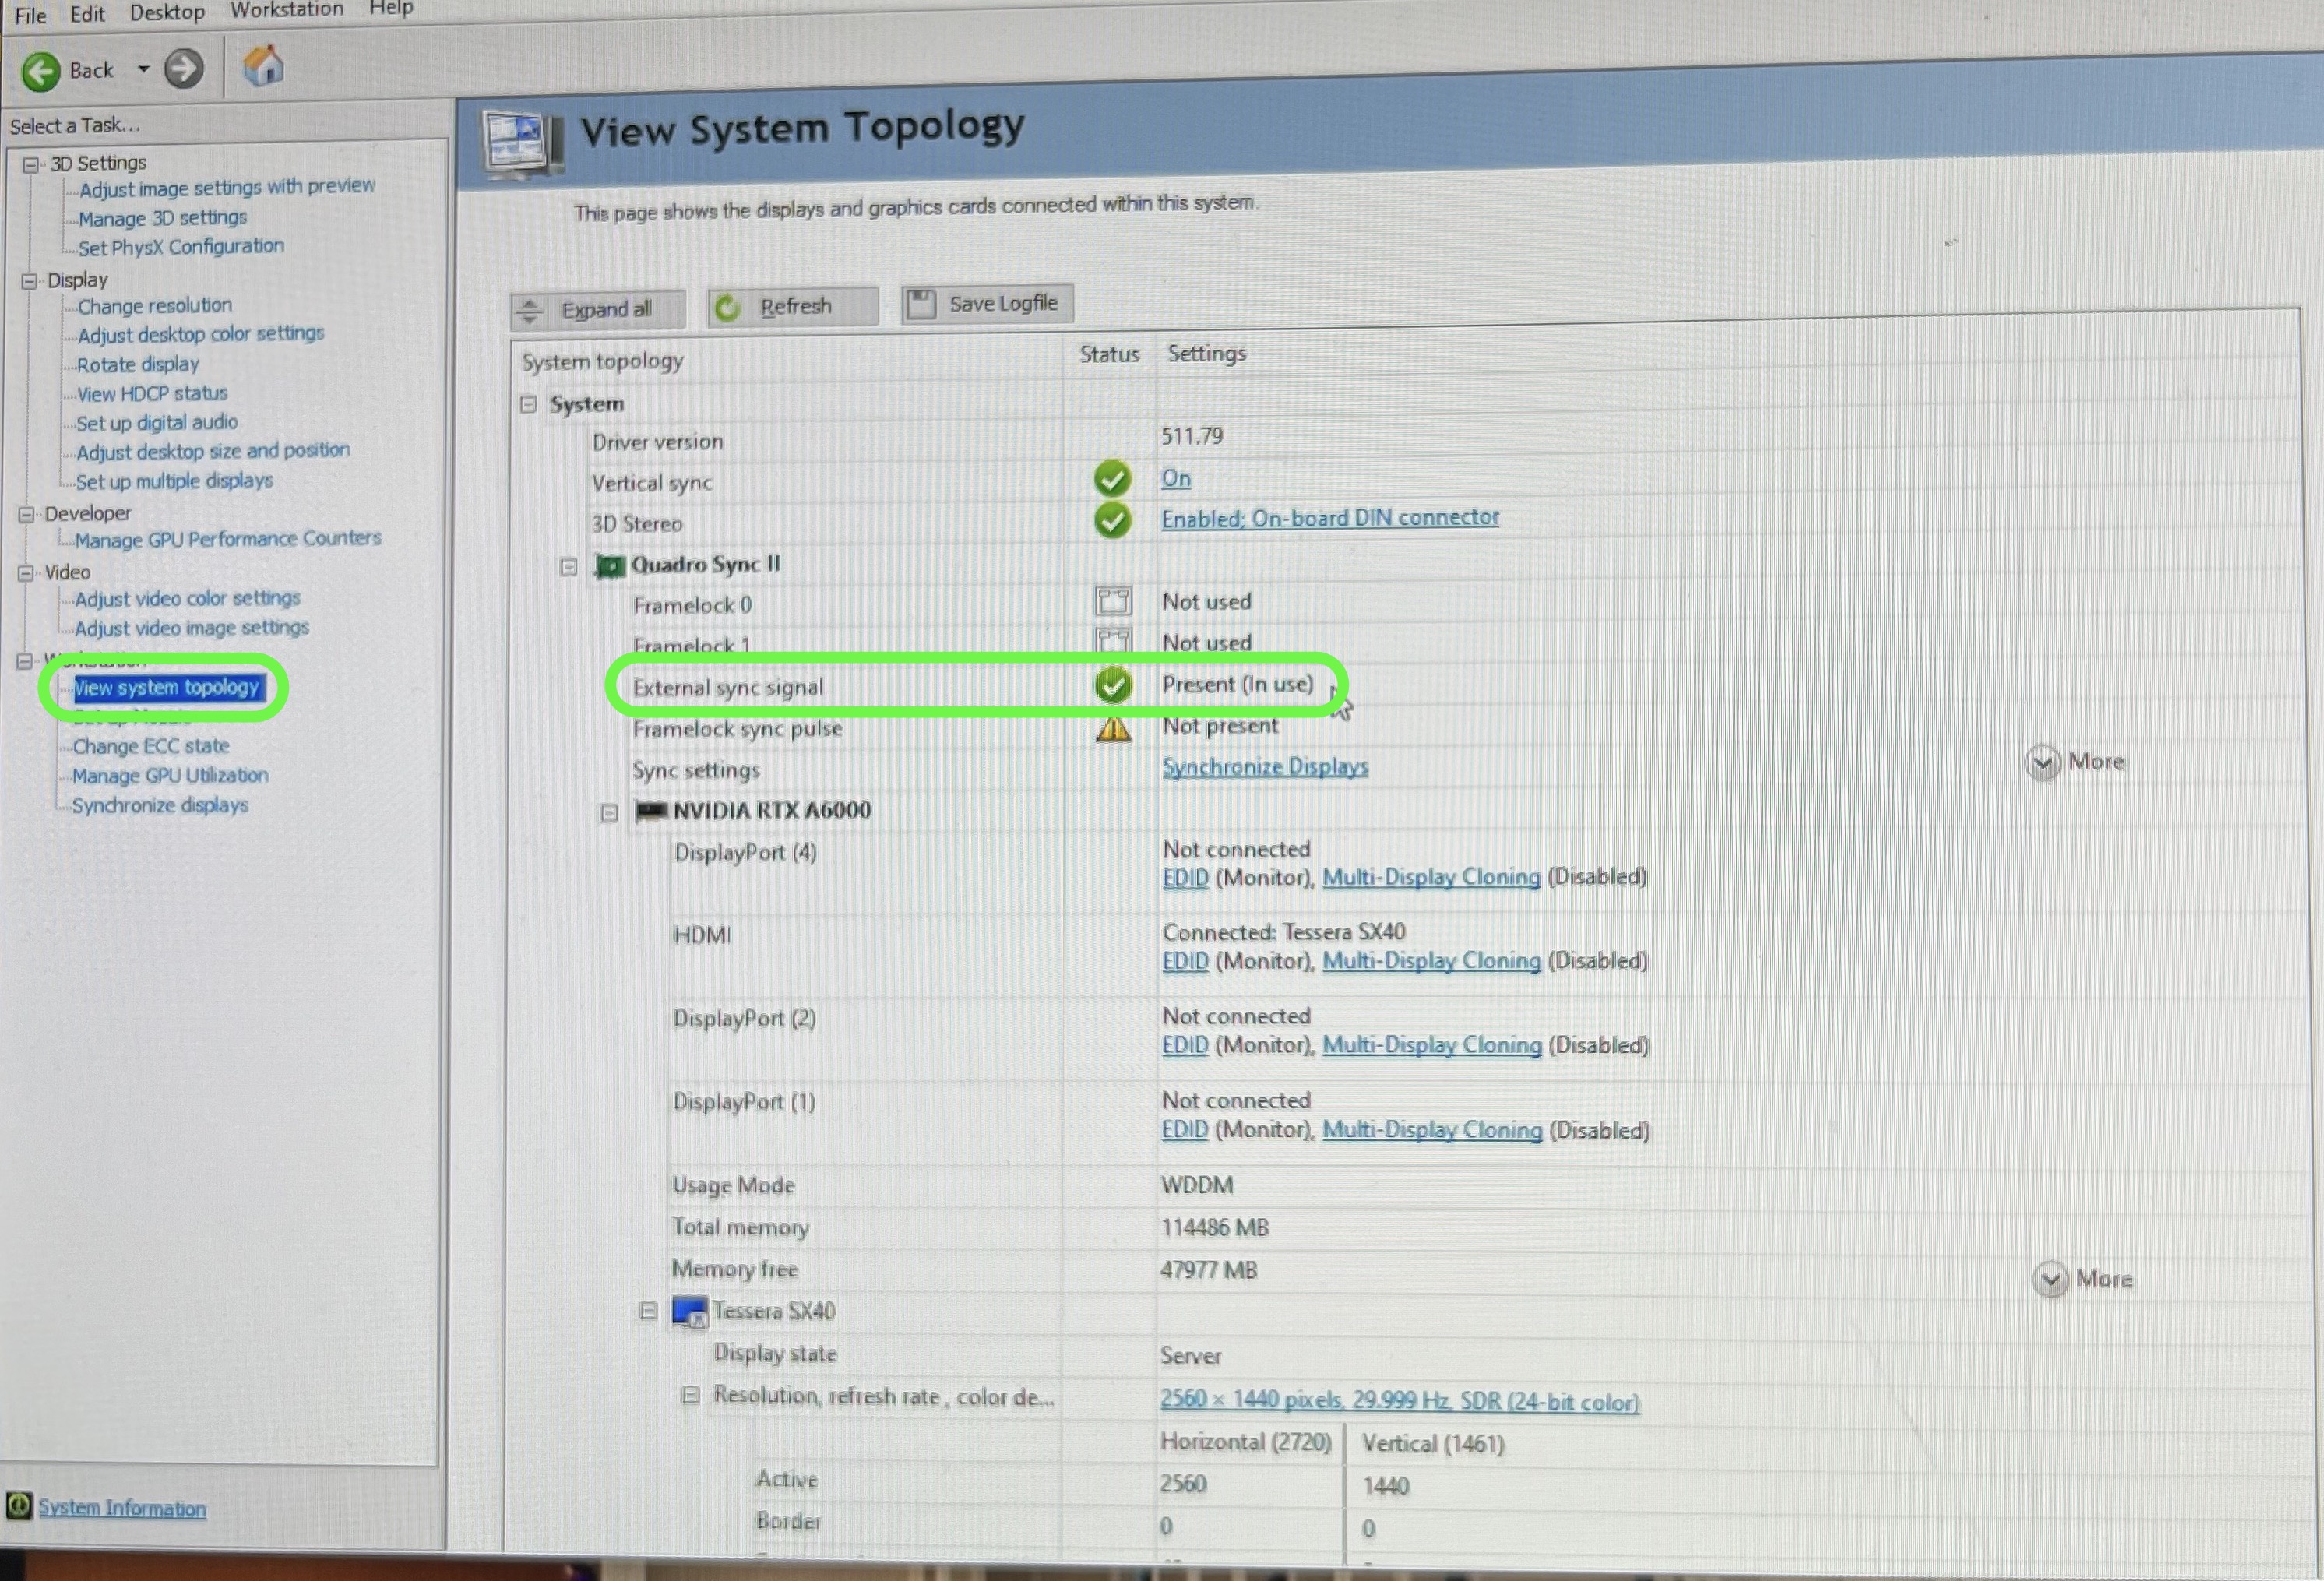
Go to the Render Node pc and check the NVidia Control Panel. Select Synchronize Displays and select a timing server that is On this System. Make sure it has an External House Signal and ensure it is 30 fps. Please note this requires a second NVidea card alongside the GPU that provides sync. In our case it is the NVidia Quadro Sync card.
Step 18.|BTS|
Go to View System Topology and make sure that External Sync Signal is set to Present (in use). Then we know sync is working.
Step 19.|BTS|
Now to confirm sync in game type ~ stat fps then press enter. You will see a framerate that is no longer 200 fps but very close to 30. And we have timecode to boot. Now are set to put a project up on the wall.
Step 20.|BTS|
At this point you can also set Optitrack Live Link source to use Timecode. This way the Source will use the Engine's timecode to evaluate its subjects. Go to Window > Virtual Production > Live Link > Optitrack > Settings > Evaluation Mode > Timecode.


